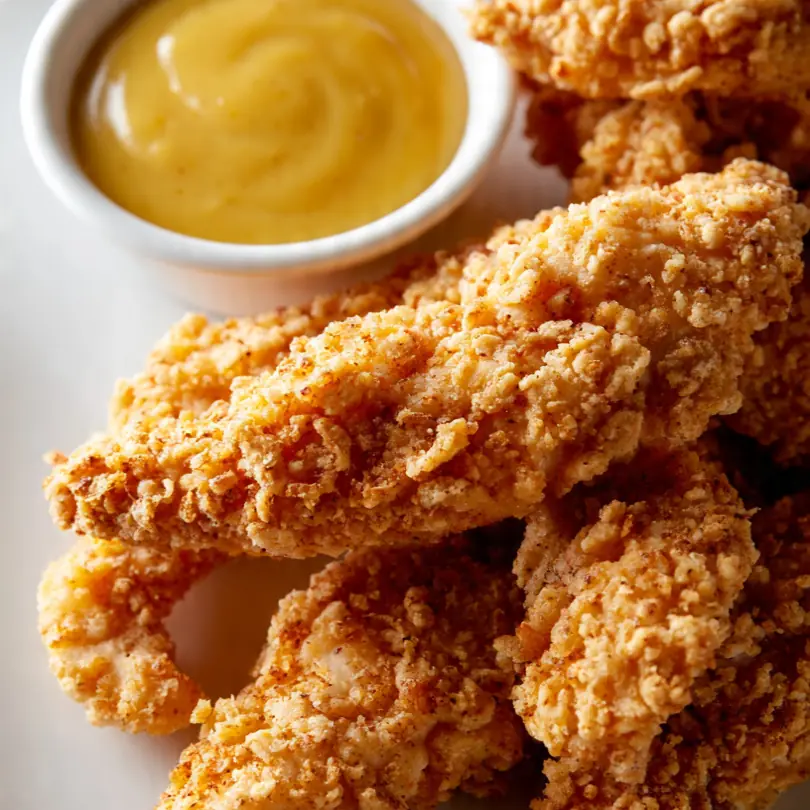
Crispy Chicken Tenders With Honey Mustard
There are few things more satisfying than biting into a perfectly cooked chicken tender—golden, shatteringly crisp on the outside, and impossibly juicy within. This recipe for Crispy Chicken Tenders with Honey Mustard has been a staple in my kitchen for years, and it never fails to deliver that exact feeling. This is my go-to recipe when I need something quick but impressive, whether it’s a weeknight dinner or a casual gathering with friends.
Recipe Overview
- Prep Time: 20 minutes
- Cook Time: 12-15 minutes
- Total Time: 35 minutes
- Servings: 4
- Difficulty: Easy
Why You’ll Love This Crispy Chicken Tenders with Honey Mustard
- Restaurant-quality crunch at home: The double-coating technique ensures a crust that stays crisp, even after the tenders have sat for a few minutes.
- A perfectly balanced sauce: The honey mustard is neither too sweet nor too sharp—it’s a creamy, tangy, and subtly sweet companion that complements the savoury chicken.
- Foolproof for all skill levels: Whether you’re a seasoned cook or just starting out, the clear cues in the instructions will guide you to success every time.
- Customisable to your taste: From adding a kick of spice to swapping the protein, this recipe adapts beautifully to whatever you have on hand.
- My husband, who’s usually picky, asked for seconds! That’s the highest praise I can give, and it’s why this recipe earns a permanent spot in our weekly rotation.

Ingredients You’ll Need
- 500 g chicken breast fillets, cut into strips
- 100 g plain flour
- 2 large eggs
- 150 g panko breadcrumbs (or regular breadcrumbs)
- 50 g finely grated Parmesan cheese
- 1 teaspoon garlic powder
- 1 teaspoon onion powder
- 1 teaspoon smoked paprika
- ½ teaspoon fine sea salt
- ½ teaspoon freshly ground black pepper
- Vegetable oil, for frying
For the Honey Mustard Sauce
- 120 ml good-quality mayonnaise
- 60 ml wholegrain mustard
- 60 ml runny honey
- 1 tablespoon lemon juice
- Pinch of salt
Tip: For the crispiest results, use panko breadcrumbs. They’re larger and flakier than standard breadcrumbs, creating more surface area for a golden, crunchy crust. If you only have regular breadcrumbs, you can still make this—just know the texture will be slightly finer.
How to Make Crispy Chicken Tenders with Honey Mustard
- Prepare your coating station. Set up three shallow bowls. In the first, whisk together the flour, garlic powder, onion powder, smoked paprika, salt, and pepper. In the second, beat the eggs until they’re a uniform, pale yellow colour and slightly frothy on top. In the third, combine the panko breadcrumbs and grated Parmesan, mixing with your fingers until the cheese is evenly distributed.
- Season and coat the chicken. Pat the chicken strips dry with kitchen paper—this helps the flour stick. Working one piece at a time, dredge a strip in the seasoned flour, shaking off any excess. You’ll see a light, even dusting of flour. Next, dip it into the beaten egg, letting any excess drip back into the bowl. Finally, press it firmly into the panko mixture, ensuring every surface is completely covered. The coating should feel dry and textured to the touch.
- Let the coating set. Place the coated tenders on a wire rack set over a baking tray. Leave them to rest for 5-10 minutes. This crucial step allows the breading to adhere properly, meaning less coating will fall off during frying. You’ll notice the coating looks slightly matte and feels more secure.
- Heat the oil. Pour enough vegetable oil into a large, heavy-bottomed frying pan to come about 1 cm up the sides. Heat over a medium-high flame. To test if it’s ready, drop a single breadcrumb into the oil—if it sizzles vigorously and floats to the surface immediately, the oil is at the right temperature (around 175°C). If the crumb sinks, the oil needs more time.
- Fry the chicken tenders. Carefully lower 3-4 tenders into the hot oil, making sure not to overcrowd the pan. You should hear a satisfying, steady sizzle. Fry for 3-4 minutes per side, until the coating is a deep, golden brown and the chicken is cooked through. The tenders will feel firm to the touch, and you’ll see a rich, caramelised colour across the surface.
- Drain and rest. Use tongs to transfer the cooked tenders to a wire rack placed over a baking tray (this keeps them crisper than paper towels). Let them rest for 2 minutes—you’ll hear a faint crackling sound as the crust settles.
- Make the honey mustard sauce. While the chicken rests, whisk together the mayonnaise, wholegrain mustard, honey, lemon juice, and a pinch of salt in a small bowl. The sauce should be smooth, creamy, and a pale golden colour. Taste and adjust the honey or mustard to your preference.
Tips From My Kitchen
- Dry the chicken thoroughly: Moisture is the enemy of a crispy coating. Before you start, pat the chicken strips completely dry with kitchen paper. Any residual water will create steam during frying, which can cause the breading to separate from the meat. The flour should cling to the chicken like a light dusting of snow, not slide off.
- Don’t skip the resting step: After breading, letting the tenders sit on a wire rack for 5-10 minutes is non-negotiable. This allows the flour and egg to hydrate the breadcrumbs slightly, creating a glue-like bond. When you fry them, the coating stays attached instead of falling off into the oil. You’ll notice the breading looks less dusty and more integrated after resting.
- Use a thermometer for the oil: If you have one, a kitchen thermometer is your best friend here. Maintaining the oil at a steady 175°C ensures the chicken cooks through without the coating burning. If the oil is too cool, the tenders will absorb excess oil and become greasy. If it’s too hot, the outside will darken before the inside is cooked. Without a thermometer, the breadcrumb test is reliable.
- Work in small batches: Adding too many tenders to the pan at once drops the oil temperature dramatically. This leads to a pale, soggy crust. Fry in batches of 3-4, and always let the oil come back up to temperature between batches. You’ll see the sizzle become less vigorous when the oil is too cool.
- Rest on a wire rack, not paper towels: While paper towels absorb excess oil, they also trap steam, which softens the crispy coating. A wire rack allows air to circulate all around the tenders, keeping them shatteringly crisp for much longer. You’ll hear a faint crackle as you place them on the rack—that’s the sound of a perfect crust.
- Make the sauce ahead of time: The honey mustard sauce actually improves after sitting for 15-20 minutes, as the flavours meld together. You can make it up to a day in advance and store it in the fridge. Just bring it to room temperature before serving.
Equipment You’ll Need
- Large frying pan or skillet
- Sharp knife and cutting board
- Mixing bowls (3 shallow, 1 small)
- Wooden spoon or spatula
- Wire rack and baking tray
- Kitchen tongs
- Kitchen thermometer (optional, but helpful)
Delicious Variations to Try
- Spicy Version: Add 1 teaspoon of cayenne pepper and ½ teaspoon of chilli flakes to the seasoned flour mixture. You can also stir a tablespoon of hot sauce into the beaten eggs for an extra layer of heat that penetrates the coating.
- Vegetarian/Vegan Option: Substitute the chicken with firm tofu or seitan, cut into similar-sized strips. For a vegan version, replace the eggs with a mixture of 120 ml plant-based milk and 1 tablespoon of cornflour, and use a vegan mayonnaise in the sauce. The coating will be just as crispy.
- Different Protein: This recipe works beautifully with turkey breast strips, which have a similar texture to chicken. For a fish option, use thick white fish fillets like cod or haddock—reduce the frying time by about a minute per side, as fish cooks faster.
What to Serve With Crispy Chicken Tenders with Honey Mustard
- A crisp green salad with a simple vinaigrette to cut through the richness.
- Oven-baked potato wedges or a pile of crunchy coleslaw.
- For a heartier meal, try them alongside a bowl of Homestyle Chicken Noodle Soup for a comforting duo.
- Steamed green beans or roasted broccoli make a light, healthy side.
- If you’re planning a bigger spread, these tenders also pair wonderfully with a Summer Grilled Chicken Salad for a protein-packed feast.
Frequently Asked Questions
Crispy Chicken Tenders with Honey Mustard
Ingredients
Method
- Prepare your coating station. Set up three shallow bowls. In the first, whisk together the flour, garlic powder, onion powder, smoked paprika, salt, and pepper. In the second, beat the eggs until they're a uniform, pale yellow colour and slightly frothy on top. In the third, combine the panko breadcrumbs and grated Parmesan, mixing with your fingers until the cheese is evenly distributed.
- Season and coat the chicken. Pat the chicken strips dry with kitchen paper—this helps the flour stick. Working one piece at a time, dredge a strip in the seasoned flour, shaking off any excess. You'll see a light, even dusting of flour. Next, dip it into the beaten egg, letting any excess drip back into the bowl. Finally, press it firmly into the panko mixture, ensuring every surface is completely covered. The coating should feel dry and textured to the touch.
- Let the coating set. Place the coated tenders on a wire rack set over a baking tray. Leave them to rest for 5-10 minutes. This crucial step allows the breading to adhere properly, meaning less coating will fall off during frying. You'll notice the coating looks slightly matte and feels more secure.
- Heat the oil. Pour enough vegetable oil into a large, heavy-bottomed frying pan to come about 1 cm up the sides. Heat over a medium-high flame. To test if it's ready, drop a single breadcrumb into the oil—if it sizzles vigorously and floats to the surface immediately, the oil is at the right temperature (around 175°C). If the crumb sinks, the oil needs more time.
- Fry the chicken tenders. Carefully lower 3-4 tenders into the hot oil, making sure not to overcrowd the pan. You should hear a satisfying, steady sizzle. Fry for 3-4 minutes per side, until the coating is a deep, golden brown and the chicken is cooked through. The tenders will feel firm to the touch, and you'll see a rich, caramelised colour across the surface.
- Drain and rest. Use tongs to transfer the cooked tenders to a wire rack placed over a baking tray (this keeps them crisper than paper towels). Let them rest for 2 minutes—you'll hear a faint crackling sound as the crust settles.
- Make the honey mustard sauce. While the chicken rests, whisk together the mayonnaise, wholegrain mustard, honey, lemon juice, and a pinch of salt in a small bowl. The sauce should be smooth, creamy, and a pale golden colour. Taste and adjust the honey or mustard to your preference.
Notes
I hope you enjoy making these Crispy Chicken Tenders with Honey Mustard as much as I do. They’ve become a reliable favourite in our home, and I’d love to hear how they turn out for you. Did you try a variation? Have a question about a step? Please leave a comment below—I read every single one and I’m always here to help. Happy cooking!