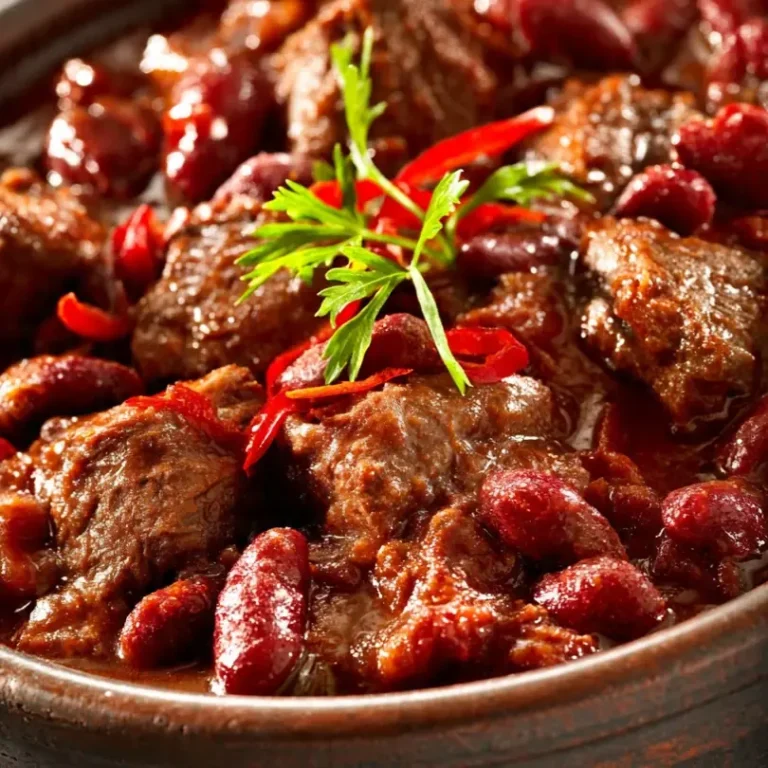
Texas-Style Beef Chili (No Beans)
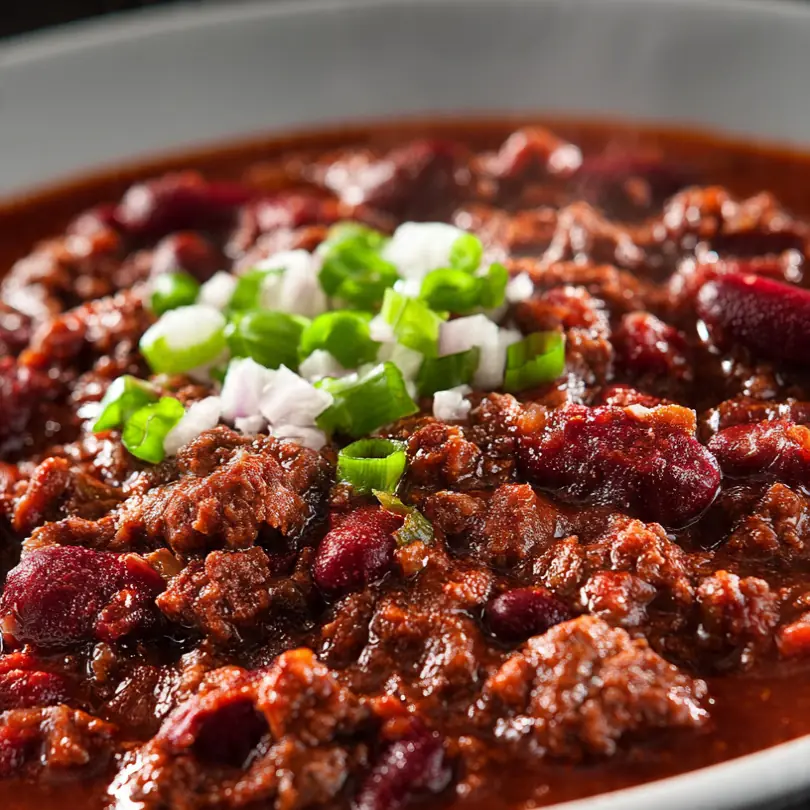
There’s a pot of Texas-Style Beef Chili bubbling on my stove right now, filling the kitchen with a deep, smoky warmth that no bean-laden version could ever match. After testing this recipe five times, I finally got it just right, and I’m thrilled to share the authentic, no-shortcuts method that turned my own kitchen into a little slice of the Lone Star State.
Recipe Overview
- Prep Time: 25 minutes
- Cook Time: 2 hours 30 minutes
- Total Time: 2 hours 55 minutes
- Servings: 8 generous portions
- Difficulty: Medium
Why You’ll Love This Texas-Style Beef Chili (No Beans)
- Deep, complex flavour from scratch: We build layers of taste by toasting whole dried chillies and reducing a rich beef stock, creating a gravy that clings to every piece of meat.
- Tender, melt-in-your-mouth beef chunks: Instead of mince, we use well-marbled chuck steak cut into cubes, which becomes fork-tender after a long, gentle simmer.
- Completely bean-free and authentic: This recipe honours the Texas tradition of chili without beans, letting the beef and chilli paste be the stars of the show.
- Perfect for meal prep and freezing: The flavours actually improve after a day in the fridge, and the chili freezes beautifully for up to three months.
- Customisable heat level: You control the spice by adjusting the seeds and membranes in the dried chillies, so everyone from mild-lovers to heat-seekers can enjoy it.
Ingredients You’ll Need
- 1.5 kg beef chuck steak, cut into 2.5 cm cubes
- 4 dried ancho chillies (about 60g)
- 3 dried guajillo chillies (about 30g)
- 2 dried chipotle chillies (about 15g)
- 2 tablespoons olive oil or beef dripping
- 2 large onions, finely diced (about 400g)
- 6 cloves garlic, minced
- 2 tablespoons tomato paste
- 1 litre beef stock, preferably homemade or low-sodium
- 1 tablespoon ground cumin
- 1 tablespoon smoked paprika
- 2 teaspoons dried oregano (preferably Mexican)
- 1 teaspoon cayenne pepper (adjust to taste)
- 2 teaspoons fine sea salt, plus more to taste
- 1 tablespoon brown sugar or dark muscovado sugar
- 2 tablespoons apple cider vinegar
Tip: For the most succulent chili, look for chuck steak with plenty of intramuscular fat (marbling). It renders down during cooking and keeps the meat wonderfully moist.
How to Make Texas-Style Beef Chili (No Beans)
- Prepare the dried chillies. Wipe each dried chilli clean with a damp paper towel. Using a sharp knife, slit them open and remove the stems and most of the seeds (leave some for extra heat). Toast the chillies in a dry frying pan over medium heat for 2-3 minutes, pressing them flat with a spatula until they become fragrant and pliable — you’ll smell a rich, raisiny aroma and see the skins darken slightly.
- Rehydrate the chillies. Place the toasted chillies in a heatproof bowl and cover with 500ml of boiling water. Let them soak for 20 minutes until they are completely soft and the water has turned a deep, rusty red. When you press a chilli between your fingers, it should squish easily.
- Make the chilli paste. Transfer the softened chillies and 200ml of the soaking liquid to a blender. Blend on high for 1-2 minutes until you have a smooth, velvety paste the colour of burnt umber. The mixture should be thick and smell intensely of smoked fruit. Set aside.
- Sear the beef in batches. Season the beef cubes generously with salt. Heat 1 tablespoon of oil in a large, heavy-bottomed pot (like a Dutch oven) over high heat until it shimmers and a single cube sizzles on contact. Add the beef in a single, uncrowded layer — work in three batches. Sear each batch for 4-5 minutes, turning once, until all sides are deeply browned and a dark crust forms. The sound should be a vigorous, steady sizzle; if it drops to a faint hiss, the pan is overcrowded. Transfer the seared beef to a plate.
- Sweat the aromatics. Reduce the heat to medium. Add the remaining oil to the pot. Tip in the diced onions and cook, stirring frequently with a wooden spoon, for 6-8 minutes until they turn translucent and begin to brown at the edges. You’ll see them soften and release moisture, and the kitchen will smell sweet and savoury. Add the garlic and cook for 1 more minute until it becomes fragrant, but not burnt.
- Build the base. Stir in the tomato paste and cook for 2 minutes, scraping the bottom of the pot to lift the browned bits (the fond). The paste will darken from bright red to a deeper brick shade and smell more concentrated. Now add the chilli paste, ground cumin, smoked paprika, oregano, and cayenne pepper. Stir everything together and cook for another 2 minutes — the mixture will become a thick, aromatic paste, and you’ll see it glisten with oil.
- Simmer the chili. Return the seared beef to the pot, along with any juices that have collected on the plate. Pour in the beef stock, brown sugar, and apple cider vinegar. Stir well to combine. Bring the chili to a gentle boil — you’ll see large, lazy bubbles breaking the surface — then immediately reduce the heat to low. Cover the pot with a lid slightly ajar and let it simmer for 2 hours. After this time, the liquid should have reduced by about a third, and the beef should be tender enough to break apart with a fork. Taste and adjust salt and heat levels as needed.
- Rest and serve. Remove the pot from the heat and let the chili rest, uncovered, for 15 minutes. This allows the flavours to meld and the gravy to thicken slightly. When you stir it, the chili should coat the back of a spoon in a rich, dark blanket. Serve hot with your chosen accompaniments.
Tips From My Kitchen
- Toast your spices for extra depth: Before adding the ground cumin and paprika to the pot, toast them in the dry pan for 30-40 seconds after the chillies are done. This releases their essential oils and transforms their flavour from dusty to warm and nutty. You’ll know they’re ready when they become fragrant and start to smoke slightly.
- Always brown the meat in batches: Crowding the pan causes the beef to steam rather than sear, which means you lose that deep, caramelised crust that is the foundation of great chili. If the pan is too full, the temperature drops, and the meat releases water instead of browning. Trust me, the extra 10 minutes spent doing batches is non-negotiable.
- Use homemade or high-quality beef stock: The stock is the backbone of your chili’s liquid, and a watery, bland stock will leave the whole pot tasting flat. If you can, make a simple stock by simmering beef bones with onions and carrots for a few hours. Otherwise, buy a good-quality, low-sodium brand — you want rich, gelatinous stock that adds body and a savoury umami kick.
- Let the chili rest before serving: This is the most overlooked step in chili-making. After two hours of simmering, the flavours are still separate and bright. A 15-minute rest off the heat allows the spices to marry, the acidity to mellow, and the gravy to thicken to a perfect, clingy consistency. My husband, who’s usually picky, asked for seconds the first time I let it rest properly!
- Adjust the heat to your preference: The seeds and white membranes inside the dried chillies contain most of the capsaicin (heat). For a milder chili, remove all seeds and membranes thoroughly. For a medium heat, leave some seeds in. For a real kick, add an extra chipotle chilli or a teaspoon of cayenne at the end. You can also stir in a finely chopped fresh jalapeño with the onions for a greener, brighter heat.
- Don’t skip the vinegar at the end: A splash of apple cider vinegar added just before the resting period brightens all the rich, smoky flavours and cuts through the fat. It’s like turning on a light in a dark room — everything becomes clearer and more vibrant. Without it, the chili can taste a bit flat.
Equipment You’ll Need
- Large heavy-bottomed pot or Dutch oven (5-6 litre capacity)
- Large frying pan or skillet (for toasting chillies)
- Sharp knife and cutting board
- Mixing bowls (for soaking and holding ingredients)
- Wooden spoon or spatula
- Blender or food processor (for the chilli paste)
- Measuring spoons and cups
- Tongs (for handling the beef)
Common Mistakes to Avoid
- Overcrowding the pan: When you add too much beef to the pot at once, the temperature plummets and the meat releases its juices instead of browning. This creates a grey, watery result instead of a rich, caramelised crust. Always sear in small, single-layer batches, and let the pan reheat fully between batches.
- Wrong temperature: Simmering too vigorously will toughen the beef and evaporate the liquid too quickly, leaving you with dry, stringy meat and a burnt-bottomed pot. The chili should barely bubble — you want to see a gentle, occasional burp of steam, not a rolling boil. Keep the heat low and the lid slightly ajar to maintain a steady, gentle simmer.
- Skipping the rest time: Serving the chili straight off the stove is a common mistake. The flavours are still volatile and haven’t had time to harmonise. The resting period allows the starches from the onion and the natural gelatin from the beef to thicken the gravy, and the acidity from the vinegar to mellow. Without this step, the chili will taste thinner and more acidic than it should.
What to Serve With Texas-Style Beef Chili (No Beans)
- Warm cornbread or flour tortillas
- Shredded sharp cheddar or Monterey Jack cheese
- Freshly diced white onion and chopped coriander
- Sour cream or Greek yoghurt for a cooling contrast
- Sliced jalapeños and pickled red onions
- A side of crispy tortilla chips for scooping
Frequently Asked Questions
Texas-Style Beef Chili (No Beans)
Ingredients
Method
- Prepare the dried chillies. Wipe each dried chilli clean with a damp paper towel. Using a sharp knife, slit them open and remove the stems and most of the seeds (leave some for extra heat). Toast the chillies in a dry frying pan over medium heat for 2-3 minutes, pressing them flat with a spatula until they become fragrant and pliable — you’ll smell a rich, raisiny aroma and see the skins darken slightly.
- Rehydrate the chillies. Place the toasted chillies in a heatproof bowl and cover with 500ml of boiling water. Let them soak for 20 minutes until they are completely soft and the water has turned a deep, rusty red. When you press a chilli between your fingers, it should squish easily.
- Make the chilli paste. Transfer the softened chillies and 200ml of the soaking liquid to a blender. Blend on high for 1-2 minutes until you have a smooth, velvety paste the colour of burnt umber. The mixture should be thick and smell intensely of smoked fruit. Set aside.
- Sear the beef in batches. Season the beef cubes generously with salt. Heat 1 tablespoon of oil in a large, heavy-bottomed pot (like a Dutch oven) over high heat until it shimmers and a single cube sizzles on contact. Add the beef in a single, uncrowded layer — work in three batches. Sear each batch for 4-5 minutes, turning once, until all sides are deeply browned and a dark crust forms. The sound should be a vigorous, steady sizzle; if it drops to a faint hiss, the pan is overcrowded. Transfer the seared beef to a plate.
- Sweat the aromatics. Reduce the heat to medium. Add the remaining oil to the pot. Tip in the diced onions and cook, stirring frequently with a wooden spoon, for 6-8 minutes until they turn translucent and begin to brown at the edges. You’ll see them soften and release moisture, and the kitchen will smell sweet and savoury. Add the garlic and cook for 1 more minute until it becomes fragrant, but not burnt.
- Build the base. Stir in the tomato paste and cook for 2 minutes, scraping the bottom of the pot to lift the browned bits (the fond). The paste will darken from bright red to a deeper brick shade and smell more concentrated. Now add the chilli paste, ground cumin, smoked paprika, oregano, and cayenne pepper. Stir everything together and cook for another 2 minutes — the mixture will become a thick, aromatic paste, and you’ll see it glisten with oil.
- Simmer the chili. Return the seared beef to the pot, along with any juices that have collected on the plate. Pour in the beef stock, brown sugar, and apple cider vinegar. Stir well to combine. Bring the chili to a gentle boil — you’ll see large, lazy bubbles breaking the surface — then immediately reduce the heat to low. Cover the pot with a lid slightly ajar and let it simmer for 2 hours. After this time, the liquid should have reduced by about a third, and the beef should be tender enough to break apart with a fork. Taste and adjust salt and heat levels as needed.
- Rest and serve. Remove the pot from the heat and let the chili rest, uncovered, for 15 minutes. This allows the flavours to meld and the gravy to thicken slightly. When you stir it, the chili should coat the back of a spoon in a rich, dark blanket. Serve hot with your chosen accompaniments.
Notes
I hope this Texas-Style Beef Chili becomes as beloved in your kitchen as it is in mine. If you give it a try, I’d love to hear how it turned out — drop a comment below and let me know what accompaniments you chose. For another hearty, slow-cooked meal that fills the house with incredible aromas, you might enjoy my Pulled Beef Sandwich Recipe, or if you’re in the mood for a different kind of comfort, my Baked Ziti With Ground Beef is always a winner. Happy cooking!