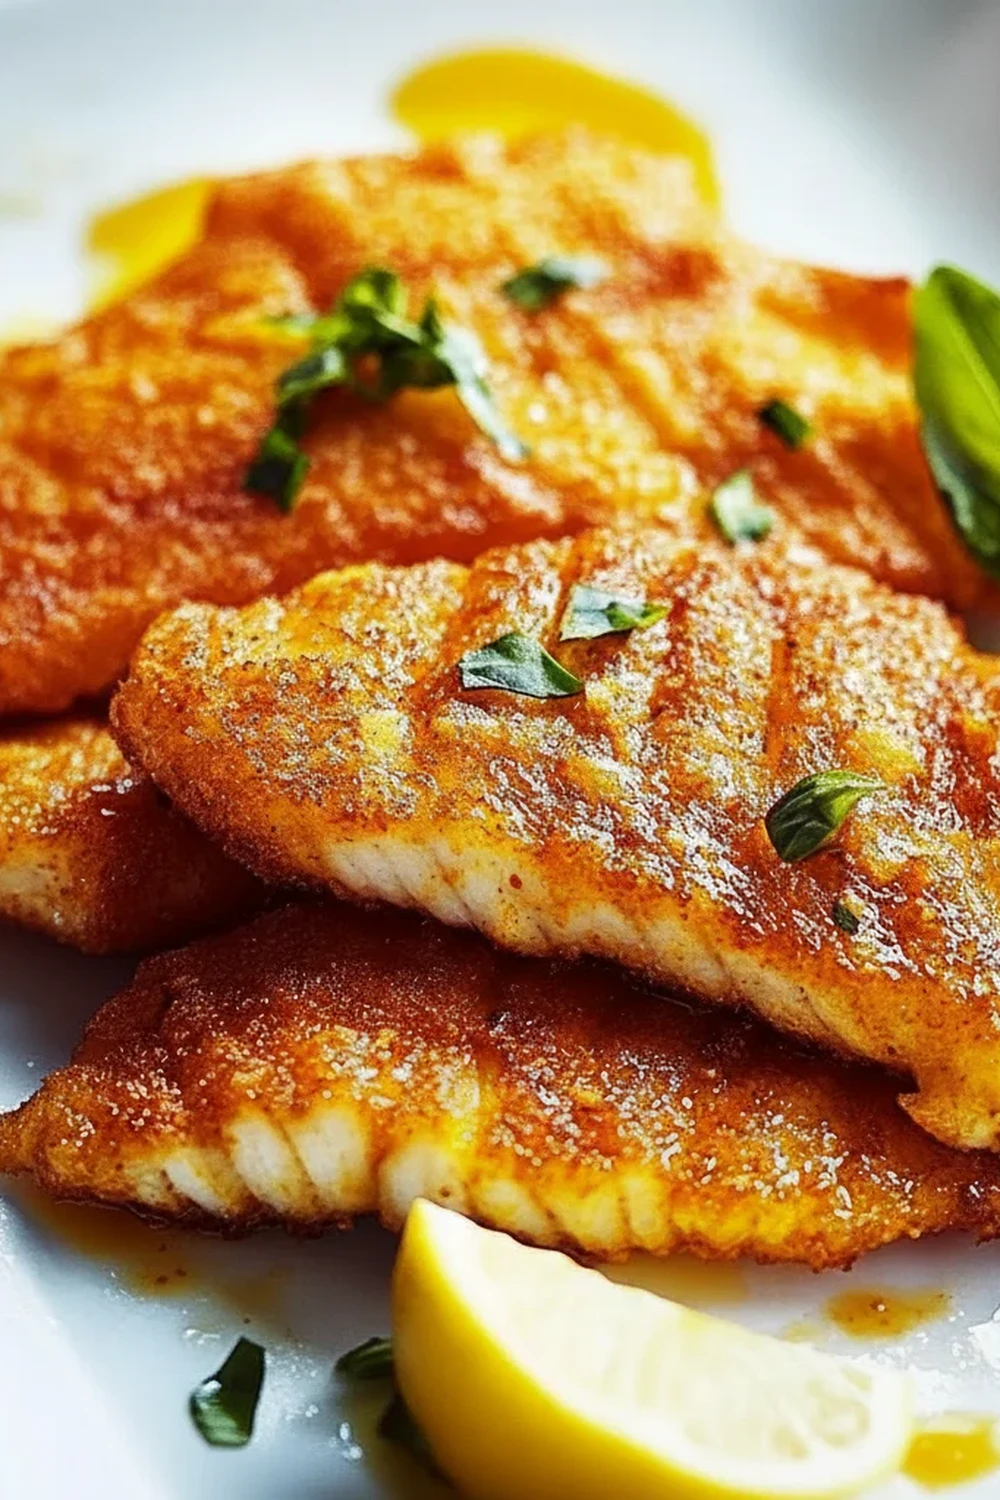
Crispy Fried Fish Recipe Dinner
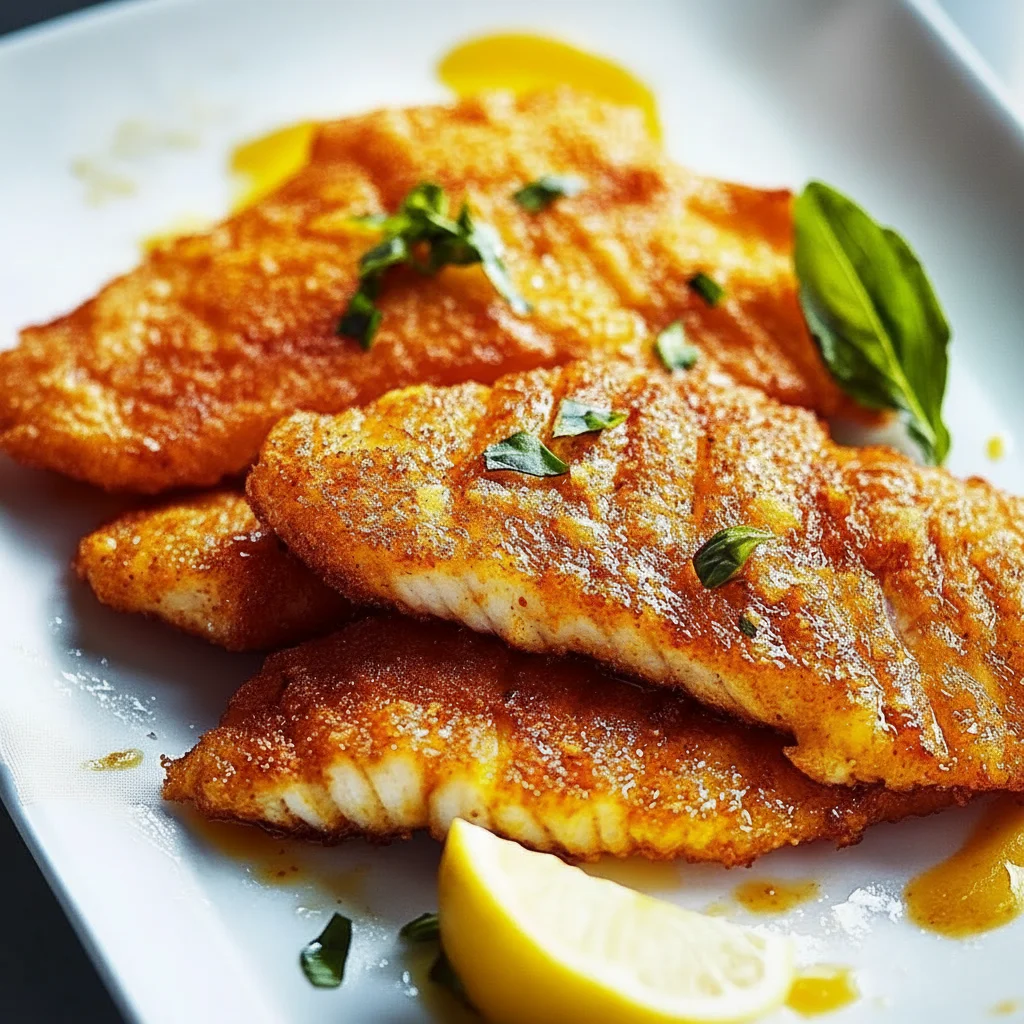
There’s something truly special about the sound and smell of fish sizzling away in a pan, promising a meal that’s both comforting and utterly satisfying. For many of us in Britain, a good piece of fried fish is more than just food; it’s a memory, a tradition, a Friday night treat. I’m talking about that perfect, shattering crust that gives way to pearly white, flaky fish inside – a texture and flavour combination that is simply second to none. It’s the kind of meal that makes the whole house smell wonderful and brings everyone to the table with a smile.
My journey to perfecting this crispy fried fish recipe wasn’t without its trials. I used to struggle with this dish until I discovered this technique. For years, I battled soggy coatings and fish that fell apart. But through countless attempts in my own kitchen, I’ve refined a method that guarantees a wonderfully crunchy exterior and succulent, perfectly cooked fish every single time. It relies on a simple, yet specific, dredging process and careful temperature control. This isn’t a batter, but a seasoned flour coating that fries up light, airy, and magnificently crisp.
This recipe is ideal when you want to recreate that authentic chip shop experience at home, but with a fresher, lighter touch. It works beautifully for a family dinner during the week as it comes together in about 30 minutes, but it’s also special enough for a relaxed weekend lunch in the garden. Everyone seems to love this, from the little ones to the grown-ups.
Recipe Overview
This crispy fried fish recipe focuses on creating an incredibly crunchy, savoury crust without a heavy, greasy batter. We use a double-dredging technique in seasoned flour which creates layers of crispiness. I’ve found this method far more reliable than traditional wet batters for achieving that signature crunch at home. The key is ensuring the fish is very dry and the oil is at the right temperature.
- Prep Time: 15 minutes
- Cook Time: 10-12 minutes
- Total Time: 25-27 minutes
- Servings: 4 people
- Difficulty: Medium
Why You’ll Love This Crispy Fried Fish Recipe
- Unbeatable Texture: The coating isn’t just crispy; it’s shatteringly so. The double dredge creates a craggy, golden-brown crust that stays crunchy, beautifully contrasting with the tender, flaky fish beneath.
- Comes Together in Under 30 Minutes: From start to finish, you can have this incredible fried fish on the table in less than half an hour, making it a brilliant choice for a satisfying weeknight meal.
- Flexible Recipe: You can easily change the seasonings. Add a pinch of cayenne for some warmth, or smoked paprika for a deeper, smoky flavour. It works with various white fish fillets, too.
- Great for a Casual Friday Night: This is our go-to for a relaxed Friday dinner. Served with some homemade chips and mushy peas, it feels like a proper treat to end the week.
- Family Tested: I’ve been making this for over 8 years, and it never disappoints. My family, especially my husband, says it’s even better than our local chippy – which is the highest praise I could ask for!
Ingredients You’ll Need
The beauty of this fried fish recipe is in its simplicity. We’re using staple pantry ingredients to let the quality of the fish shine. I always opt for thick, sustainable cod or haddock fillets from a trusted fishmonger. When it comes to flour, I find that a standard plain flour like Allinson’s gives a consistently light and crispy result.
- 4 large, thick skinless and boneless cod or haddock fillets (about 170g each)
- 150g plain flour
- 2 teaspoons fine sea salt
- 1 teaspoon freshly ground black pepper
- 1 teaspoon garlic powder
- 1 teaspoon onion powder
- ½ teaspoon paprika (not smoked)
- 2 large free-range eggs
- 2 tablespoons milk (any kind)
- 1 litre vegetable or sunflower oil, for frying
- Lemon wedges, to serve
- Fresh parsley, chopped, to serve (optional)
Kira’s Tip: The most crucial step for a crispy coating is starting with bone-dry fish. After rinsing, pat the fillets meticulously with paper towels. Any excess moisture will create steam and prevent the flour from adhering properly, leading to a soggy result.
How to Make This Crispy Fried Fish Recipe
The process is straightforward. We set up a simple dredging station and focus on maintaining the oil temperature. Don’t be tempted to rush the steps; a little patience pays off with an exceptionally crisp finish. Let’s get started.
- Prepare the Fish: Take your fish fillets out of the fridge about 15 minutes before you start. Pat them completely dry with paper towels on all sides. This is non-negotiable for a crispy coating! Season both sides lightly with a little salt and pepper.
- Set Up Your Dredging Station: You’ll need two shallow dishes or trays. In the first dish, whisk together the plain flour, salt, pepper, garlic powder, onion powder, and paprika until evenly combined. In the second dish, whisk the eggs and milk together until smooth.
- Coat the Fish (First Dredge): Working with one fillet at a time, press it firmly into the seasoned flour mixture, ensuring it’s completely coated on all sides. Shake off any excess flour.
- Dip in Egg Wash: Transfer the flour-coated fillet to the egg mixture. Turn it over a few times to make sure it’s fully coated, letting any excess egg drip back into the dish for a few seconds.
- Coat the Fish (Second Dredge): Return the fillet to the seasoned flour. This second coating is key! Press the flour gently onto the fish, covering every bit of the egg wash. Place the coated fillet on a wire rack and repeat with the remaining fillets. Let them rest for 5-10 minutes – this helps the coating set.
- Heat the Oil: Pour the oil into a large, heavy-bottomed pan or Dutch oven until it’s about 4-5 cm deep. Heat it over a medium-high heat to 180°C. I highly recommend using a cooking thermometer for accuracy. If you don’t have one, a small cube of bread should turn golden brown in about 30-40 seconds.
- Fry the Fish: Carefully place two fillets into the hot oil, laying them away from you to avoid splashes. Don’t overcrowd the pan, as this will drop the oil temperature and make the fish greasy. I find that frying in batches is what works best for me. Fry for 3-4 minutes per side, turning once, until the coating is a deep golden brown and magnificently crisp.
- Drain and Serve: Once cooked, use a fish slice to carefully remove the fillets from the oil. Let any excess oil drip off, then place them on a wire rack set over a baking sheet (not on paper towels, which can make the bottom soggy). Sprinkle with a tiny bit more sea salt while they are hot. Keep the first batch warm in a low oven while you fry the second. Serve immediately with fresh lemon wedges and a scattering of parsley.
Tips From My Kitchen
- Temperature Control is Everything: The single biggest factor for success is maintaining an oil temperature of 180°C. Too low, and the fish absorbs oil and becomes greasy. Too high, and the crust will burn before the fish is cooked through. A digital thermometer is your best friend here.
- The Secret Step: Letting the coated fish rest on a wire rack for 5-10 minutes before frying is a game-changer. I learned that this brief rest helps the coating adhere to the fish, ensuring it doesn’t fall off in the fryer. This process is similar to how fried chicken is made and you can read more about the science of what makes a perfect crust on Serious Eats.
- Make-Ahead: While fried fish is always best served immediately, you can get a head start. The seasoned flour mixture can be combined and stored in an airtight container for weeks. You can also make a delicious homemade tartar sauce, like the one I pair with my Grilled Salmon With Lemon Butter Sauce Recipe, a day or two in advance.
- Storage: Honestly, leftovers are rare! But if you have them, store the cooled fish in an airtight container in the fridge for up to 2 days. To reheat, place the fish on a wire rack on a baking sheet and bake at 190°C (170°C fan) for 10-15 minutes, or until hot and re-crisped. Avoid the microwave at all costs.
Delicious Variations to Try
Once you’ve mastered the basic technique, it’s fun to experiment with the flavours. This recipe is a fantastic canvas for your own culinary creativity.
- Spicy Fried Fish: Add 1-2 teaspoons of cayenne pepper or hot smoked paprika to the flour mixture for a fiery kick. You could also serve it with a spicy mayonnaise or sriracha dipping sauce.
- Herb-Crusted Fish: Add 2 tablespoons of finely chopped dried herbs like parsley, dill, or chives to the flour mixture for a fresh, aromatic twist.
- Gluten-Free Version: You can substitute the plain flour with a good quality gluten-free all-purpose flour blend. I find those containing rice flour work particularly well for frying.
What to Serve With This Crispy Fried Fish Recipe
A beautifully cooked piece of fish deserves the perfect partners. Here are a few of our family favourites that complement this dish wonderfully.
- Proper Homemade Chips: You simply can’t beat the classic combination. My recipe for Crispy Oven Roasted Potatoes Side makes a fantastic, healthier alternative to deep-fried chips and they get wonderfully fluffy inside.
- Mushy Peas and Tartar Sauce: For the full chip shop experience, serve with a side of vibrant mushy peas and a dollop of tangy, homemade tartar sauce. It cuts through the richness of the fried fish beautifully.
- A Crisp Drink: A cold, crisp lager or a pilsner is a classic pairing that cleanses the palate. For a wine option, a zesty Sauvignon Blanc or an unoaked Chardonnay works wonderfully.
Frequently Asked Questions
Crispy Fried Fish Recipe
Ingredients
Method
- Prepare the Fish: Take your fish fillets out of the fridge about 15 minutes before you start. Pat them completely dry with paper towels on all sides. This is non-negotiable for a crispy coating! Season both sides lightly with a little salt and pepper.
- Set Up Your Dredging Station: You'll need two shallow dishes or trays. In the first dish, whisk together the plain flour, salt, pepper, garlic powder, onion powder, and paprika until evenly combined. In the second dish, whisk the eggs and milk together until smooth.
- Coat the Fish (First Dredge): Working with one fillet at a time, press it firmly into the seasoned flour mixture, ensuring it's completely coated on all sides. Shake off any excess flour.
- Dip in Egg Wash: Transfer the flour-coated fillet to the egg mixture. Turn it over a few times to make sure it's fully coated, letting any excess egg drip back into the dish for a few seconds.
- Coat the Fish (Second Dredge): Return the fillet to the seasoned flour. This second coating is key! Press the flour gently onto the fish, covering every bit of the egg wash. Place the coated fillet on a wire rack and repeat with the remaining fillets. Let them rest for 5-10 minutes – this helps the coating set.
- Heat the Oil: Pour the oil into a large, heavy-bottomed pan or Dutch oven until it's about 4-5 cm deep. Heat it over a medium-high heat to 180°C. I highly recommend using a cooking thermometer for accuracy. If you don't have one, a small cube of bread should turn golden brown in about 30-40 seconds.
- Fry the Fish: Carefully place two fillets into the hot oil, laying them away from you to avoid splashes. Don't overcrowd the pan, as this will drop the oil temperature and make the fish greasy. I find that frying in batches is what works best for me. Fry for 3-4 minutes per side, turning once, until the coating is a deep golden brown and magnificently crisp.
- Drain and Serve: Once cooked, use a fish slice to carefully remove the fillets from the oil. Let any excess oil drip off, then place them on a wire rack set over a baking sheet (not on paper towels, which can make the bottom soggy). Sprinkle with a tiny bit more sea salt while they are hot. Keep the first batch warm in a low oven while you fry the second. Serve immediately with fresh lemon wedges and a scattering of parsley.
Notes
I really hope you give this crispy fried fish recipe a go. It’s one of those foundational recipes that, once you’ve made it, will become a regular in your meal rotation. There’s nothing better than mastering a dish that feels like a special treat. If you do make it, I’d love to hear how it turned out for you. Please leave a comment below and let me know! Happy cooking! – Kira