Crisp Lemon Butter Cookies
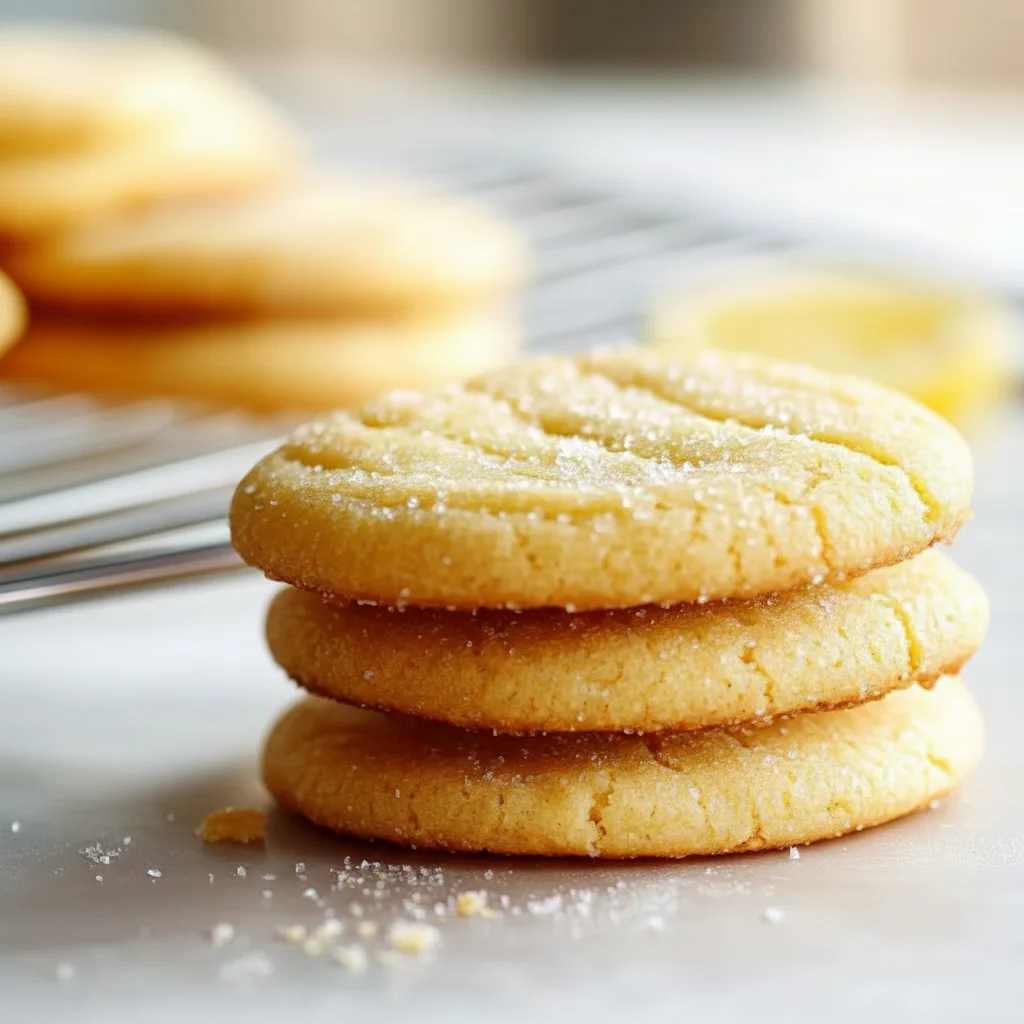
There’s a particular magic that happens when you combine the richness of good butter with the bright, zesty perfume of fresh lemons. It’s a scent that fills the kitchen and promises something truly special. These Lemon Butter Cookies are the result of that wonderful partnership: they are exceptionally tender, with a crumbly texture that melts in your mouth, leaving behind a wave of pure citrus and buttery goodness. They aren’t overly sweet; instead, the flavour is clean, bright, and utterly moreish. I’ve been making this for over 6 years, and it never disappoints.
What I adore about this lemon cookie recipe is its honesty. There are no complicated steps or fussy ingredients, just a focus on quality and technique to achieve a superior result. The texture is what sets them apart – almost like a shortbread, but lighter, with a delicate snap. They work beautifully for an afternoon tea with friends, as a thoughtful homemade gift packaged in a simple tin, or just as a little treat to have with your evening cuppa. They’re the kind of biscuit that feels both elegant and comforting at the same time.
Recipe Overview
This recipe produces wonderfully fragrant and tender lemon cookies with crisp edges and a soft, crumbly centre. The key is using real butter and fresh lemon zest to get that authentic, vibrant citrus flavour that cuts through the richness. I’ve found that the addition of a little cornflour is the secret to that perfect melt-in-the-mouth texture. Expect a dough that is soft and needs chilling, which is a vital step for ensuring the cookies hold their shape while baking.
- Prep Time: 20 minutes
- Chilling Time: 30 minutes
- Cook Time: 12-15 minutes
- Total Time: 1 hour 5 minutes
- Servings: Makes approximately 24 cookies
- Difficulty: Easy
Why You’ll Love This Lemon Butter Cookies Recipe
- Genuine Lemon Flavour: We use both the zest and juice of a fresh lemon. This creates a layered citrus taste that’s bright and tangy, with none of the artificial aftertaste you get from flavourings. The aroma as they bake is simply wonderful.
- Comes Together in About an Hour: Including the essential chilling time, you can have a batch of these beautiful butter cookies cooling on your counter in just over 60 minutes.
- A Wonderfully Adaptable Recipe: This dough is a brilliant base. Try adding a tablespoon of poppy seeds for a classic pairing, or dip the cooled cookies in melted white chocolate for an extra layer of decadence.
- Works Brilliantly for Gifting: These cookies look so lovely stacked in a cellophane bag tied with a ribbon or arranged in a tin. They’re a great bake for school fairs, coffee mornings, or as part of a larger gathering, perhaps alongside my Big Batch Pasta Salad for Crowds.
- Family Tested and Approved: Everyone I’ve served these to seems to love them. My parents, in particular, request a batch every time they visit, enjoying the classic, clean flavours.
Ingredients You’ll Need
For the best butter cookies, quality ingredients make all the difference. I always opt for a good block of unsalted butter, like Lurpak or a supermarket’s own premium brand. It has a lower water content than soft baking spreads, which gives a much better texture. And please, use a real lemon – you simply can’t replicate the flavour of fresh zest.
- 225g unsalted butter, softened to room temperature
- 140g caster sugar
- 1 large free-range egg yolk
- 1 teaspoon pure vanilla extract
- 1 large unwaxed lemon, zest and 1 tbsp of juice
- 280g plain flour
- 30g cornflour
- ½ teaspoon salt
Sara’s Tip: Make sure your butter is properly at room temperature. It should be soft enough to press an indent into easily, but not greasy or melting. This is the key to getting a light, fluffy texture when you cream it with the sugar.
How to Make Lemon Butter Cookies
The process for these lemon cookies is straightforward. The most important parts are creaming the butter and sugar properly at the beginning and not skipping the chilling time, which is essential for texture and shape.
- Cream Butter and Sugar: In a large mixing bowl, using an electric hand mixer or a stand mixer with the paddle attachment, beat the softened butter and caster sugar together on medium speed for about 3-4 minutes. You’re looking for the mixture to become pale, light, and fluffy.
- Add Wet Ingredients: Add the egg yolk, vanilla extract, lemon zest, and 1 tablespoon of lemon juice to the bowl. Beat again for another minute until everything is well combined and smooth. Scrape down the sides of the bowl to ensure it’s all incorporated.
- Combine Dry Ingredients: In a separate bowl, whisk together the plain flour, cornflour, and salt. This helps to distribute the salt and cornflour evenly.
- Form the Dough: Add the dry ingredients to the wet mixture in two batches, mixing on a low speed until just combined. Be careful not to overmix here; stop as soon as you no longer see streaks of flour. The dough will be soft.
- Chill the Dough: Tip the dough out onto a piece of cling film. Form it into a flat disc about 2cm thick, wrap it tightly, and place it in the refrigerator to chill for at least 30 minutes. What works best for me is chilling it for a full hour if I have the time, as it makes the dough much easier to handle.
- Preheat and Prepare: Towards the end of the chilling time, preheat your oven to 180°C (160°C Fan / Gas Mark 4). Line two large baking trays with baking parchment.
- Roll and Cut: Lightly flour your work surface and rolling pin. Unwrap the chilled dough and roll it out to a thickness of about 5mm (the thickness of a £1 coin). Use a 6cm round cutter to cut out your cookies, placing them on the prepared baking trays. Leave a little space between them as they will spread slightly.
- Bake the Cookies: Bake for 12-15 minutes, or until the edges are just starting to turn a very pale golden-brown. The centres should still look quite pale. They will firm up as they cool.
- Cool Down: Let the cookies cool on the baking trays for 5 minutes before carefully transferring them to a wire rack to cool completely.
Tips From My Kitchen
- Temperature is Key: Using room temperature butter and egg yolk helps the ingredients emulsify properly, creating a smooth, uniform dough. Cold ingredients can cause the butter mixture to curdle. This process is known as creaming, and you can learn more about the science behind it from experts like Serious Eats.
- The Secret Step for Tenderness: I learned that adding cornflour is a game-changer for shortbread-style biscuits. It inhibits some of the gluten development in the plain flour, resulting in a cookie that is incredibly short and tender, giving it that signature melt-in-the-mouth quality.
- Make-Ahead Dough: This dough is brilliant for preparing in advance. You can keep the wrapped dough disc in the fridge for up to 3 days. Alternatively, roll it into a log, wrap it well in cling film and foil, and freeze for up to 3 months. Simply slice and bake from frozen, adding a couple of extra minutes to the baking time.
- Storing Your Cookies: Once completely cool, store the lemon butter cookies in an airtight container at room temperature. They will stay fresh and crisp for up to 5 days.
Common Mistakes to Avoid
- Overcrowding the Baking Tray: It can be tempting to squeeze as many cookies as possible onto one tray, but this is a mistake. Leaving at least 5cm between each cookie allows hot air to circulate freely, ensuring they bake evenly and develop those lovely crisp edges. Bake in batches if you need to.
- Using Melted Butter: If your butter is too soft or melted, the cookies will spread excessively in the oven and become greasy and flat. Aim for softened, room temperature butter – not liquid.
- Skipping the Chilling Time: This is a non-negotiable step! Chilling solidifies the butter in the dough. When the cold dough hits the hot oven, the butter melts more slowly, which means the cookies spread less and hold their shape beautifully. It also allows the flour to hydrate, leading to a better flavour and texture.
Delicious Variations to Try
While this lemon butter cookie recipe is a star in its own right, it’s also a fantastic canvas for a few simple twists. Here are a couple of my favourites:
- Lemon & White Chocolate Cookies: The creamy sweetness of white chocolate is a perfect match for the tart lemon. Once the cookies are completely cool, melt 100g of good-quality white chocolate. Dip half of each cookie into the chocolate, let any excess drip off, and place them on baking parchment to set.
- Lemon & Poppy Seed Cookies: For a classic combination with a little textural crunch, add 1 tablespoon of poppy seeds to the dry ingredients in step 3. The little black specks also look beautiful in the finished cookie.
- Simple Lemon Glaze: For an extra hit of citrus, you can make a simple water icing. Sift 100g of icing sugar into a bowl and gradually stir in enough lemon juice to create a thick but pourable glaze. Drizzle over the cooled cookies.
What to Serve With Lemon Butter Cookies
These cookies are truly self-sufficient, but they also sit very happily alongside other treats. Here are a few ideas:
- A Classic Cuppa: Their best partner is a simple cup of tea or coffee. The bright lemon flavour is particularly good with an Earl Grey tea.
- With Fresh Berries: Serve a plate of these cookies alongside a bowl of fresh raspberries or strawberries for a simple, elegant dessert.
- As Part of an Afternoon Tea: These are a must-have for any afternoon tea spread. They would be wonderful served after some delicate sandwiches and alongside some of my Cream Filled Donuts Treat.
Frequently Asked Questions
Lemon Butter Cookies
Ingredients
Method
- Cream Butter and Sugar: In a large mixing bowl, using an electric hand mixer or a stand mixer with the paddle attachment, beat the softened butter and caster sugar together on medium speed for about 3-4 minutes. You’re looking for the mixture to become pale, light, and fluffy.
- Add Wet Ingredients: Add the egg yolk, vanilla extract, lemon zest, and 1 tablespoon of lemon juice to the bowl. Beat again for another minute until everything is well combined and smooth. Scrape down the sides of the bowl to ensure it's all incorporated.
- Combine Dry Ingredients: In a separate bowl, whisk together the plain flour, cornflour, and salt. This helps to distribute the salt and cornflour evenly.
- Form the Dough: Add the dry ingredients to the wet mixture in two batches, mixing on a low speed until just combined. Be careful not to overmix here; stop as soon as you no longer see streaks of flour. The dough will be soft.
- Chill the Dough: Tip the dough out onto a piece of cling film. Form it into a flat disc about 2cm thick, wrap it tightly, and place it in the refrigerator to chill for at least 30 minutes. What works best for me is chilling it for a full hour if I have the time, as it makes the dough much easier to handle.
- Preheat and Prepare: Towards the end of the chilling time, preheat your oven to 180°C (160°C Fan / Gas Mark 4). Line two large baking trays with baking parchment.
- Roll and Cut: Lightly flour your work surface and rolling pin. Unwrap the chilled dough and roll it out to a thickness of about 5mm (the thickness of a £1 coin). Use a 6cm round cutter to cut out your cookies, placing them on the prepared baking trays. Leave a little space between them as they will spread slightly.
- Bake the Cookies: Bake for 12-15 minutes, or until the edges are just starting to turn a very pale golden-brown. The centres should still look quite pale. They will firm up as they cool.
- Cool Down: Let the cookies cool on the baking trays for 5 minutes before carefully transferring them to a wire rack to cool completely.
Notes
I really hope you enjoy baking – and eating – these bright and buttery lemon cookies. They are a true favourite in my home, and they always manage to bring a little bit of sunshine into the kitchen. If you give them a go, please leave a comment below and let me know how you got on. Happy baking!