Classic Cheesecake Recipe Dessert
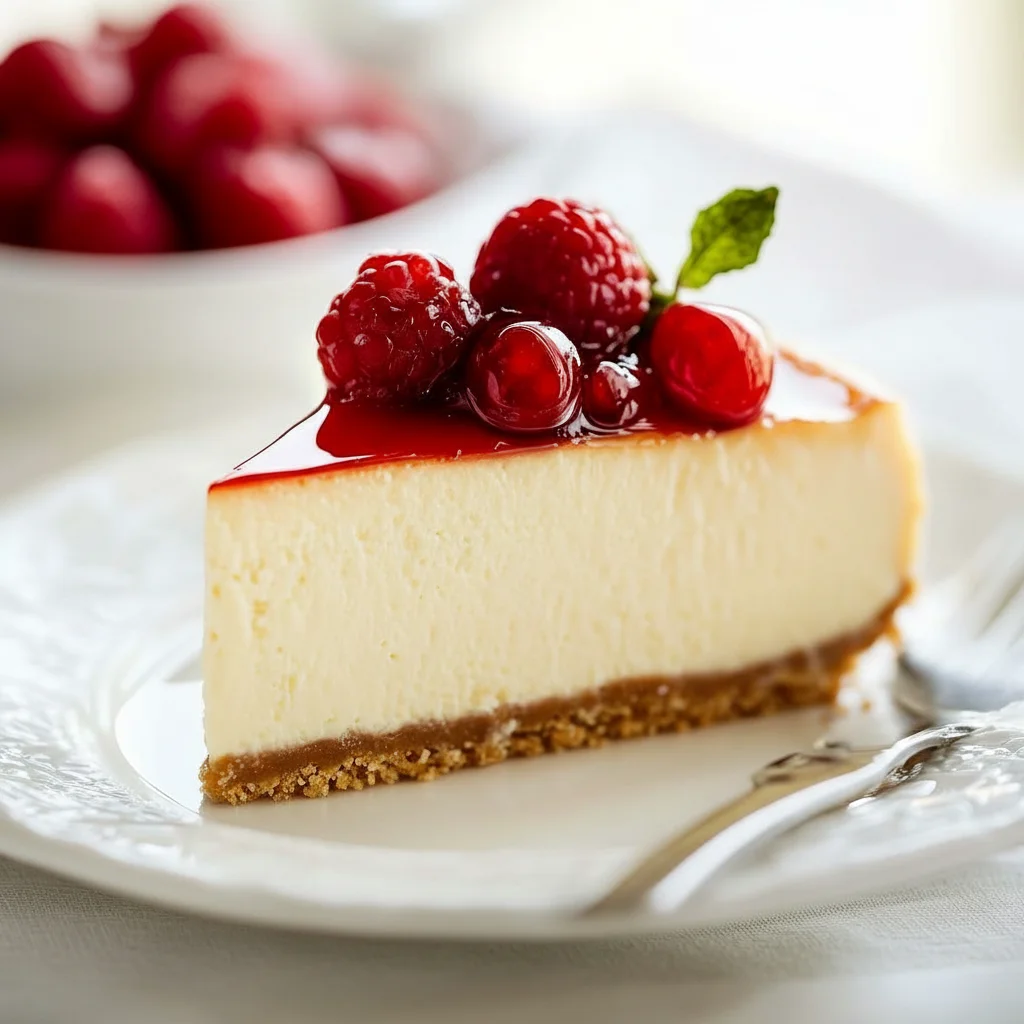
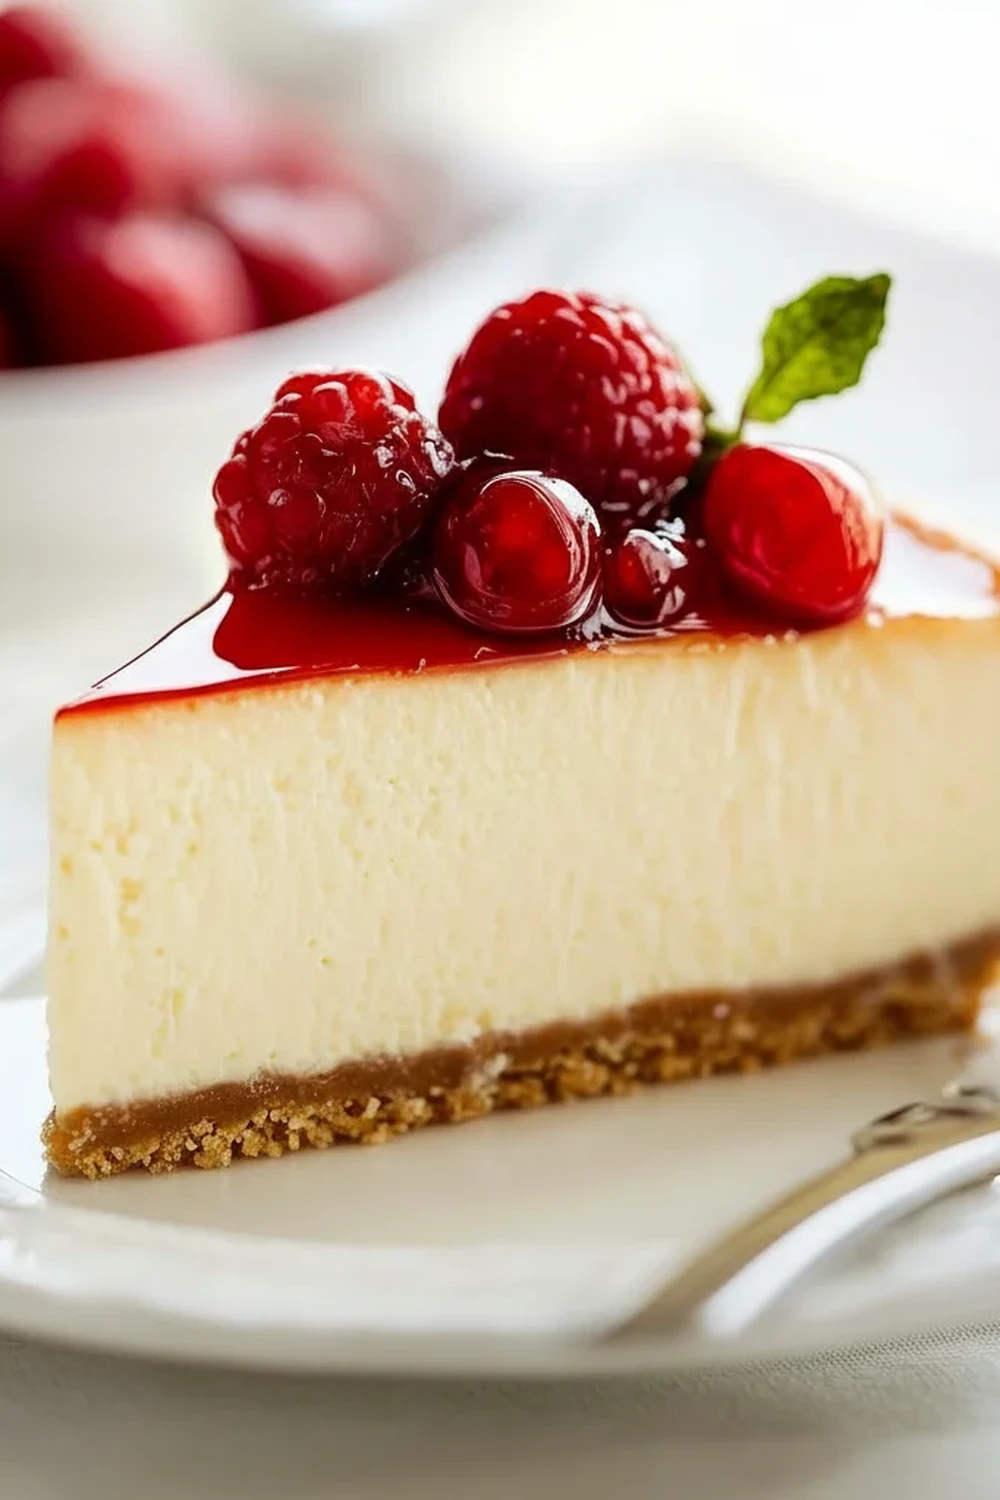
There is something truly special about a classic baked cheesecake. It’s not the speedy, no-bake versions we whip up in a hurry; this is the real deal. A dense, velvety smooth filling that is rich yet tangy, all sitting atop a buttery, crunchy biscuit base. For years, I was a bit intimidated by the idea of making one from scratch, worried about cracks and curdled textures. But after many trials in my own kitchen, I’ve landed on this foolproof cheesecake recipe that delivers a perfect result every single time. It’s the dessert I turn to for family gatherings and special Sunday dinners, the one that always has everyone asking for the recipe.
What makes this particular cheesecake recipe so wonderful is its purity. We’re not hiding behind tons of toppings or sauces (though you certainly can add them!). The focus is on that glorious baked cream cheese filling, scented with vanilla and brightened with a hint of lemon. It has a texture that is simply sublime – firm enough to slice cleanly, yet it melts in your mouth. My kids absolutely devour this every time I make it, and seeing their happy faces makes the little bit of effort completely worthwhile.
This dessert recipe is ideal for when you want to make something a little bit special. It works beautifully for a birthday celebration, an anniversary, or just as a luxurious treat to end the week. We’ll walk through every step together, from getting the base just right to ensuring that famously smooth, crack-free top. Let’s get baking!
Recipe Overview
This is a New York-style baked cheesecake recipe, which means it’s rich, dense, and supremely creamy. The flavour is a classic combination of tangy cream cheese, sweet vanilla, and a subtle zing from fresh lemon juice, which cuts through the richness beautifully. After testing this recipe multiple times, I found that the secret to its velvety texture is letting it cool down slowly in the oven after baking—a step you should never skip!
- Prep Time: 25 minutes
- Cook Time: 60 minutes
- Total Time: 1 hour 25 minutes + 6 hours chilling
- Servings: 10-12 people
- Difficulty: Medium
Why You’ll Love This Cheesecake Recipe
- Authentic Flavour & Texture: This isn’t a light and fluffy cheesecake. It boasts a genuinely rich, dense, and creamy filling with prominent notes of vanilla and tangy cream cheese, all built on a crisp, buttery digestive biscuit base.
- Active Prep in Under 30 Minutes: All the hands-on work of making the base and the filling is done in less than half an hour. After that, the oven and the fridge do the rest of the work for you.
- A Fantastic Base for Customisation: While stunning on its own, this cheesecake is a brilliant canvas. You can top it with a sharp raspberry coulis, a rich chocolate ganache, or a salted caramel drizzle.
- Great for Special Occasions: It works beautifully as the centrepiece dessert for a birthday, a dinner party, or a festive holiday meal. Because it needs to be made ahead, it frees up your time on the day.
- Family Tested & Approved: This is the dessert my family requests most often. It always gets compliments from friends and disappears from the plate in record time.
Ingredients You’ll Need
For a truly exceptional cheesecake, using full-fat ingredients is key. They provide the necessary structure and richness. I always use Philadelphia Original for the cream cheese; its firm texture and consistent quality have never let me down. Make sure all your dairy and eggs are at room temperature before you begin.
- For the Biscuit Base:
- 250g digestive biscuits
- 125g unsalted butter, melted
- 1 tbsp demerara sugar
- For the Creamy Filling:
- 900g full-fat cream cheese, at room temperature
- 250g caster sugar
- 3 large free-range eggs, at room temperature
- 1 large free-range egg yolk, at room temperature
- 180ml soured cream, at room temperature
- 1 tsp vanilla bean paste or extract
- 1 tbsp plain flour
- Zest and juice of 1 lemon
Kira’s Tip: Don’t be tempted to use low-fat cream cheese or soured cream. The fat content is crucial for the cheesecake’s structure and its luxuriously dense texture. Using a lower-fat version can result in a watery, less stable filling.
How to Make This Cheesecake Recipe
The process for this dessert recipe is straightforward. The most important parts are not over-mixing the batter and allowing the cheesecake to cool gradually. We’ll use a water bath, or bain-marie, which is the secret to an even bake and a crack-free surface. It might sound fancy, but it’s just a tray of hot water that creates a steamy, gentle environment for our cheesecake to bake in.
- Prepare the Tin and Oven: Preheat your oven to 160°C (140°C fan). Grease and line the base of a 23cm (9-inch) springform cake tin with parchment paper. To prepare for the water bath, wrap the outside of the tin in a double layer of heavy-duty aluminium foil, ensuring it comes right up the sides to prevent any water from seeping in.
- Make the Biscuit Base: Place the digestive biscuits in a food processor and blitz until they form fine crumbs. Alternatively, put them in a sealed bag and crush them with a rolling pin. Pour the crumbs into a bowl, add the demerara sugar and melted butter, and mix until everything is well combined and resembles wet sand.
- Form the Base: Tip the buttery crumbs into your prepared springform tin. Use the back of a spoon or the base of a glass to press the mixture down firmly and evenly across the bottom and slightly up the sides. Place the tin in the fridge to chill while you make the filling.
- Start the Filling: In a large bowl using a stand mixer with the paddle attachment or a hand mixer, beat the room-temperature cream cheese on a low speed for 1-2 minutes until it’s smooth and free of lumps. Scrape down the sides and bottom of the bowl.
- Combine the Wet Ingredients: Add the caster sugar and plain flour to the cream cheese and beat on low speed until just combined. Add the eggs and egg yolk one at a time, mixing gently after each addition until just incorporated. What works best for me is to keep the mixer speed low throughout this process to avoid whipping too much air into the batter, which can cause cracks.
- Finish the Filling: Gently fold in the soured cream, vanilla, lemon zest, and lemon juice with a spatula until the batter is smooth and uniform. Take care not to over-mix.
- Assemble and Bake: Pour the filling over your chilled biscuit base and smooth the top. Place the springform tin into a large roasting tray. Carefully pour boiling water into the roasting tray so that it comes about halfway up the sides of the cake tin.
- Bake and Cool: Carefully transfer the roasting tray to the preheated oven. Bake for 60 minutes. The cheesecake should be set around the edges but still have a slight wobble in the centre. Turn off the oven, prop the oven door open slightly with a wooden spoon, and leave the cheesecake inside to cool down completely for at least 1-2 hours. This gradual cooling is the ultimate trick for a flawless finish.
- Chill Thoroughly: Once completely cool, remove the cheesecake from the water bath and take off the foil. Cover it loosely with cling film and transfer it to the refrigerator to chill for at least 6 hours, but preferably overnight. This step is essential for the cheesecake to set fully, allowing for clean, beautiful slices.
Tips From My Kitchen
- Room Temperature is Non-Negotiable: I can’t stress this enough. Cold cream cheese will result in a lumpy batter, and cold eggs can cause the mixture to curdle. Set your ingredients out on the counter for at least an hour before you start.
- The Secret Step – The Water Bath: A bain-marie, or water bath, provides moist, even heat that cooks the cheesecake gently, preventing it from drying out, cracking, or becoming rubbery. I learned that this simple technique is the difference between a good cheesecake and a great one.
- Make-Ahead Magic: This cheesecake recipe is designed to be made ahead of time. It needs its long chilling period to set properly and for the flavours to meld. You can make it up to two days before you plan to serve it.
- Storage: Leftover cheesecake will keep beautifully in the fridge. Cover it well (or store it in an airtight container) and it will last for up to 5 days. I don’t recommend freezing this cheesecake, as it can affect the creamy texture upon thawing.
Equipment You’ll Need
- 23cm (9-inch) springform cake tin
- Stand mixer with paddle attachment or an electric hand mixer
- Large roasting tray (for the water bath)
- Food processor (or a ziplock bag and rolling pin)
Delicious Variations to Try
This classic cheesecake recipe is a wonderful starting point for your own creations. Once you’ve mastered the basic technique, feel free to experiment with these delicious twists.
- Chocolate Swirl Cheesecake: Melt 100g of good-quality dark chocolate and let it cool slightly. After pouring the cheesecake batter into the tin, drizzle the melted chocolate over the top and use a skewer to gently swirl it through the filling for a beautiful marbled effect.
- Passion Fruit & Mango Topping: Create a tropical topping by simmering the pulp of 4 passion fruits with 1 chopped mango and 2 tablespoons of sugar until slightly thickened. Cool completely before spooning over the chilled cheesecake.
- Ginger Nut Base: For a bit of warmth and spice, simply swap the digestive biscuits for ginger nut biscuits. The gentle heat of the ginger is a fantastic complement to the tangy filling. This is a lovely variation for autumn and winter.
What to Serve With This Cheesecake Recipe
This dessert is so rich and satisfying that it doesn’t need much accompaniment, but a little something extra can elevate it even further. We often have this after a lovely main like my Grilled Salmon With Lemon Butter Sauce Recipe.
- Fresh Berries: A simple handful of fresh raspberries, strawberries, or blueberries provides a sharp, fresh contrast that cuts through the creaminess of the cheesecake.
- Berry Coulis: A simple sauce made by simmering berries with a little sugar and lemon juice is a classic pairing. It adds a vibrant splash of colour and flavour.
- A Dollop of Crème Fraîche: For those who love extra tang, a small spoonful of crème fraîche on the side beautifully balances the sweetness of the dessert.
Frequently Asked Questions
Cheesecake Recipe
Ingredients
Method
- Prepare the Tin and Oven: Preheat your oven to 160°C (140°C fan). Grease and line the base of a 23cm (9-inch) springform cake tin with parchment paper. To prepare for the water bath, wrap the outside of the tin in a double layer of heavy-duty aluminium foil, ensuring it comes right up the sides to prevent any water from seeping in.
- Make the Biscuit Base: Place the digestive biscuits in a food processor and blitz until they form fine crumbs. Alternatively, put them in a sealed bag and crush them with a rolling pin. Pour the crumbs into a bowl, add the demerara sugar and melted butter, and mix until everything is well combined and resembles wet sand.
- Form the Base: Tip the buttery crumbs into your prepared springform tin. Use the back of a spoon or the base of a glass to press the mixture down firmly and evenly across the bottom and slightly up the sides. Place the tin in the fridge to chill while you make the filling.
- Start the Filling: In a large bowl using a stand mixer with the paddle attachment or a hand mixer, beat the room-temperature cream cheese on a low speed for 1-2 minutes until it's smooth and free of lumps. Scrape down the sides and bottom of the bowl.
- Combine the Wet Ingredients: Add the caster sugar and plain flour to the cream cheese and beat on low speed until just combined. Add the eggs and egg yolk one at a time, mixing gently after each addition until just incorporated. What works best for me is to keep the mixer speed low throughout this process to avoid whipping too much air into the batter, which can cause cracks.
- Finish the Filling: Gently fold in the soured cream, vanilla, lemon zest, and lemon juice with a spatula until the batter is smooth and uniform. Take care not to over-mix.
- Assemble and Bake: Pour the filling over your chilled biscuit base and smooth the top. Place the springform tin into a large roasting tray. Carefully pour boiling water into the roasting tray so that it comes about halfway up the sides of the cake tin.
- Bake and Cool: Carefully transfer the roasting tray to the preheated oven. Bake for 60 minutes. The cheesecake should be set around the edges but still have a slight wobble in the centre. Turn off the oven, prop the oven door open slightly with a wooden spoon, and leave the cheesecake inside to cool down completely for at least 1-2 hours. This gradual cooling is the ultimate trick for a flawless finish.
- Chill Thoroughly: Once completely cool, remove the cheesecake from the water bath and take off the foil. Cover it loosely with cling film and transfer it to the refrigerator to chill for at least 6 hours, but preferably overnight. This step is essential for the cheesecake to set fully, allowing for clean, beautiful slices.
Notes
I truly hope you give this classic cheesecake recipe a go. It is one of the most rewarding bakes, and the result is a truly elegant and delicious dessert that everyone seems to love. Once you master it, it will become a go-to in your dessert recipe collection. Let me know how you get on in the comments below – I’d love to hear about your cheesecake creations!