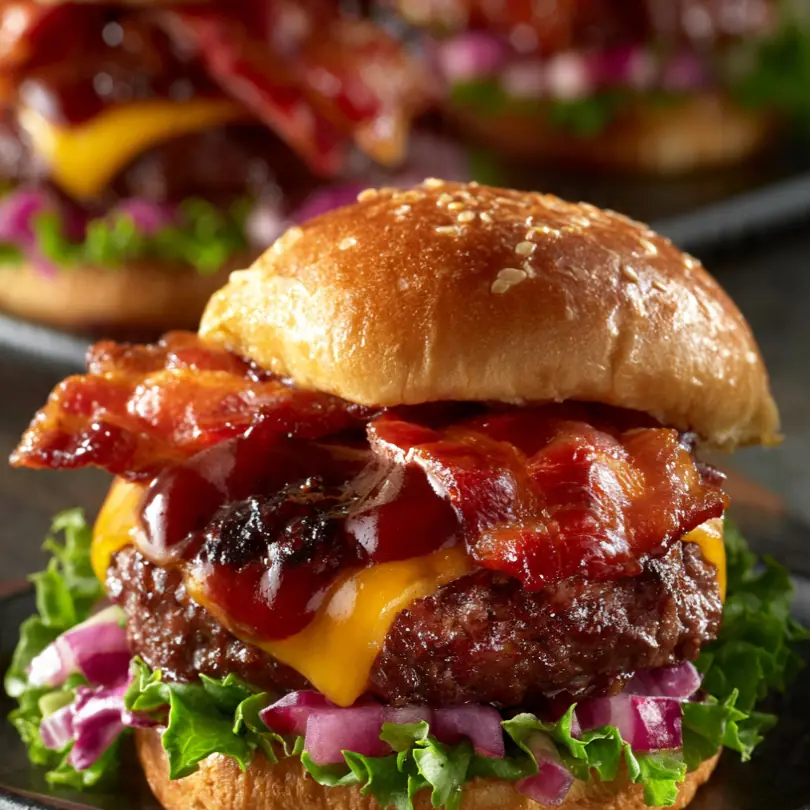
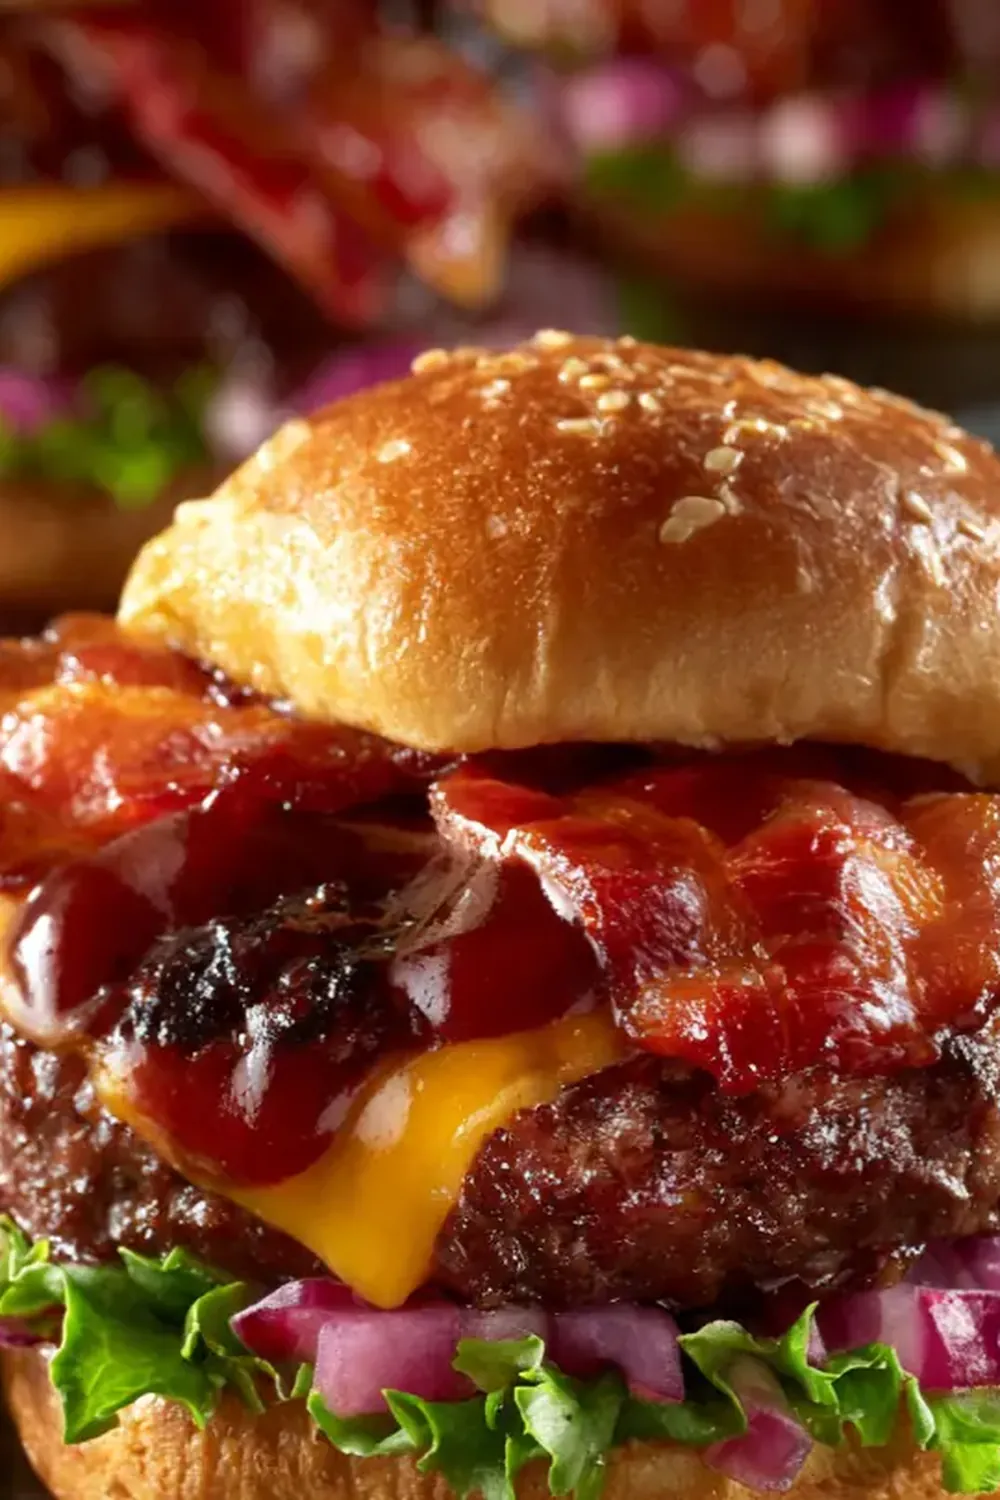
Bbq Bacon Cheeseburger Sliders
Welcome, dear reader, to a truly delightful recipe that always brings a smile to our faces: BBQ Bacon Cheeseburger Sliders. These mini burgers pack a mighty punch of flavour and are a fantastic way to enjoy a taste of summer, no matter the season. Let’s get cooking!
Recipe Overview
- Prep Time: 25 minutes
- Cook Time: 20-25 minutes
- Total Time: 45-50 minutes
- Servings: 12 sliders
- Difficulty: Moderate
Why You’ll Love This BBQ Bacon Cheeseburger Sliders
- They offer a concentrated burst of classic burger flavours in every bite, making them utterly moreish.
- These sliders are incredibly versatile, perfect for casual family meals or entertaining guests with ease.
- The combination of juicy beef patties, smoky beef rashers, tangy BBQ sauce, and melted cheese is simply irresistible.
- Making them from scratch means you control the quality of ingredients, ensuring a fresher, tastier outcome.
- They are a wonderful way to enjoy a gourmet burger experience without the fuss of larger, more unwieldy sandwiches.
Ingredients You’ll Need
- 500g lean beef mince (around 10-15% fat)
- 12 slider buns, preferably brioche
- 12 slices of Cheddar cheese (or your favourite melting cheese)
- 150g beef rashers, thinly sliced
- 1 small red onion, very finely diced
- 2 tbsp Worcestershire sauce (ensure halal-certified)
- 1 tbsp English mustard
- 1 tsp garlic powder
- 1/2 tsp smoked paprika
- Salt and freshly ground black pepper to taste
- 100ml quality BBQ sauce (check for no alcohol)
- 2 tbsp olive oil
- Toppings: baby gem lettuce leaves, sliced gherkins, sliced tomatoes
- Optional: 2 tbsp mayonnaise for serving
Tip: For the best flavour, always opt for freshly ground beef mince and high-quality cheese. The beef rashers should be thin enough to crisp up beautifully.
How to Make BBQ Bacon Cheeseburger Sliders
- Prepare the Beef Patties: In a large mixing bowl, combine the beef mince with the finely diced red onion, Worcestershire sauce, English mustard, garlic powder, smoked paprika, salt, and black pepper. Mix gently but thoroughly with your hands until just combined – avoid overmixing, as this can make the burgers tough. The mixture should feel slightly sticky and uniform in colour.
- Form the Sliders: Divide the seasoned beef mixture into 12 equal portions. Roll each portion into a small ball, then gently flatten into a disc, about 1cm thick and slightly wider than your slider buns, as they will shrink during cooking. You want them to be neat, compact patties, ready for the grill.
- Cook the Beef Rashers: Heat 1 tablespoon of olive oil in a large frying pan or skillet over medium-high heat. Add the beef rashers in a single layer, ensuring not to overcrowd the pan. Cook for 2-3 minutes per side, until they turn wonderfully crisp and golden-brown, releasing a rich, smoky aroma. Once done, remove them from the pan and place them on a plate lined with kitchen paper to drain any excess fat.
- Grill the Patties: Preheat your grill or grill pan to a medium-high heat. Lightly brush the grill grates with the remaining olive oil. Place the beef patties onto the hot grill. Cook for 3-4 minutes per side for medium-rare, or 5-6 minutes per side for well-done. You’ll hear a satisfying sizzle, and the patties will develop a lovely char and grill marks, transitioning from a raw pink to a rich brown, with internal juices running clear when pressed. An internal temperature of 71°C (160°F) ensures they are cooked through.
- Assemble and Melt the Cheese: During the last minute of cooking the patties, place a slice of Cheddar cheese on top of each one. Close the grill lid or tent the pan with foil for about 30-60 seconds, allowing the cheese to melt and become gloriously gooey and shiny, cascading slightly over the sides of the patties. Meanwhile, lightly toast the slider buns on the grill or under a grill for 1-2 minutes until they are lightly golden and fragrant.
- Finish and Serve: Spread a generous dollop of BBQ sauce on the bottom half of each toasted bun. Place a cheesy patty on top, then add a few crispy beef rashers, a fresh baby gem lettuce leaf, a slice of tomato, and a gherkin. Top with the other half of the bun. Arrange the BBQ Bacon Cheeseburger Sliders on a platter and serve immediately, allowing everyone to enjoy the incredible combination of textures and aromas.
Tips From My Kitchen
- Don’t Overmix the Mince: When combining the beef mince with the seasonings, handle it as little as possible. Overmixing compacts the meat proteins, leading to a tough, dense burger patty. We want light, tender sliders, so mix just until the ingredients are incorporated. This preserves the texture and juiciness.
- Use a Thumbprint Indentation: Before grilling, press a small indentation into the centre of each patty with your thumb. This simple trick prevents the patties from bulging in the middle as they cook, ensuring they remain flat and even. Burgers tend to swell when heat causes the proteins to contract, but this small dimple helps them hold their shape.
- Grill, Don’t Fry, for Flavour: While you can fry these, grilling imparts a much deeper, smoky flavour and creates those desirable char marks. The direct heat caramelises the exterior of the beef, adding complexity. If you don’t have an outdoor grill, a ridged grill pan on your hob is a fantastic alternative for achieving similar results.
- Toast Your Buns: This step is often overlooked but crucial. Lightly toasting the slider buns adds a delightful texture contrast and prevents them from becoming soggy from the juicy patties and sauces. A slightly crisp bun holds up better and contributes to the overall eating experience. You’ll notice the difference immediately.
- Season Generously and Taste: Don’t be shy with the salt and pepper in your mince mixture. Beef needs good seasoning to really sing. While you can’t taste raw mince, you can ensure a well-balanced flavour by following the recipe’s guidelines and remembering that seasoning helps to enhance the natural richness of the beef.
- Rest the Patties (Briefly): After grilling, it’s a good idea to let the patties rest for just a minute or two before assembling. This allows the juices to redistribute throughout the meat, making them even more succulent. While sliders are small, even a short rest makes a difference.
Equipment You’ll Need
- Grill or grill pan
- Meat thermometer
- Tongs
- Basting brush
Delicious Variations to Try
- Spicy Version: For those who love a bit of heat, mix 1/2-1 teaspoon of chilli flakes or a dash of hot sauce into your beef mince. You could also add a slice of jalapeño to each slider before the cheese melts.
- Vegetarian/Vegan Option: Swap the beef mince for a plant-based burger alternative. Use a dairy-free cheese slice and ensure your BBQ sauce is vegan. Omit the beef rashers or use a plant-based alternative.
- Different Protein: These sliders are also delightful with other proteins. Consider using lean chicken mince for lighter chicken burgers, or even turkey mince, seasoned similarly for a different take on the classic.
What to Serve With BBQ Bacon Cheeseburger Sliders
- Crispy French fries or sweet potato fries
- A fresh green salad with a zesty vinaigrette
- Homemade coleslaw or potato salad
- Onion rings or corn on the cob
- A vibrant pasta salad for a complete meal
Frequently Asked Questions
BBQ Bacon Cheeseburger Sliders
Ingredients
Method
- Prepare the Beef Patties: In a large mixing bowl, combine the beef mince with the finely diced red onion, Worcestershire sauce, English mustard, garlic powder, smoked paprika, salt, and black pepper. Mix gently but thoroughly with your hands until just combined – avoid overmixing, as this can make the burgers tough. The mixture should feel slightly sticky and uniform in colour.
- Form the Sliders: Divide the seasoned beef mixture into 12 equal portions. Roll each portion into a small ball, then gently flatten into a disc, about 1cm thick and slightly wider than your slider buns, as they will shrink during cooking. You want them to be neat, compact patties, ready for the grill.
- Cook the Beef Rashers: Heat 1 tablespoon of olive oil in a large frying pan or skillet over medium-high heat. Add the beef rashers in a single layer, ensuring not to overcrowd the pan. Cook for 2-3 minutes per side, until they turn wonderfully crisp and golden-brown, releasing a rich, smoky aroma. Once done, remove them from the pan and place them on a plate lined with kitchen paper to drain any excess fat.
- Grill the Patties: Preheat your grill or grill pan to a medium-high heat. Lightly brush the grill grates with the remaining olive oil. Place the beef patties onto the hot grill. Cook for 3-4 minutes per side for medium-rare, or 5-6 minutes per side for well-done. You'll hear a satisfying sizzle, and the patties will develop a lovely char and grill marks, transitioning from a raw pink to a rich brown, with internal juices running clear when pressed. An internal temperature of 71°C (160°F) ensures they are cooked through.
- Assemble and Melt the Cheese: During the last minute of cooking the patties, place a slice of Cheddar cheese on top of each one. Close the grill lid or tent the pan with foil for about 30-60 seconds, allowing the cheese to melt and become gloriously gooey and shiny, cascading slightly over the sides of the patties. Meanwhile, lightly toast the slider buns on the grill or under a grill for 1-2 minutes until they are lightly golden and fragrant.
- Finish and Serve: Spread a generous dollop of BBQ sauce on the bottom half of each toasted bun. Place a cheesy patty on top, then add a few crispy beef rashers, a fresh baby gem lettuce leaf, a slice of tomato, and a gherkin. Top with the other half of the bun. Arrange the BBQ Bacon Cheeseburger Sliders on a platter and serve immediately, allowing everyone to enjoy the incredible combination of textures and aromas.
Notes
There you have it – a recipe for BBQ Bacon Cheeseburger Sliders that I’ve been making for over 4 years, and it never disappoints. This was inspired by a dish I had at a little restaurant in the American South, and I’ve adapted it over time to make it truly my own. I hope you enjoy creating and devouring these delicious little parcels of joy as much as we do. Please let me know in the comments below if you try them and what your favourite toppings are! Happy cooking, everyone!