Classic Hash Browns (Crispy)
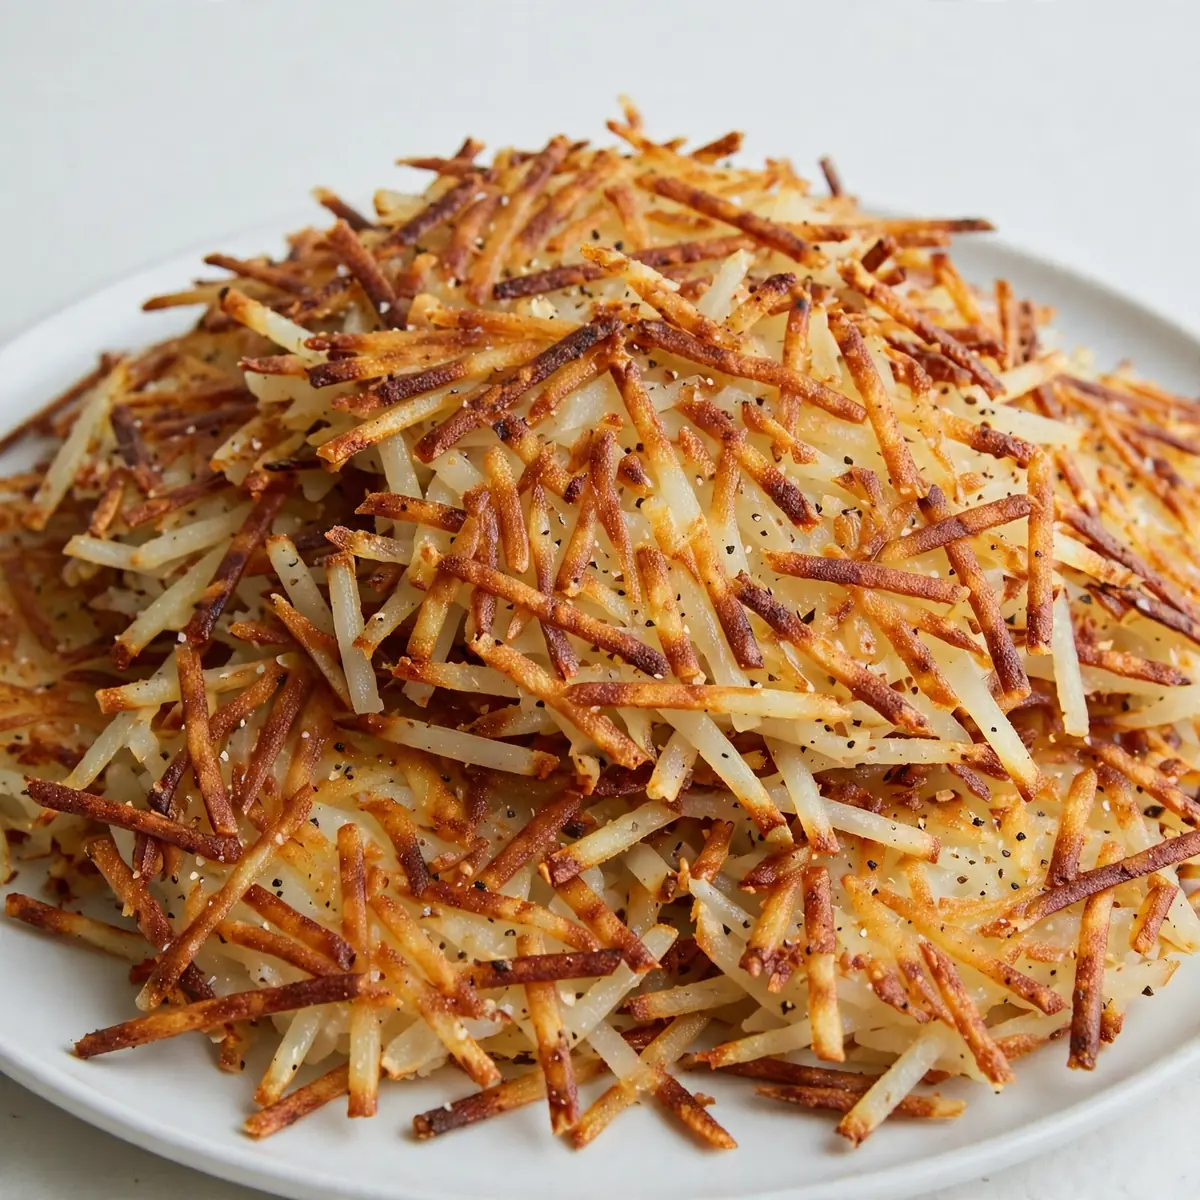
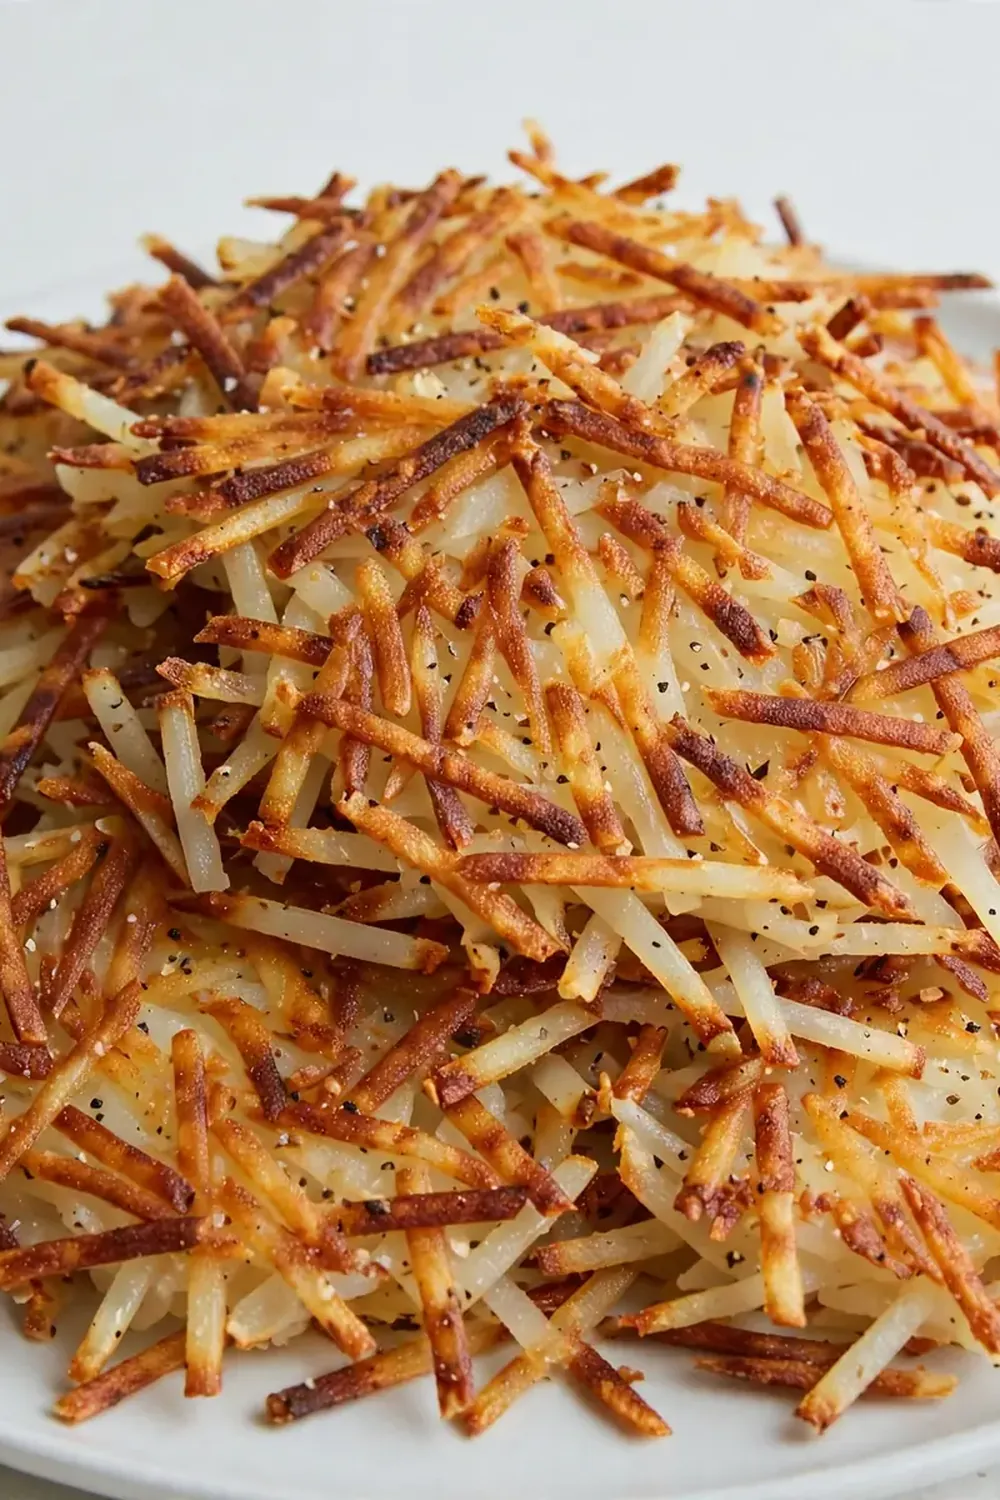
There’s a moment when the first forkful of a homemade hash brown shatters against the roof of your mouth, and the sound alone tells you it’s going to be a good meal. I’ve spent years chasing that sound, tweaking and testing until I could reliably produce a stack of golden, restaurant-quality shreds that look as good on the plate as they taste. This Classic Hash Browns (Crispy) recipe is the result of that obsession, and I’m going to show you exactly how to serve it like a head chef.
Recipe Overview
- Prep Time: 20 minutes
- Cook Time: 12 minutes
- Total Time: 32 minutes
- Servings: 4
- Difficulty: Medium
Why You’ll Love This Classic Hash Browns (Crispy)
- Restaurant-worthy presentation: Each hash brown holds its shape with a deep, even golden crust that makes a stunning centrepiece on any breakfast or brunch plate.
- Consistent crunch every time: The method I use removes excess moisture so thoroughly that you get a shatteringly crisp exterior without any sogginess hiding beneath.
- Simple, everyday ingredients: You don’t need any fancy equipment or hard-to-find items — just potatoes, a few pantry staples, and a bit of patience.
- Customisable for any occasion: Whether you serve them alongside eggs for a quiet weekend or stack them high for a dinner party side, they adapt effortlessly to your menu.
- Make-ahead friendly: You can prep the shredded potatoes the night before and store them in cold water, making your morning cooking routine seamless and stress-free.
Ingredients You’ll Need
- 1 kg large floury potatoes (such as Maris Piper or King Edward)
- 1 large onion, finely grated
- 2 large free-range egg yolks
- 3 tablespoons plain flour
- 1 teaspoon fine sea salt
- ½ teaspoon freshly ground black pepper
- ¼ teaspoon smoked paprika
- Vegetable oil or clarified butter, for frying
- Flaky sea salt, for finishing
- Small handful of fresh chives, finely snipped (for garnish)
- Crème fraîche or soured cream, to serve (optional)
Tip: For the best texture, use floury potatoes — their high starch content creates a fluffy interior that contrasts beautifully with the crispy crust. Waxy potatoes hold too much moisture and will steam rather than fry.
How to Make Classic Hash Browns (Crispy)
- Prepare the potatoes: Peel the potatoes and grate them on the large holes of a box grater. Immediately place the shreds into a large bowl of cold water and swish them around with your hands — the water will turn cloudy with starch. Drain the potatoes in a colander, then rinse them again under cold running water until the water runs clear. This step removes the surface starch that would otherwise make your hash browns gluey.
- Remove every drop of moisture: Tip the rinsed potato shreds onto a clean, lint-free tea towel. Gather the edges of the towel tightly to form a bundle, then twist the top firmly over the sink. Squeeze with all your strength — you should hear a distinct squeaking sound as the water forces its way through the fabric. When you can twist no more, unwrap the bundle and transfer the dry shreds to a large mixing bowl. The shreds should feel almost powdery to the touch.
- Combine the base mixture: Add the finely grated onion to the bowl with the potatoes. The onion will release its own liquid as you work, so work quickly. Sprinkle over the flour, salt, pepper, and smoked paprika, then add the egg yolks. Use your hands to toss everything together until every shred is lightly coated. The mixture should feel cohesive but not wet — if it looks watery, add another tablespoon of flour.
- Shape the hash browns: Divide the mixture into 8 equal portions. Using your hands, shape each portion into a flat, oval patty about 1cm thick. Press the edges firmly so they hold together — you want neat, uniform shapes that will cook evenly and look polished on the plate.
- Heat the fat: Place a large, heavy-based frying pan over a medium-high heat and add enough vegetable oil or clarified butter to cover the base by about 5mm. When the oil shimmers and a tiny pinch of potato mixture sizzles immediately on contact, the fat is ready. The surface should be active but not smoking — adjust the heat down if it starts to darken too quickly.
- Fry until deep golden: Carefully lower the hash brown patties into the hot oil using a fish slice. Do not overcrowd the pan — cook in batches of 4 if necessary. Fry for 4–5 minutes without moving them. You will see the edges turn a deep, burnished gold, and you should hear a steady, gentle sizzle. Flip each patty carefully using the fish slice — the cooked side should be an even, dark amber colour with a visibly craggy surface. Fry for another 4 minutes on the second side until the same colour is achieved.
- Drain and season: Transfer the cooked hash browns to a wire rack set over a baking tray. Immediately sprinkle with a generous pinch of flaky sea salt while they are still hot — the salt will stick to the hot fat and enhance the crunch. Keep them warm in a low oven (100°C) while you cook the remaining batches.
- Plate and garnish: Arrange the hash browns on warmed plates in an overlapping stack of two or three per serving. Spoon a small dollop of crème fraîche or soured cream beside the stack, then scatter over the snipped chives. The contrast of the pale, creamy garnish against the dark, craggy potato is what makes this dish look like it came from a smart brunch spot.
Tips From My Kitchen
- Use a tea towel, not paper towels: Paper towels simply cannot handle the volume of liquid that comes from a kilo of grated potatoes. A lint-free tea towel gives you the leverage to wring out the shreds completely, which is the single most important factor for achieving that glass-like crust. If your towel is too small, split the batch in half and squeeze each portion separately.
- Do not rinse the onion: I know it sounds counterintuitive, but the moisture from the grated onion is actually beneficial here. It helps the flour and egg yolk bind the mixture without making it wet. However, if the onion looks excessively watery after grating, give it a gentle squeeze over the sink before adding it to the bowl. This balances the moisture perfectly.
- Let the oil come back to temperature between batches: After you remove the first batch of hash browns, the oil temperature will drop significantly. Wait 60–90 seconds for the oil to shimmer again before adding the next batch. I learned this the hard way — rushing this step leads to pale, greasy hash browns that absorb oil instead of crisping up.
- Shape the patties on a cold surface: If your hands are warm or the kitchen is hot, the mixture can start to soften and become sticky. I like to shape the patties on a chilled chopping board or a plate that has been in the fridge for 10 minutes. This keeps the fat solid and the shreds separate, which translates directly into a lighter, airier texture once fried.
- Season in layers: The salt you add to the mixture seasons the interior, but the flaky salt you sprinkle after frying adds texture and a burst of clean salinity on the surface. This two-stage seasoning is a trick I picked up from a chef friend, and it makes a noticeable difference — the hash browns taste seasoned all the way through, not just on the outside.
- Test one before you cook the batch: Fry a single small patty first to check your seasoning and heat level. If it browns too quickly, lower the heat. If it looks pale after 5 minutes, turn it up. This tiny test saves an entire batch from being ruined and gives you the confidence to proceed with the rest.
Delicious Variations to Try
- Spicy Version: Add 1 finely chopped red chilli (seeds removed if you prefer less heat) and ½ teaspoon of cayenne pepper to the potato mixture. The heat blooms beautifully against the creamy crème fraîche garnish. My kids absolutely devour this every time I make it — I just dial down the chilli for their portions.
- Vegetarian/Vegan Option: Replace the egg yolks with 2 tablespoons of aquafaba (the liquid from a tin of chickpeas) and use a plant-based oil for frying. The aquafaba binds the shreds just as effectively as egg, and the result is every bit as crispy. I stumbled upon this combination by accident when I ran out of eggs, and it’s been a hit ever since.
- Different Protein: Finely dice 200g of cooked, shredded roast chicken or turkey and fold it into the potato mixture before shaping. This turns the hash browns into a more substantial main course, perfect for a lunch or light dinner. Serve them alongside a simple green salad and a dollop of mayonnaise mixed with a squeeze of lemon.
What to Serve With Classic Hash Browns (Crispy)
- Poached or fried free-range eggs — the runny yolk acts as a natural sauce
- Grilled tomatoes and sautéed mushrooms for a classic full English plate
- A side of Homestyle Chicken Noodle Soup for a comforting weekend lunch
- Smoked salmon and a squeeze of lemon for an elegant brunch
- A refreshing glass of Refreshing Fresh Lemonade Recipe to cut through the richness
Still hungry for ideas? You might also love Savory And Healthy Sweet Potato Hash Browns Recipe from our sister kitchens.
Frequently Asked Questions
Classic Hash Browns (Crispy)
Ingredients
Method
- Prepare the potatoes: Peel the potatoes and grate them on the large holes of a box grater. Immediately place the shreds into a large bowl of cold water and swish them around with your hands — the water will turn cloudy with starch. Drain the potatoes in a colander, then rinse them again under cold running water until the water runs clear. This step removes the surface starch that would otherwise make your hash browns gluey.
- Remove every drop of moisture: Tip the rinsed potato shreds onto a clean, lint-free tea towel. Gather the edges of the towel tightly to form a bundle, then twist the top firmly over the sink. Squeeze with all your strength — you should hear a distinct squeaking sound as the water forces its way through the fabric. When you can twist no more, unwrap the bundle and transfer the dry shreds to a large mixing bowl. The shreds should feel almost powdery to the touch.
- Combine the base mixture: Add the finely grated onion to the bowl with the potatoes. The onion will release its own liquid as you work, so work quickly. Sprinkle over the flour, salt, pepper, and smoked paprika, then add the egg yolks. Use your hands to toss everything together until every shred is lightly coated. The mixture should feel cohesive but not wet — if it looks watery, add another tablespoon of flour.
- Shape the hash browns: Divide the mixture into 8 equal portions. Using your hands, shape each portion into a flat, oval patty about 1cm thick. Press the edges firmly so they hold together — you want neat, uniform shapes that will cook evenly and look polished on the plate.
- Heat the fat: Place a large, heavy-based frying pan over a medium-high heat and add enough vegetable oil or clarified butter to cover the base by about 5mm. When the oil shimmers and a tiny pinch of potato mixture sizzles immediately on contact, the fat is ready. The surface should be active but not smoking — adjust the heat down if it starts to darken too quickly.
- Fry until deep golden: Carefully lower the hash brown patties into the hot oil using a fish slice. Do not overcrowd the pan — cook in batches of 4 if necessary. Fry for 4–5 minutes without moving them. You will see the edges turn a deep, burnished gold, and you should hear a steady, gentle sizzle. Flip each patty carefully using the fish slice — the cooked side should be an even, dark amber colour with a visibly craggy surface. Fry for another 4 minutes on the second side until the same colour is achieved.
- Drain and season: Transfer the cooked hash browns to a wire rack set over a baking tray. Immediately sprinkle with a generous pinch of flaky sea salt while they are still hot — the salt will stick to the hot fat and enhance the crunch. Keep them warm in a low oven (100°C) while you cook the remaining batches.
- Plate and garnish: Arrange the hash browns on warmed plates in an overlapping stack of two or three per serving. Spoon a small dollop of crème fraîche or soured cream beside the stack, then scatter over the snipped chives. The contrast of the pale, creamy garnish against the dark, craggy potato is what makes this dish look like it came from a smart brunch spot.
Notes
That first forkful, with its jagged crunch and soft, steamy centre, never gets old in my kitchen. Whether you are plating these up for a quiet Sunday or staging a brunch spread that will have your guests reaching for their phones, the effort you put into the details — the squeeze, the sizzle, the salt — pays off in every single bite. I would love to hear how your hash browns turned out, so drop a comment below and let me know what you served them with. If you are looking for another show-stopping breakfast idea, my Hearty Breakfast Burrito Recipe is a brilliant next step on your cooking journey.