No-Bake Energy Bites for Hiking Snacks
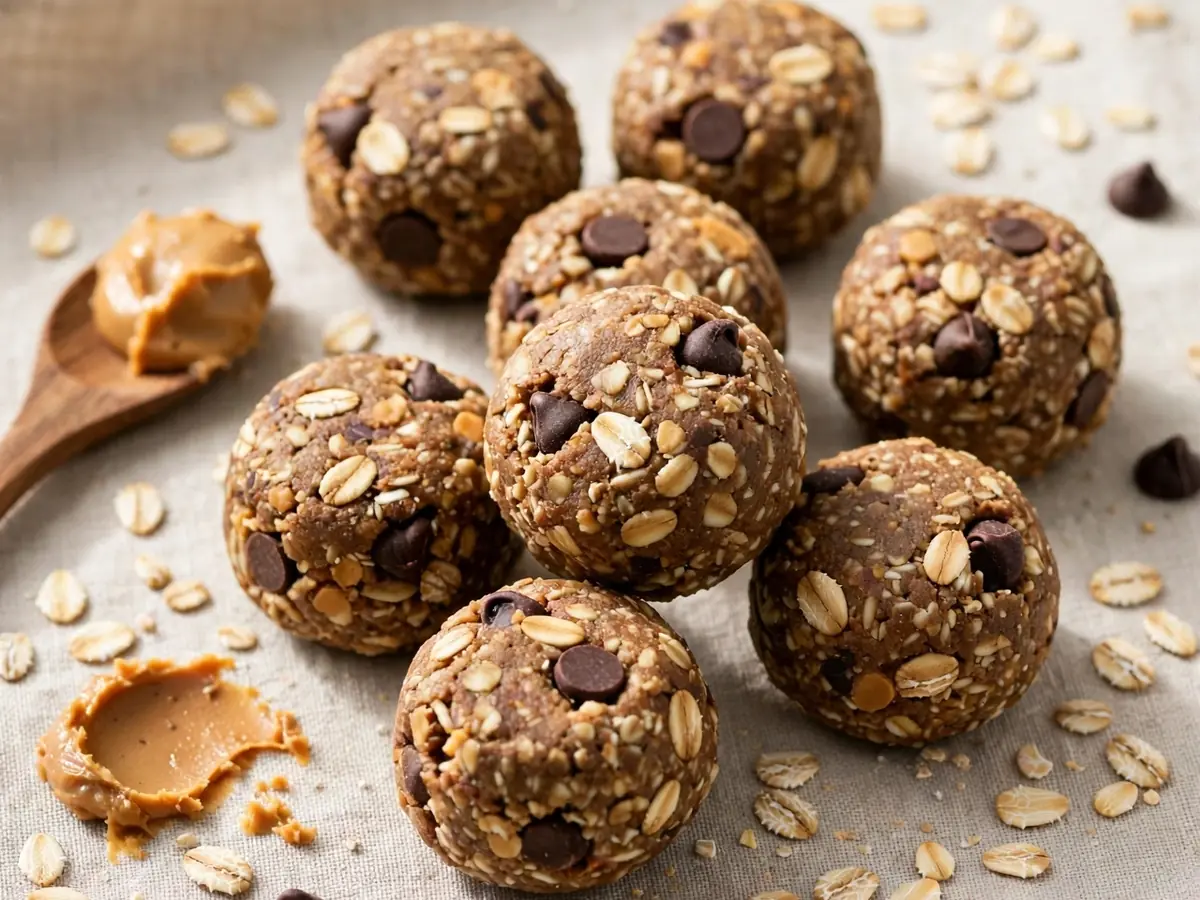
Trail food has a reputation problem. It’s either expensive foil packets, sticky supermarket granola bars that crumble into dust in your hip pocket, or a sad handful of nuts eaten while you stare longingly at someone else’s sandwich. No-bake energy bites solve that problem neatly: they’re compact, calorie-dense, made in one bowl, and they don’t require you to heat up a kitchen in the middle of summer. Better still, you control exactly what goes into them, so you can tune texture, sweetness, and durability to the kind of hiking you actually do.
This guide covers what makes a no-bake bite work as trail fuel, the equipment you need, three complete recipes with precise quantities, and the practical details that matter most on the trail — substitutions, storage, packing, and how to keep a batch from turning into a sticky brick. If you enjoy practical, make-ahead snack projects, the kirarecipes blog has more ideas along the same lines.
Why No-Bake Energy Bites Suit Hiking
Hiking nutrition comes down to a few unglamorous requirements: portability, shelf stability for a day or two, enough calories per ounce to justify the weight, and a texture that doesn’t require a table, a plate, or clean hands. No-bake bites hit all four. Because they’re bound with sticky ingredients rather than baked, they stay soft rather than shattering, which matters when you’re eating one-handed on a steep section.
They’re also forgiving. A baked granola bar has a narrow window between underdone and rock-hard. A no-bake bite is essentially a ratio: something sticky, something dry, something with fat, and something with crunch. Once you understand that ratio, you can improvise with whatever is in the pantry.
One honest caveat: no-bake bites are not freeze-dried backpacking food. They contain moisture and fats, so they’re best for day hikes, overnighters, and the first two to three days of a longer trip in cool weather. For multi-week expeditions, they’re a treat rather than a staple.
Equipment You Actually Need
Nothing specialized is required, but a few small tools make the process faster and cleaner:
- A large mixing bowl (3 to 4 quarts) — you’ll be stirring stiff mixtures.
- A sturdy wooden spoon or a stiff silicone spatula.
- A food processor for the recipes that call for pulsing oats or nuts (optional but useful).
- A digital kitchen scale — the single best investment for consistent bites.
- A small cookie scoop (about 1 tablespoon capacity) or two spoons for portioning.
- Parchment paper or a rimmed baking sheet for chilling.
- Wax paper or small food-safe wrappers for packing.
- An airtight container for storage.
A note on measuring: volume measures for sticky ingredients like honey and nut butter are unreliable. Weighing them takes ten extra seconds and prevents the two most common failures — crumbly bites and gluey bites.
The Core Ratio Behind Every No-Bake Bite
Before the recipes, here’s the framework. A reliable no-bake bite is roughly:
- 40% dry base — rolled oats, crushed crackers, puffed rice, or crushed cereal.
- 25% sticky binder — honey, maple syrup, date paste, or brown rice syrup.
- 25% fat and body — nut butter, seed butter, tahini, or coconut butter.
- 10% extras — chocolate chips, dried fruit, seeds, spices, salt.
If a mixture won’t hold together when squeezed, add binder one teaspoon at a time. If it’s too wet and sticky to roll, add dry base one tablespoon at a time. Let the mixture rest five minutes before judging it — oats absorb moisture slowly, and many batches that seem too wet at first are perfect after a short rest.
Recipe 1: Classic Oat and Peanut Butter Bites
Makes: 18 bites (about 25 g each) · Active time: 15 minutes · Chill time: 30 minutes
The workhorse recipe. Familiar, kid-friendly, and sturdy enough for a day pack.
Ingredients
- 150 g (1½ cups) rolled oats
- 80 g (¼ cup) creamy peanut butter
- 85 g (¼ cup) honey
- 30 g (2 tbsp) ground flaxseed
- 25 g (2 tbsp) mini chocolate chips
- ¼ tsp fine salt
- ½ tsp vanilla extract
Instructions
- Combine the oats, ground flaxseed, and salt in a large bowl and stir to distribute the salt evenly.
- Add the peanut butter, honey, and vanilla. Stir firmly with a wooden spoon until no dry oats remain at the bottom of the bowl, about 2 minutes.
- Fold in the chocolate chips. Let the mixture rest 5 minutes so the oats hydrate.
- Squeeze a small amount in your palm. If it holds its shape without cracking, proceed. If it crumbles, stir in 1 tsp honey; if it’s too sticky, add 1 tbsp oats.
- Scoop level tablespoons of the mixture and roll into balls between your palms, about 2.5 cm (1 inch) across.
- Place on a parchment-lined sheet and chill uncovered for 30 minutes to firm up.
- Transfer to an airtight container and refrigerate.
Recipe 2: Chocolate-Date Trekking Bites
Makes: 16 bites (about 28 g each) · Active time: 20 minutes · Chill time: 20 minutes
Dense, brownie-adjacent, and naturally sweetened mostly by dates. These hold up well in warm weather because there’s no chocolate coating to melt.
Ingredients
- 200 g (about 12) pitted Medjool dates
- 60 g (½ cup) rolled oats
- 40 g (¼ cup) almonds
- 30 g (3 tbsp) cocoa powder
- 32 g (2 tbsp) almond butter
- ¼ tsp fine salt
- 2 tbsp water, only if needed
Instructions
- Pulse the almonds in a food processor until they resemble coarse crumbs, with no large pieces remaining.
- Add the oats and pulse 4 to 5 times, just until broken up. Do not turn them into flour — texture matters.
- Add the dates, cocoa powder, almond butter, and salt. Process for 60 to 90 seconds, scraping down the sides once, until the mixture forms a rough, cohesive mass.
- Test by pinching a small piece. If it crumbles, add water 1 tsp at a time and pulse briefly. If it’s greasy or overly sticky, pulse in 1 tbsp oats.
- Turn out onto parchment paper. Roll into 16 balls, about 2.5 cm across.
- Chill 20 minutes to set, then store airtight in the refrigerator.
Recipe 3: Seedy Lemon-Coconut Bites (Nut-Free)
Makes: 20 bites (about 22 g each) · Active time: 15 minutes · Chill time: 40 minutes
A nut-free option for shared trail groups and anyone packing for a school or workplace setting where nut allergies are a consideration.
Ingredients
- 120 g (1¼ cups) rolled oats
- 60 g (¾ cup) unsweetened shredded coconut, plus 20 g (¼ cup) for rolling
- 60 g (¼ cup) sunflower seed butter
- 85 g (¼ cup) brown rice syrup or honey
- 40 g (¼ cup) sunflower seeds
- 30 g (3 tbsp) pumpkin seeds
- Zest of 1 lemon
- 1 tbsp lemon juice
- ¼ tsp fine salt
Instructions
- In a dry skillet over medium heat, toast the sunflower seeds and pumpkin seeds for 3 to 4 minutes, stirring often, until fragrant. Transfer to a plate to cool completely.
- In a large bowl, combine the oats, 60 g shredded coconut, salt, and lemon zest.
- Stir in the sunflower seed butter, brown rice syrup, and lemon juice until the mixture is evenly moistened.
- Fold in the cooled toasted seeds.
- Rest 5 minutes, then test the consistency as described above, adjusting with oats or syrup.
- Roll into 20 balls, then roll each in the reserved shredded coconut.
- Chill 40 minutes before packing, as these are softer than the other two recipes.
Practical Substitutions
Nut butter swaps: Sunflower seed butter and tahini both work one-for-one, though tahini is looser, so reduce it by 1 tbsp and add 1 tbsp oats. Crunchy nut butter makes a chunkier bite; creamy binds more reliably.
Sweetener swaps: Honey and brown rice syrup are the most reliable binders. Maple syrup is thinner — use 10% less and add extra oats. Date paste works but requires a food processor and produces a denser bite.
Oat swaps: Quick oats absorb faster and make a softer bite; rolled oats give more chew. Avoid instant oatmeal packets, which contain added sugar and salt. For gluten-free needs, use certified gluten-free oats.
Extras: Swap chocolate chips for cacao nibs, dried cranberries for raisins, or add 1 tbsp chia seeds in place of 1 tbsp oats. Keep total extras at roughly 10% of the mixture or binding suffers.
Salt: Don’t skip it. A pinch of salt is what separates a bland trail snack from one you actually look forward to. If your nut butter is salted, reduce the added salt to a small pinch.
Storage and Packing Guidance
No-bake bites keep well because they contain little free water, but they are not indefinitely shelf-stable.
- Refrigerator: Up to 2 weeks in an airtight container.
- Freezer: Up to 3 months. Freeze on a sheet first, then transfer to a bag. They thaw in about 30 minutes at room temperature.
- Room temperature: 2 to 3 days in a cool, dry place. Above roughly 24°C (75°F), nut-butter-based bites soften and chocolate chips bloom.
- On the trail: Wrap individually in wax paper or place in a small rigid container to prevent crushing. Keep them near the top of the pack, not against a water bladder.
For warm-weather hikes, favor Recipe 2 and Recipe 3, which contain no chocolate chips and hold shape better. In cold weather, the opposite is true: high-fat bites become hard, so let them warm in a pocket for a few minutes before eating.
Tips for Better Bites
- Weigh sticky ingredients. It’s the difference between a batch that rolls cleanly and one that sticks to your hands.
- Wet your hands lightly before rolling to prevent sticking, but not so much that the surface gets slippery.
- Chill before packing. Bites firm up as they cool, so packing them warm leads to a flattened lump in your bag.
- Keep batches small. A single recipe makes 16 to 20 bites — enough for two or three day hikes. Doubling is fine, but mix in two batches for even distribution.
- Label the container with the date and whether it contains nuts, especially if you’re sharing with a group.
- Pair with a protein source. Energy bites are carbohydrate- and fat-forward; on long hikes, combine them with jerky, cheese, or a sandwich for a more balanced intake.
If you enjoy make-ahead snacks and hearty portable food, our meatloaf with Stove Top stuffing recipe is a good example of the same prep-ahead philosophy applied to a main dish — and it slices well for a cold lunch the next day.
Frequently Asked Questions
How long do no-bake energy bites last on a hiking trip?
For a typical day hike, they’re fine from morning to evening in a pack. For overnight trips, plan on two to three days at cool ambient temperatures in an airtight container. In hot weather, treat them as a day-one food or keep them insulated. If you need longer shelf life, freeze them beforehand and let them thaw slowly in your pack — they’ll stay cold for several hours and be ready to eat by lunch.
Why did my energy bites fall apart?
Almost always too little binder or too much dry base. Oats vary in absorbency, and a humid kitchen can change things too. Fix a crumbly batch by returning it to the bowl and stirring in honey or nut butter one teaspoon at a time, then resting five minutes and testing again. If the mixture is already rolled, you can press the balls back together with slightly damp hands and a firmer squeeze.
Can I make these without a food processor?
Yes. Recipes 1 and 3 need no processor at all — just a bowl and a sturdy spoon. Recipe 2 relies on a processor to break down dates and almonds, but you can substitute 200 g of ready-made date paste and 40 g of pre-chopped almonds, then mix by hand. The texture will be slightly coarser but entirely workable.
Are energy bites a good meal replacement on the trail?
No. They’re a snack, and a calorie-dense one at that — roughly 90 to 120 calories per bite depending on the recipe. They’re excellent for quick energy on a climb or a mid-morning top-up, but they lack the protein and volume to replace a proper trail meal. Use them alongside a sandwich, cheese, or jerky rather than instead of them.
Can I use quick oats instead of rolled oats?
Yes, and the result is a softer, less chewy bite. Quick oats absorb liquid faster, so start with the same weight and add binder only if the mixture still crumbles after a five-minute rest. Avoid flavored instant oatmeal, which adds sugar and sodium that will throw off the balance of the recipe.
How do I stop the bites from sticking together in the bag?
Roll them firmly, chill them thoroughly before packing, and wrap individually in wax paper or nestle them in a small rigid container. A light dusting of shredded coconut or cocoa powder on the surface also reduces tackiness. Avoid stacking warm bites directly on top of each other, which is the most common cause of a merged lump.
Are these suitable for children on family hikes?
Generally yes, with two considerations. First, honey should not be given to children under 12 months, so use brown rice syrup or date paste in Recipe 1 for that age group. Second, whole nuts and large seed pieces are a choking risk for young children — chop nuts finely or choose Recipe 1 with mini chocolate chips omitted. For a fun, shareable treat at home after the hike, you might also enjoy our cream filled donuts treat as a weekend project.