Homemade Graham Cracker Crust Cheesecake Bites
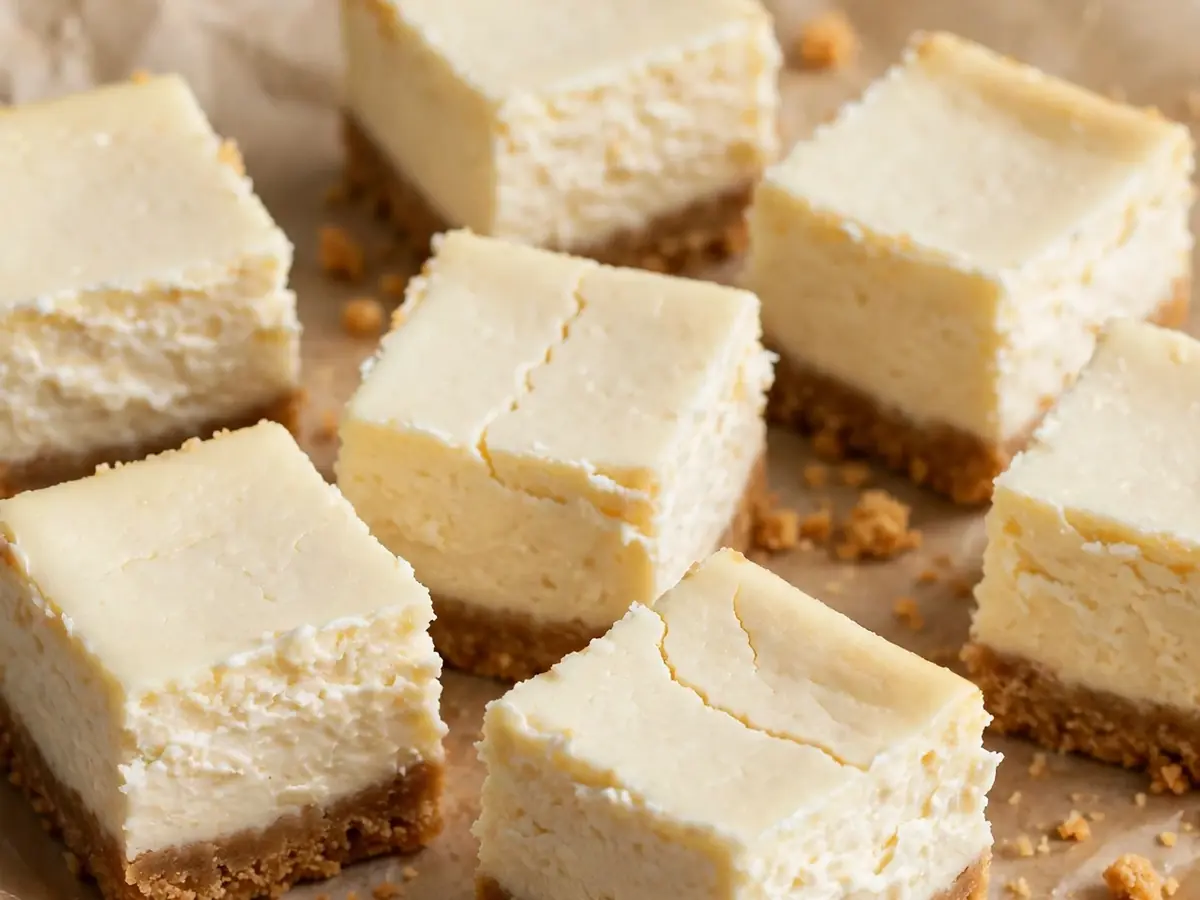
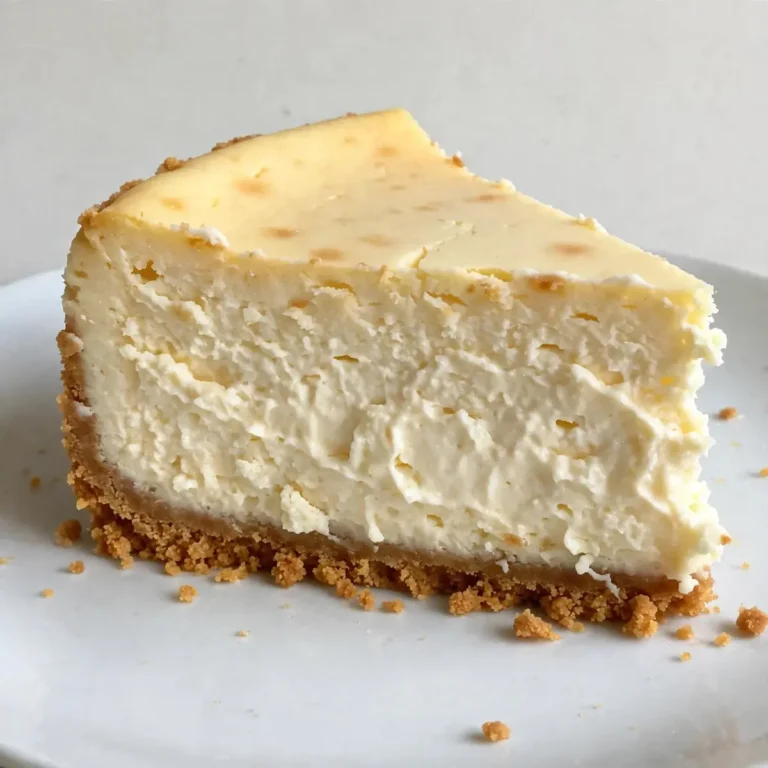
Cheesecake has a way of showing up at every celebration, but a whole slice can feel like a commitment — and a whole cake feels like a project. Homemade graham cracker crust cheesecake bites solve both problems. They give you the tangy, creamy richness of classic cheesecake and the buttery crunch of a graham cracker crust in a neat, two-bite package. Because they bake in a muffin pan, there’s no water bath, no springform pan, and no cracking anxiety. Each bite has its own built-in crust, so every serving is perfectly portioned.
This recipe is designed for real kitchens: a simple press-in crust, a smooth five-ingredient filling, and a bake time short enough to fit into a busy afternoon. You can serve them plain, top them with fruit, or drizzle them with chocolate. They also freeze beautifully, which makes them a practical make-ahead dessert for parties, potlucks, and holiday trays. Below you’ll find exact quantities, equipment notes, step-by-step instructions, and the substitutions and storage guidance you need to make them successfully the first time.
Why Cheesecake Bites Work So Well
Traditional cheesecake depends on a large volume of batter baking slowly in a water bath to stay creamy and crack-free. Mini cheesecakes sidestep most of that fuss. A muffin pan provides structure, the smaller mass of batter heats evenly, and the individual crusts are pressed directly into the cups. The result is a dense, velvety bite with a crisp base that holds together when you pick it up.
There are a few practical advantages worth knowing before you start:
- Portion control is automatic. One pan yields a dozen uniform servings, so you don’t have to slice or guess.
- No water bath required. The small size means the filling sets without the slow, humid environment a full cheesecake needs.
- Fast chilling. Bites cool and firm in a fraction of the time a whole cake requires.
- Freezer-friendly. They hold up well for weeks when stored properly, making them a reliable backup dessert.
If you enjoy baking projects that deliver a lot of payoff for modest effort, these bites fit that description well. For more everyday baking ideas, the Kira Recipes blog is a good place to browse between bakes.
Ingredients
This recipe makes 12 cheesecake bites in a standard 12-cup muffin pan. Read through the quantities before you shop, because the crust and filling use overlapping ingredients.
For the Graham Cracker Crust
- 1 1/2 cups (about 150 g) finely crushed graham crackers — roughly 11 to 12 full sheets
- 3 tablespoons (37 g) granulated sugar
- 1/4 teaspoon fine salt
- 6 tablespoons (85 g) unsalted butter, melted
For the Cheesecake Filling
- 16 ounces (454 g) full-fat cream cheese, softened at room temperature
- 1/2 cup (100 g) granulated sugar
- 2 large eggs, at room temperature
- 1/4 cup (60 g) sour cream, at room temperature
- 1 teaspoon vanilla extract
- 1 tablespoon freshly squeezed lemon juice (optional, for brightness)
Optional Toppings
- Whipped cream
- Fresh berries or a spoonful of berry jam
- Melted chocolate for drizzling
- Crushed graham cracker crumbs for garnish
Equipment
- Standard 12-cup muffin pan (metal works best for even baking)
- Paper muffin liners (optional but helpful for release)
- Food processor or a heavy zip-top bag and rolling pin for crushing crackers
- Stand mixer or hand mixer with a large bowl
- Rubber spatula
- Measuring cups and spoons, or a kitchen scale
- Small bowl for melting butter
- Wire cooling rack
A note on liners: paper liners make removal effortless, but the crust can stick slightly to the paper. If you skip liners, grease the cups lightly and run a thin knife around each bite before lifting it out. Metal pans produce a crisper crust than silicone pans, which tend to bake more gently.
Step-by-Step Instructions
- Preheat the oven to 325°F (165°C). Position a rack in the center of the oven. If using paper liners, line all 12 cups of the muffin pan.
- Make the crust. Crush the graham crackers until they resemble coarse sand with no large chunks remaining. In a medium bowl, combine the crumbs, 3 tablespoons sugar, and 1/4 teaspoon salt. Pour in the melted butter and stir until every crumb is evenly moistened. The mixture should hold together when squeezed in your fist.
- Press the crust into the pan. Divide the crumb mixture evenly among the 12 cups, about 1 1/2 tablespoons per cup. Use the flat bottom of a small measuring cup or a spoon to press the crumbs firmly and evenly across the bottom and about 1/2 inch up the sides. Pressing firmly is the key to a crust that doesn’t crumble when bitten.
- Pre-bake the crusts for 6 to 7 minutes, until fragrant and just set. Remove the pan from the oven and set it aside. Leave the oven on.
- Beat the cream cheese and sugar. In a large bowl, beat the softened cream cheese on medium-low speed until completely smooth, about 1 to 2 minutes. Scrape down the bowl. Add 1/2 cup sugar and beat until combined, another minute. Avoid whipping at high speed, which incorporates air and can cause the bites to puff and crack.
- Add the eggs one at a time, beating on low speed just until each is incorporated. Scrape the bowl between additions. Add the sour cream, vanilla, and lemon juice (if using) and mix on low until the batter is uniform and silky.
- Fill the cups. Spoon the batter over the pre-baked crusts, filling each cup about three-quarters full. Tap the pan gently on the counter once or twice to release large air bubbles.
- Bake for 18 to 22 minutes. The bites are done when the edges look set and slightly puffed, and the centers still have a faint wobble when you nudge the pan. They will continue to firm up as they cool. Avoid baking until the centers are completely rigid, which leads to dry, crumbly bites.
- Cool gradually. Transfer the pan to a wire rack and let the bites cool in the pan for 20 minutes. Then refrigerate the pan, uncovered, for at least 2 hours, or up to overnight, until fully chilled and firm.
- Release and serve. Run a thin knife around the edge of any bite without a liner, then lift each one out. Top as desired just before serving.
Tips for the Best Results
Bring everything to room temperature. Cold cream cheese lumps and never fully smooths out, and cold eggs can cause the batter to curdle. Set the cream cheese, eggs, and sour cream on the counter for 45 to 60 minutes before mixing.
Don’t overmix after adding the eggs. Once the eggs go in, mix on low and stop as soon as the batter is uniform. Excess mixing incorporates air, and air is what makes mini cheesecakes rise and then fall, leaving cracks and a less creamy texture.
Press the crust with conviction. Loose crumbs produce a base that falls apart. Use a flat-bottomed glass or measuring cup and press until the crust feels compact and level.
Pre-bake the crust. Those six or seven minutes set the butter and firm the base so it doesn’t turn soggy under the filling. It also deepens the toasted graham flavor.
Judge doneness by the wobble. A slight jiggle in the center is correct. The residual heat finishes the job during cooling, and the refrigerator sets the texture.
Chill long enough. Two hours is the minimum; overnight is better. Properly chilled bites slice cleanly and hold their shape when picked up.
Keep toppings until serving time. Whipped cream, fresh fruit, and warm drizzles should go on right before the bites are eaten, especially if they’ll sit out for a while.
Substitutions and Variations
Crust Substitutions
- Other cookies: Digestive biscuits, vanilla wafers, or shortbread cookies can replace graham crackers cup for cup by weight. Adjust the added sugar: if the cookies are already sweet, reduce the 3 tablespoons to 1 tablespoon.
- Gluten-free: Use gluten-free graham crackers or gluten-free shortbread in the same quantity.
- Butter alternative: Melted coconut oil works in the same amount, though the crust will be slightly more delicate and should be chilled thoroughly before releasing.
- Spiced crust: Add 1/2 teaspoon ground cinnamon and a pinch of nutmeg to the crumb mixture for a warmer flavor.
Filling Variations
- Lemon cheesecake bites: Increase the lemon juice to 2 tablespoons and add 1 teaspoon finely grated lemon zest.
- Chocolate swirl: Melt 2 ounces (56 g) semisweet chocolate, let it cool slightly, and swirl 1/2 teaspoon into each filled cup with a skewer before baking.
- Berry fold-in: Gently fold 1/3 cup thick berry jam into the finished batter in two or three strokes for a marbled effect.
- Sour cream swap: Plain full-fat Greek yogurt can replace the sour cream in the same quantity, though the flavor will be slightly tangier.
Pan and Size Notes
This batter also works in a 24-cup mini muffin pan. Reduce the crust to about 2 teaspoons per cup and the bake time to 12 to 15 minutes, checking early. For a standard 9-inch springform cheesecake, triple the recipe and bake at 325°F for 55 to 65 minutes in a water bath.
Storage and Make-Ahead Guidance
Refrigerator: Store cooled, un-topped bites in an airtight container in the refrigerator for up to 4 days. Place a sheet of parchment or wax paper between layers if you need to stack them. Keep toppings separate until serving.
Freezer: Freeze fully cooled, un-topped bites on a parchment-lined tray until solid, about 1 hour, then transfer them to a freezer-safe container or zip-top bag. They keep for up to 2 months. Thaw overnight in the refrigerator, or set individual bites on the counter for 20 to 30 minutes before serving.
Make-ahead plan: These bites are ideal for preparing a day or two in advance. Bake, cool, and chill them, then keep them covered in the refrigerator until you’re ready to top and serve. If you’re assembling a dessert tray, add the whipped cream and fruit at the last minute so everything looks fresh.
Transport: For potlucks, keep the bites in the muffin pan, cover with plastic wrap, and carry the pan itself. The cups protect the crusts and prevent the bites from sliding around.
Looking for another crowd-pleasing treat to round out a dessert table? These cream filled donuts make a fun companion to a batch of cheesecake bites. And if you like practical, family-friendly recipes that use everyday ingredients, this meatloaf with stuffing is a solid weeknight option worth saving for later.
Troubleshooting Common Issues
- The crust crumbles when picked up: It wasn’t pressed firmly enough, or there wasn’t enough butter. Press harder next time and make sure the crumb mixture holds together when squeezed before pressing.
- The filling cracked: The batter was overmixed or overbaked. Mix on low after adding eggs and pull the pan when the centers still wobble slightly.
- The bites sank in the middle: Too much air in the batter, or the bites cooled too quickly in a draft. Cool them gradually on the counter before refrigerating.
- The crust is soggy: The crust wasn’t pre-baked, or the bites were stored before fully cooling. Pre-bake the crusts and cool completely before covering.
- The bites stick to the liners: Let them chill fully before peeling the paper away, and peel slowly from the base rather than pulling upward.
Frequently Asked Questions
Can I make these cheesecake bites without a muffin pan?
Yes. You can bake the filling in a parchment-lined 8-inch square pan using the same crust and filling quantities, then cut it into 12 squares after chilling. Bake at 325°F for 30 to 35 minutes, until the edges are set and the center still wobbles slightly. Mini muffin pans also work; reduce the crust to about 2 teaspoons per cup and start checking for doneness at 12 minutes.
How do I know when the cheesecake bites are fully baked?
Look for set, slightly puffed edges and a center that jiggles gently when you nudge the pan. The surface should look matte rather than wet or glossy. If the centers are completely firm, the bites are overbaked and will be drier and more crumbly once chilled. Residual heat finishes setting them as they cool.
Can I use low-fat or whipped cream cheese?
Full-fat block cream cheese gives the creamiest texture and the most reliable set. Low-fat cream cheese can work but often produces a slightly grainy or softer result. Whipped cream cheese is not recommended because it contains extra air and stabilizers that change the batter’s structure and baking behavior.
How far in advance can I make cheesecake bites for a party?
You can bake and chill them up to 4 days ahead and store them covered in the refrigerator. For longer storage, freeze them un-topped for up to 2 months and thaw overnight in the refrigerator. Add whipped cream, fruit, or chocolate drizzle right before serving so the toppings stay fresh and the crust stays crisp.
Why did my cheesecake bites crack on top?
Cracking usually comes from overmixing the batter after the eggs are added, which whips in air, or from overbaking. Mix on low speed just until each ingredient is incorporated, avoid whipping, and pull the pan while the centers still have a slight wobble. Cooling them gradually in the pan rather than moving them straight to the refrigerator also helps prevent cracks.
Can I double this recipe?
Yes. The recipe doubles cleanly, but bake one pan at a time on the center rack rather than placing two pans side by side, which can cause uneven baking. Let the first pan cool while the second bakes, and keep the batter refrigerated between batches. You can also bake in two batches using the same pan after it has cooled and been re-lined.