Make-Ahead Freezer Breakfast Sandwiches for School Mornings
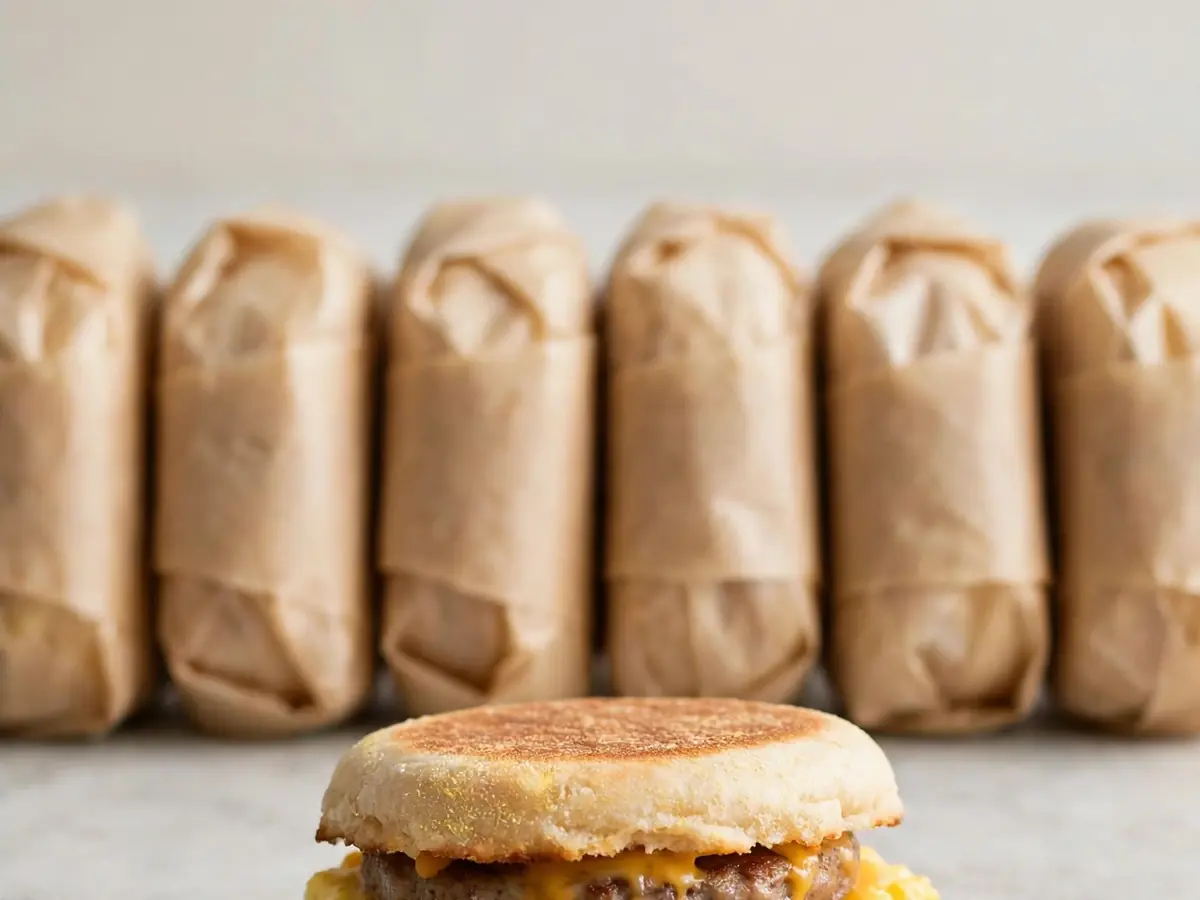
School mornings have a way of compressing time. Between locating the missing shoe, signing the permission slip, and getting everyone out the door, breakfast is often the first thing to be sacrificed. That is exactly where make-ahead freezer breakfast sandwiches earn their place in the kitchen. You spend one focused session assembling a batch, freeze them individually, and then each morning pull out as many as you need and reheat them in minutes. The result is a hot, protein-packed breakfast that tastes far better than anything from a drive-through, costs a fraction of the price, and requires almost no decision-making at 7 a.m.
This guide covers a complete, tested method for building a freezer breakfast sandwich that holds up to freezing and reheating without turning soggy or rubbery. You will find precise quantities, the equipment that actually matters, a full walkthrough with numbered steps, a set of practical substitutions, and storage guidance that keeps quality high for weeks. The base recipe makes 12 sandwiches, which is a comfortable amount for a family to work through in two to three weeks.
Why Freezer Breakfast Sandwiches Work
The key to a freezer sandwich that reheats well is moisture control. Bread that is too fresh and soft absorbs steam and turns gummy; eggs that are too wet release water into the bun; and cheese that is sliced too thin disappears into the bread. The method below addresses each of these issues directly by toasting the English muffins lightly, cooking the eggs in a sheet pan so they are uniform and slightly firm, and layering cheese against the hot egg so it acts as a moisture barrier. The sandwiches are then wrapped tightly and frozen flat, which helps them reheat evenly.
There is also a practical argument. A batch of 12 sandwiches takes roughly 45 minutes of active work, and the per-sandwich cost is typically a third or less of a comparable coffee-shop breakfast sandwich. If you have ever bought a round of breakfast sandwiches for a car full of hungry kids, the math makes itself.
Equipment You Will Need
None of this is specialty gear, but having it ready before you start makes the process smooth.
- A rimmed sheet pan, roughly 13 by 18 inches (a half sheet pan), plus parchment paper
- A second sheet pan or a large plate for holding toasted muffins
- A large skillet or griddle for the sausage or bacon
- A silicone spatula and a sharp knife or bench scraper for cutting the egg sheet
- A 3-inch round biscuit cutter or a drinking glass with a 3-inch rim (optional, for trimming eggs)
- Plastic wrap or parchment squares for wrapping
- A gallon-size freezer bag or a rigid freezer container
- A cooling rack
Ingredients for 12 Sandwiches
This base version uses sausage, egg, and cheddar, which is the most freezer-friendly combination. Quantities are precise; do not reduce the eggs, as the sheet pan size depends on them.
- 12 English muffins, split
- 12 large eggs
- 1/2 cup whole milk
- 1/2 teaspoon fine salt
- 1/4 teaspoon black pepper
- 1 tablespoon unsalted butter, softened, for greasing the pan
- 12 fully cooked breakfast sausage patties, about 1 1/2 ounces each (or 12 slices of cooked bacon, about 2 slices per sandwich)
- 12 slices sharp cheddar cheese, about 3/4 ounce each
Optional add-ins that freeze well: a pinch of garlic powder or smoked paprika in the egg mixture, finely diced bell pepper (about 1/3 cup, patted dry), or a thin spread of softened butter on the muffin before toasting.
Step-by-Step Preparation
- Preheat and prep. Heat the oven to 350°F (175°C). Line the rimmed sheet pan with parchment paper and grease the parchment lightly with the softened butter, paying attention to the corners.
- Mix the eggs. In a large bowl, whisk the 12 eggs with the milk, salt, and pepper until completely uniform, with no streaks of white remaining. If using optional seasonings, whisk them in now.
- Bake the egg sheet. Pour the egg mixture into the prepared pan and tilt gently to spread it evenly to the edges. Bake for 14 to 16 minutes, until the center is set and no longer jiggles when the pan is nudged. Do not overbake; a slightly soft center will firm up as it cools.
- Cool and cut. Let the egg sheet cool in the pan for 10 minutes, then slide it onto a cutting board. Cut into 12 equal rectangles, roughly 3 by 4 inches each. If you prefer round eggs, use the 3-inch cutter to stamp out rounds, saving the trimmings for snacking or scrambling.
- Toast the muffins. While the eggs cool, arrange the split English muffins cut-side up on a second sheet pan and toast under the broiler for 2 to 3 minutes, watching closely, until lightly golden. Alternatively, toast them in a toaster in batches. Toasting is not optional — it is the single biggest defense against soggy sandwiches.
- Cook the sausage. If your patties are not pre-cooked, cook them in a skillet over medium heat for 3 to 4 minutes per side until browned and cooked through (160°F internal). Drain on paper towels. If using bacon, cook until crisp and drain well.
- Build the sandwiches. Place one egg portion on the bottom half of each muffin. Top with one sausage patty, then one slice of cheese. Cap with the top half of the muffin and press down gently.
- Chill before wrapping. Arrange the assembled sandwiches on a tray and refrigerate uncovered for 20 to 30 minutes. This step prevents condensation inside the wrapper, which is a common cause of freezer burn and soggy bread.
- Wrap individually. Wrap each sandwich tightly in plastic wrap, or use a parchment square plus a layer of wrap. Press out as much air as possible.
- Freeze flat. Place the wrapped sandwiches in a single layer in a gallon freezer bag or rigid container and freeze flat for at least 2 hours. Once solid, they can be stacked to save space. Label the bag with the date.
Reheating Instructions
From frozen, unwrap the sandwich completely and discard the plastic wrap. Do not microwave the plastic wrap.
- Microwave (fastest): Place on a microwave-safe plate and heat on 50 percent power for 90 seconds, then on full power for 30 to 45 seconds, until hot throughout. Let stand 1 minute before eating. Lower power for the first stage prevents the egg from becoming rubbery.
- Oven (best texture): Heat the oven to 350°F (175°C). Wrap the unwrapped sandwich loosely in foil and bake for 20 to 25 minutes, until heated through. This method keeps the muffin edges crisp.
- Air fryer (crisp and quick): Heat at 340°F (170°C) for 8 to 10 minutes, flipping halfway, until hot in the center.
Whichever method you use, check the center is hot before serving, especially for sandwiches headed to a child.
Practical Substitutions
The formula is flexible. Keep the egg-to-milk ratio and the toasting step intact, and swap the rest as you like.
- Bread: English muffins are ideal, but bagels (halved and toasted), croissants (toast cut-side down briefly), or sturdy sandwich rolls work. Avoid very soft white bread, which collapses when frozen.
- Meat: Use cooked bacon, ham slices, turkey sausage, or a plant-based patty. Cook and drain all meat well before assembling.
- Cheese: Cheddar, Monterey Jack, provolone, and Swiss all freeze well. Avoid very crumbly cheeses like feta, which do not melt smoothly. Slices should be at least 3/4 ounce to form a proper barrier.
- Dairy-free: Replace the milk with an unsweetened plain plant milk and use a dairy-free cheese slice. The egg bakes slightly firmer but works fine.
- Add-ins: Spinach, diced peppers, and caramelized onions can go into the egg mixture, but pat them very dry first. Wet vegetables are the most common cause of a soggy sandwich.
- Lower sodium: Skip the added salt in the eggs and use a reduced-sodium cheese and sausage.
Storage and Food Safety
Properly wrapped and frozen at 0°F (-18°C) or below, these sandwiches keep their best quality for up to 2 months. Beyond that they are still safe but the bread may begin to dry out and pick up freezer odors. Store them in the coldest part of the freezer, not in the door, where temperature fluctuates.
For food safety, cool cooked components before assembling, refrigerate assembled sandwiches promptly, and never refreeze a sandwich that has already been reheated. Reheat only what you plan to eat. If a sandwich has been thawed in the refrigerator, it can be kept there for up to 24 hours before reheating. Discard any sandwich that has been left at room temperature for more than 2 hours.
Tips for Better Results
- Toast the muffins a shade darker than you think you need. The toasting creates a barrier that survives freezing and reheating.
- Let the egg sheet cool completely before cutting; warm eggs tear and release water.
- Pat all cooked meat dry with paper towels. Surface moisture is the enemy of a crisp reheat.
- Wrap tightly and press out air. Air is what causes freezer burn, which shows up as dry, pale patches on the bread.
- Keep a marker near the freezer bag and label with the date and contents. A two-month window is easy to lose track of.
- If you are making a double batch, work in two rounds rather than crowding one pan. Overcrowding traps steam.
- For kids, cut the reheated sandwich in half before serving so the center cools quickly to an edible temperature.
If you enjoy planning ahead for busy weeks, the same batch-cooking mindset applies to other meals. Our recipe blog has more make-ahead ideas, and if you are looking for a weekend project that the whole family will appreciate, a batch of cream filled donuts makes a fun treat to balance out the weekday routine.
Frequently Asked Questions
Can I assemble the sandwiches the night before and freeze them in the morning?
Yes, but keep them refrigerated overnight in a covered container, then wrap and freeze them in the morning. Do not leave assembled sandwiches at room temperature overnight. The chill step before wrapping is important, so refrigerating overnight actually serves the same purpose.
Why do my reheated egg sandwiches turn out soggy?
Sogginess almost always comes from one of three causes: the muffins were not toasted, the eggs were undercooked and released water, or the sandwiches were wrapped while still warm, trapping steam. Toast the muffins, bake the eggs until the center is set, and chill the assembled sandwiches for 20 to 30 minutes before wrapping.
How long do freezer breakfast sandwiches keep?
For best quality, eat them within 2 months. They remain safe longer if kept at 0°F (-18°C) or below, but the bread may dry out and absorb freezer odors. Always label the bag with the date you froze them.
Can I reheat these in a microwave without them getting rubbery?
Yes. Heat on 50 percent power for about 90 seconds first, then finish on full power for 30 to 45 seconds. The lower initial power heats the center gently, which keeps the egg tender. Let the sandwich stand for a minute before eating.
Can I make these without meat?
Absolutely. Omit the sausage or bacon and add an extra slice of cheese, or use a plant-based patty. You can also stir finely diced, well-drained vegetables into the egg mixture. The egg and cheese alone make a satisfying sandwich.
Are these safe to pack in a school lunch?
Only if the sandwich will be kept cold until lunch and eaten cold, or if the school provides a way to reheat it. A frozen sandwich placed in an insulated bag with an ice pack will thaw slowly and should be eaten cold rather than reheated unless a microwave is available. For hot breakfasts, reheat at home before leaving.