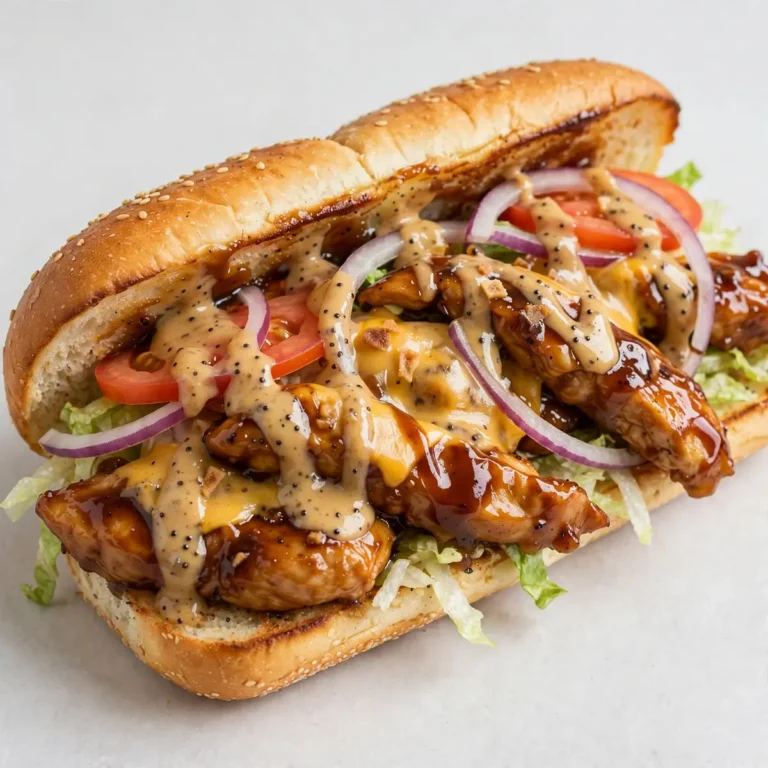
Copycat Chick-fil-A Classic Chicken Sandwich for a Cozy Weekend Project

There are some Saturdays that simply call for something special in the kitchen, a project that fills the house with a comforting, savoury aroma and promises a deeply satisfying reward. After testing this recipe five times, I finally got it just right, and this Copycat Chick-fil-A Classic Chicken Sandwich has become our weekend comfort-food project of choice, a slow-paced ritual that begins with the gentle thud of a mallet and ends with the perfect crunch.
Recipe Overview
- Prep Time: 25 minutes (plus 30 minutes for marinating)
- Cook Time: 12 minutes
- Total Time: 1 hour 7 minutes
- Servings: 4 sandwiches
- Difficulty: Medium
Why You’ll Love This Copycat Chick-fil-A Classic Chicken Sandwich
- Authentic crunch and flavour: The double-dredge method creates that signature craggy, golden crust that stays crisp against the juicy chicken.
- Perfectly seasoned, tender meat: A quick pickle-juice brine ensures the chicken breast is impossibly tender and savoury from the inside out.
- Cosy weekend cooking experience: The process itself is wonderfully therapeutic, from the rhythmic pounding of the chicken to the satisfying sizzle as it hits the hot oil, much like making Cozy Weekend Classic American Apple Pie With All-Butter Crust.
- Family favourite that delivers every time: I make this at least once a week – it’s become a family favourite that everyone looks forward to.
- Customisable to your taste: The base recipe is a blank canvas for heat, sweetness, or extra toppings, making it endlessly adaptable.

Ingredients You’ll Need
- 4 boneless, skinless chicken breasts (about 600g total)
- 240ml dill pickle juice (from a jar of pickles)
- 240ml whole milk
- 1 large egg
- 200g plain flour
- 30g cornflour
- 1 tablespoon icing sugar
- 1½ teaspoons smoked paprika
- 1 teaspoon garlic powder
- 1 teaspoon onion powder
- ½ teaspoon cayenne pepper (optional, for a mild kick)
- 1 teaspoon fine sea salt
- ½ teaspoon freshly ground black pepper
- Peanut or vegetable oil, for frying (about 1 litre)
- 4 soft brioche burger buns, split and toasted
- 4 slices of dill pickle, for serving
- Butter, for toasting the buns
Tip: For the most accurate results, use a kitchen scale for the flour and cornflour. The icing sugar is a secret ingredient that helps the crust brown beautifully without burning.
How to Make Copycat Chick-fil-A Classic Chicken Sandwich
- Prepare the chicken: Place each chicken breast between two sheets of cling film. Using a rolling pin or meat mallet, gently pound to an even thickness of about 1.5cm. You should feel the meat yielding and flattening under the pressure. This ensures even cooking and a tender bite.
- Create the brine: In a large bowl, whisk together the pickle juice, milk, and egg until completely combined. The mixture will look pale and slightly frothy. Submerge the pounded chicken breasts in the brine, cover, and refrigerate for at least 30 minutes, or up to 2 hours. The chicken will absorb the tangy liquid, becoming noticeably more tender.
- Build the seasoned coating: In a shallow dish, combine the plain flour, cornflour, icing sugar, smoked paprika, garlic powder, onion powder, cayenne pepper (if using), salt, and black pepper. Whisk thoroughly until the spices are evenly distributed. The mixture will smell aromatic and slightly sweet from the paprika and sugar.
- Dredge the chicken: Remove one chicken breast from the brine, letting any excess drip off. Place it into the flour mixture, pressing down firmly. Turn it over and press again, ensuring every surface is completely coated. You should see a thick, shaggy layer of coating forming. Shake off any loose excess and place the coated breast on a wire rack. Repeat with the remaining chicken. Let them rest for 5 minutes — this helps the coating adhere.
- Heat the oil: Pour the oil into a large, heavy-bottomed pot or deep skillet, filling to a depth of about 5cm. Heat over medium-high heat until the oil reaches 175°C (350°F) on a deep-fry thermometer. If you don’t have a thermometer, drop a small pinch of flour into the oil; it should sizzle immediately and vigorously.
- Fry the chicken: Gently slide one or two chicken breasts into the hot oil, being careful not to crowd the pan. You should hear a loud, satisfying sizzle as they hit the oil. Fry for 3-4 minutes per side, until the crust is a deep golden brown and the internal temperature of the chicken reaches 74°C (165°F). The crust will feel hard and crisp to the touch. Transfer to a wire rack set over a baking sheet and sprinkle immediately with a tiny pinch of salt.
- Toast the buns and assemble: While the chicken rests for a minute, butter the cut sides of the brioche buns. Place them butter-side down in a separate dry skillet over medium heat for about 1 minute, until they are lightly toasted and smell nutty. Spread a little mayonnaise on the top half of each bun, then place the fried chicken on the bottom half. Top with two pickle slices and close the sandwich. Serve immediately while the chicken is still audibly crunchy.
Tips From My Kitchen
- Don’t skip the pickle juice brine: The acidity in the pickle juice does more than flavour the chicken. It helps break down the proteins, resulting in meat that is exceptionally tender and moist. The longer you brine, the more pronounced the effect, but 30 minutes is the minimum for a noticeable difference.
- Use a wire rack after dredging: Placing the coated chicken on a wire rack for 5 minutes before frying allows the flour mixture to hydrate slightly, creating a craggier, more textured crust that clings to the chicken rather than falling off in the oil.
- Maintain a steady oil temperature: The oil temperature will drop when you add the chicken. Use a thermometer and adjust the heat to keep it consistently between 170°C and 175°C. If the oil is too cool, the crust will absorb oil and become greasy; if too hot, it will burn before the chicken is cooked through.
- Fry in batches: Adding too many pieces of chicken at once lowers the oil temperature dramatically and leads to uneven cooking. Fry only one or two pieces at a time, depending on the size of your pot, and allow the oil to return to temperature between batches.
- Rest the fried chicken on a rack, not paper towels: A wire rack allows air to circulate around the entire piece of chicken, keeping the crust crisp on all sides. Paper towels trap steam, which will soften the crunchy coating you worked so hard to achieve.
Common Mistakes to Avoid
- Overcrowding the pan: When you crowd the pan, the temperature of the oil plummets. This means the chicken steams rather than fries, resulting in a pale, greasy crust instead of a golden, crispy one. Fry in small batches and give the oil time to recover between batches.
- Wrong temperature: Without a thermometer, you’re guessing. An oil temperature that is too low (below 165°C) will cause the coating to absorb oil and become heavy. Too high (above 190°C) and the outside will burn while the inside remains raw. A deep-fry thermometer is a small investment that makes a huge difference.
- Skipping the rest time: The 5-minute rest after dredging is not optional. It allows the flour to bond with the moisture from the brine, creating a sturdier crust that won’t separate from the chicken during frying. Skipping this step often leads to the coating sliding off in the pan.
Delicious Variations to Try
- Spicy Version: Add an extra teaspoon of cayenne pepper to the flour mixture and a dash of hot sauce to the brine. For an even bolder heat, brush the finished chicken with a mixture of melted butter and your favourite hot sauce before assembling.
- Vegetarian/Vegan Option: Substitute the chicken with thick-cut pieces of firm tofu or a large portobello mushroom cap. Press the tofu for 30 minutes to remove excess liquid, then follow the same brining and dredging process. The result is a satisfyingly crunchy, plant-based sandwich.
- Different Protein: This same method works beautifully with turkey breast cutlets or even thick fillets of firm white fish like cod or haddock. Adjust the frying time based on the thickness of the protein — fish will cook more quickly, usually in 2-3 minutes per side.
What to Serve With Copycat Chick-fil-A Classic Chicken Sandwich
- Golden, crispy Air Fryer Sweet Potato Fries for a healthier, smoky-sweet side.
- A simple, crunchy coleslaw with a tangy vinaigrette to cut through the richness of the fried chicken.
- Cool, creamy potato salad or a fresh green salad with a lemon-herb dressing.
Still hungry for ideas? You might also love Copycat Chick Sandwich Recipe Fried, Chick Fil A Coleslaw Copycat Recipe from our sister kitchens.
Frequently Asked Questions
Copycat Chick-fil-A Classic Chicken Sandwich
Ingredients
Method
- Prepare the chicken: Place each chicken breast between two sheets of cling film. Using a rolling pin or meat mallet, gently pound to an even thickness of about 1.5cm. You should feel the meat yielding and flattening under the pressure. This ensures even cooking and a tender bite.
- Create the brine: In a large bowl, whisk together the pickle juice, milk, and egg until completely combined. The mixture will look pale and slightly frothy. Submerge the pounded chicken breasts in the brine, cover, and refrigerate for at least 30 minutes, or up to 2 hours. The chicken will absorb the tangy liquid, becoming noticeably more tender.
- Build the seasoned coating: In a shallow dish, combine the plain flour, cornflour, icing sugar, smoked paprika, garlic powder, onion powder, cayenne pepper (if using), salt, and black pepper. Whisk thoroughly until the spices are evenly distributed. The mixture will smell aromatic and slightly sweet from the paprika and sugar.
- Dredge the chicken: Remove one chicken breast from the brine, letting any excess drip off. Place it into the flour mixture, pressing down firmly. Turn it over and press again, ensuring every surface is completely coated. You should see a thick, shaggy layer of coating forming. Shake off any loose excess and place the coated breast on a wire rack. Repeat with the remaining chicken. Let them rest for 5 minutes — this helps the coating adhere.
- Heat the oil: Pour the oil into a large, heavy-bottomed pot or deep skillet, filling to a depth of about 5cm. Heat over medium-high heat until the oil reaches 175°C (350°F) on a deep-fry thermometer. If you don’t have a thermometer, drop a small pinch of flour into the oil; it should sizzle immediately and vigorously.
- Fry the chicken: Gently slide one or two chicken breasts into the hot oil, being careful not to crowd the pan. You should hear a loud, satisfying sizzle as they hit the oil. Fry for 3-4 minutes per side, until the crust is a deep golden brown and the internal temperature of the chicken reaches 74°C (165°F). The crust will feel hard and crisp to the touch. Transfer to a wire rack set over a baking sheet and sprinkle immediately with a tiny pinch of salt.
- Toast the buns and assemble: While the chicken rests for a minute, butter the cut sides of the brioche buns. Place them butter-side down in a separate dry skillet over medium heat for about 1 minute, until they are lightly toasted and smell nutty. Spread a little mayonnaise on the top half of each bun, then place the fried chicken on the bottom half. Top with two pickle slices and close the sandwich. Serve immediately while the chicken is still audibly crunchy.
Notes
I hope this recipe becomes a cherished part of your weekend rhythm, just as it has in my kitchen. The process of brining, dredging, and frying is a small act of mindfulness that yields something truly special. I’d love to hear how your sandwiches turn out — drop a comment below and let me know if you added your own twist to the spice mix or tried the spicy variation.