Cozy Weekend Baking: Copycat Crumbl Milk Chocolate Chip Cookies

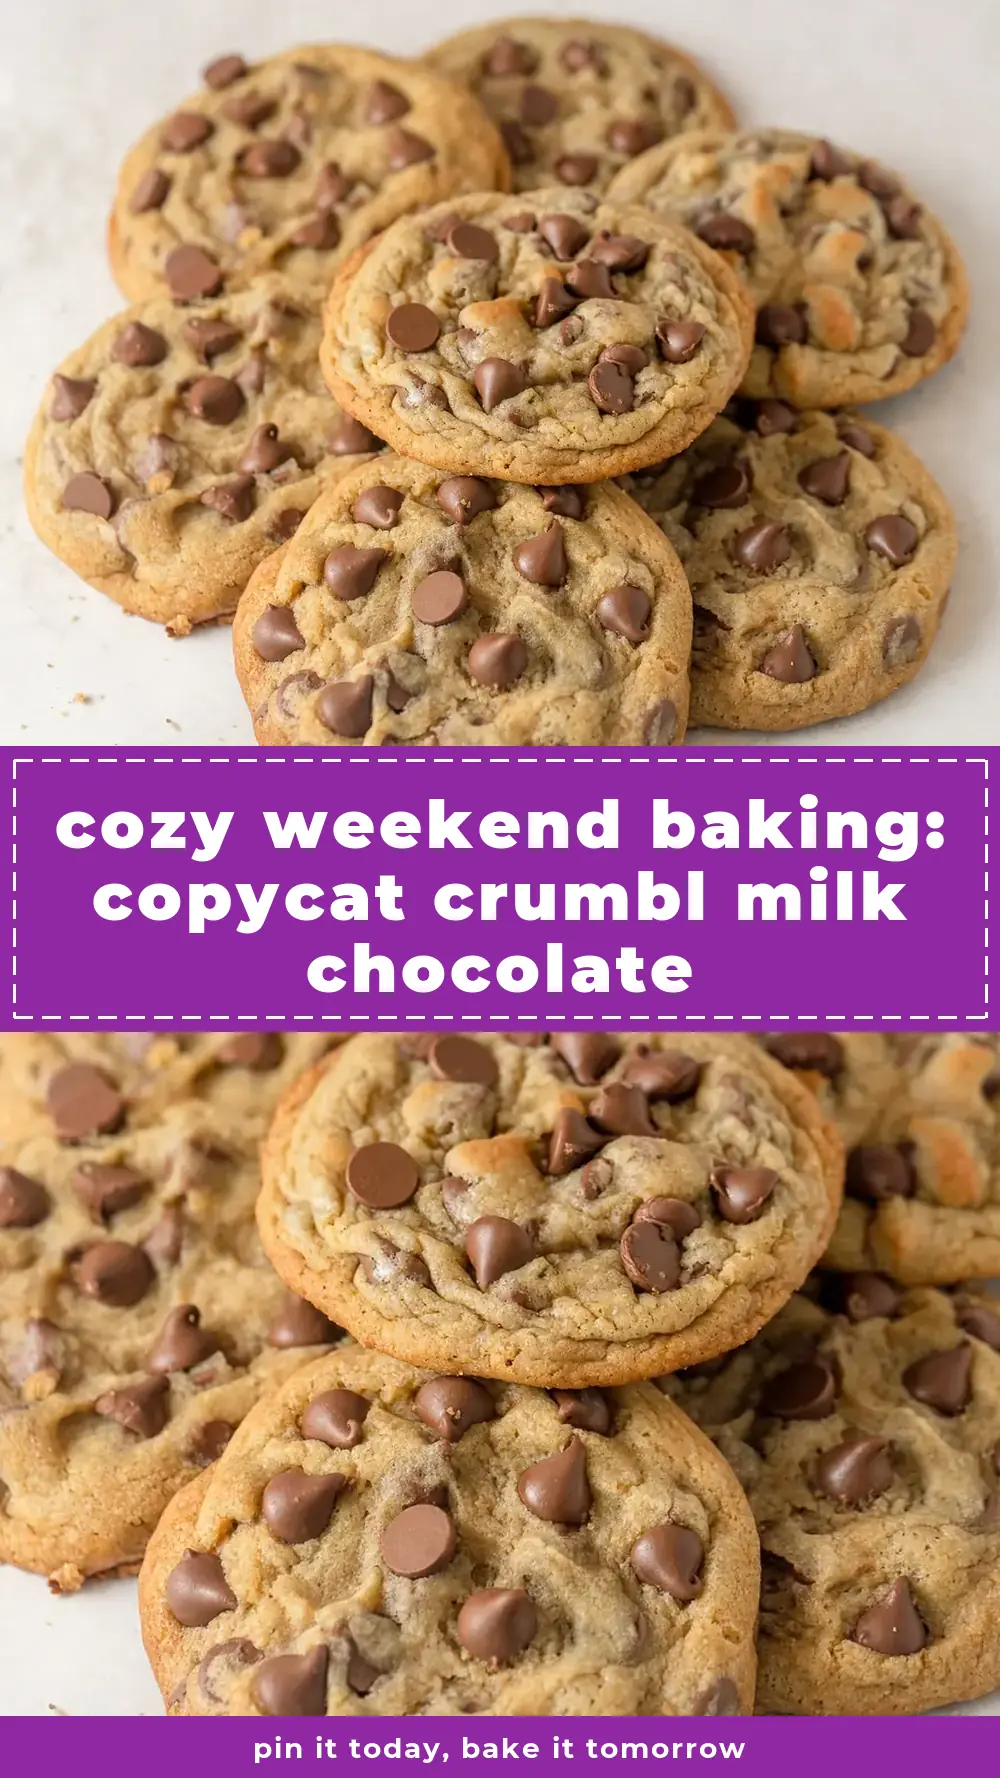
There are certain afternoons that call for something more than a mere snack; they demand a project, a ritual that fills the kitchen with warmth and the promise of something truly indulgent. For me, that project is a batch of Copycat Crumbl Milk Chocolate Chip Cookies, a recipe that transforms a quiet weekend into a sensory celebration of butter, sugar, and melting chocolate.
Recipe Overview
- Prep Time: 25 minutes
- Cook Time: 12-14 minutes per batch
- Total Time: 1 hour 45 minutes (including chill time)
- Servings: Makes 8-10 large cookies
- Difficulty: Medium
Why You’ll Love This Copycat Crumbl Milk Chocolate Chip Cookies
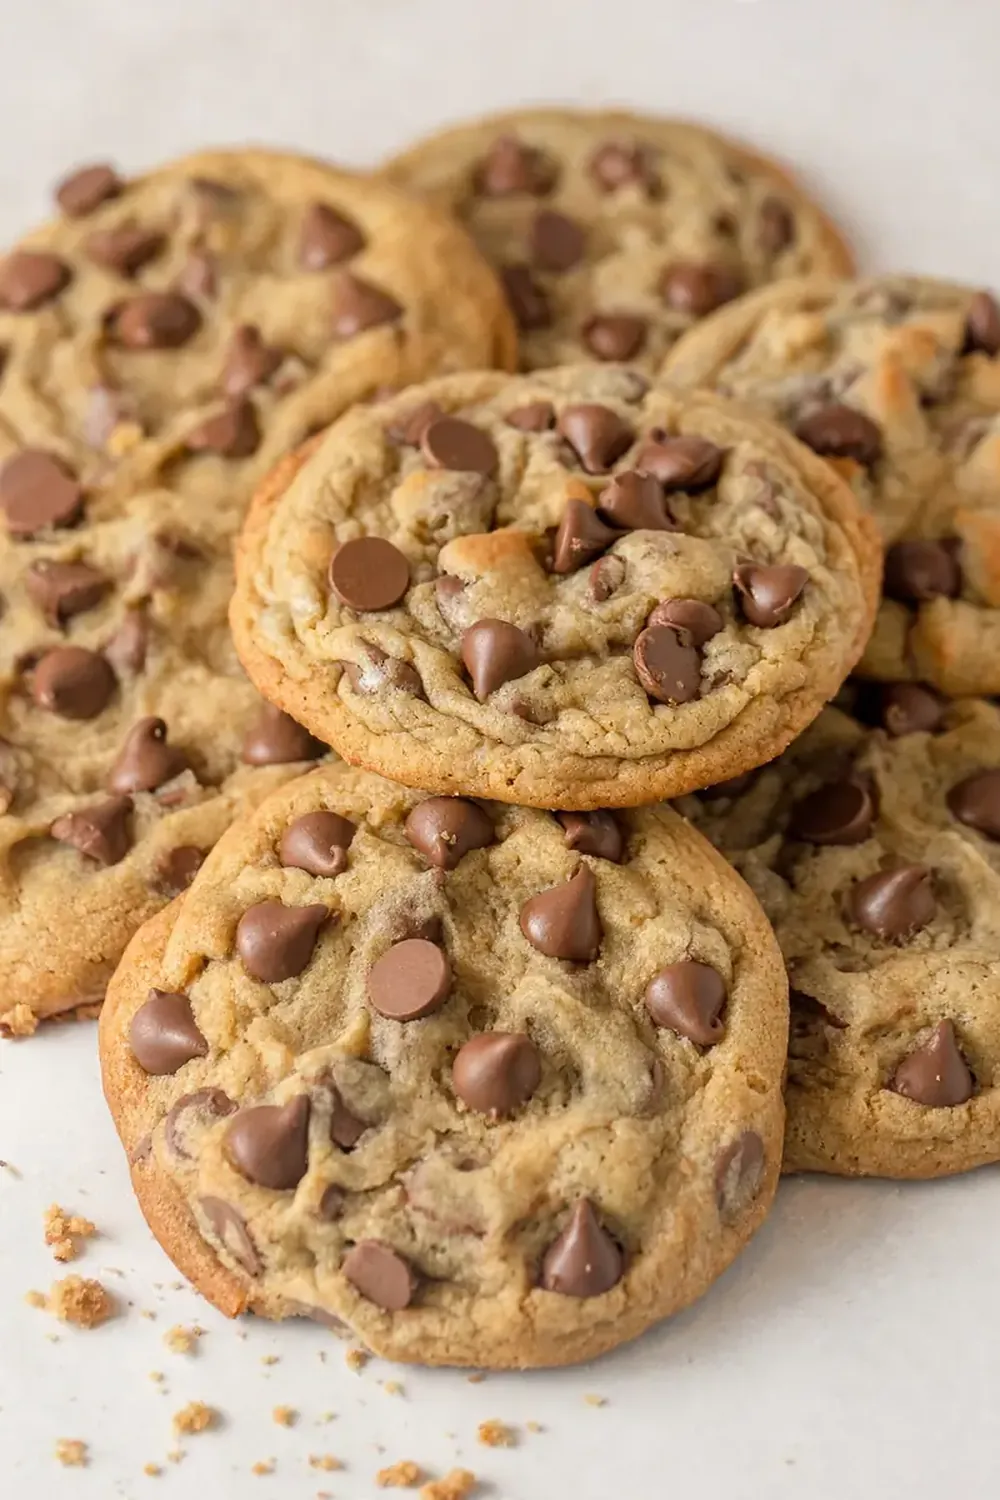
- The texture is a marvel — a crisp, sugary exterior gives way to a centre so soft and doughy it almost feels underbaked, in the best possible way.
- They are genuinely enormous, providing that signature bakery-style experience without leaving the house.
- Using high-quality milk chocolate creates pools of creamy, sweet richness that perfectly balances the salty-sweet cookie base.
- The recipe is forgiving and reliable; the chilling stage does the heavy lifting, making the actual baking process a calm, easy affair, much like preparing The Cozy Weekend Project: Copycat Olive Garden Chicken Alfredo.kirarecipes.com/cozy-weekend-classic-american-apple-pie-with-all-butter-crust/”>Cozy Weekend Classic American Apple Pie With All-Butter Crust.kirarecipes.com/cozy-weekend-project-copycat-texas-roadhouse-cinnamon-butter-rolls/”>Cozy Weekend Project: Copycat Texas Roadhouse Cinnamon Butter Rolls.kirarecipes.com/copycat-chick-fil-a-classic-chicken-sandwich-for-a-cozy-weekend-project/”>Copycat Chick-fil-A Classic Chicken Sandwich for a Cozy Weekend Project.kirarecipes.com/cozy-weekend-project-classic-biscuits-and-turkey-sausage-gravy/”>Cozy Weekend Project Classic Biscuits and Turkey Sausage Gravy.kirarecipes.com/cozy-weekend-classic-all-american-meatloaf-with-tomato-glaze/”>Cozy Weekend Classic All-American Meatloaf with Tomato Glaze.
- The aroma that fills your home is pure comfort — a nostalgic blend of browned butter and vanilla that signals a treat worth slowing down for.
Ingredients You’ll Need
- 225g unsalted butter, at room temperature
- 150g granulated sugar
- 150g light brown sugar, firmly packed
- 1 large egg, at room temperature
- 1 large egg yolk, at room temperature
- 2 teaspoons vanilla extract
- 310g plain flour (all-purpose)
- 1 teaspoon cornflour (cornstarch)
- 1 teaspoon bicarbonate of soda
- ½ teaspoon fine sea salt
- 350g good-quality milk chocolate, roughly chopped into chunks (not chips)
- Flaky sea salt, for finishing
Tip: For the most authentic texture, use a combination of a whole egg and an extra yolk. The extra yolk adds richness and tenderness, while the white provides structure. I make this at least once a month – it’s become a family favourite for lazy Sundays.
How to Make Copycat Crumbl Milk Chocolate Chip Cookies
- Brown the butter (the soul of the flavour): Place the butter in a medium, light-coloured saucepan over medium heat. Swirl the pan occasionally as it melts. You’ll hear it begin to crackle and pop as the water evaporates. Watch for the milk solids to turn a deep golden-amber colour and smell intensely nutty and toasty—this takes about 5-7 minutes. Immediately pour it into a large, heatproof bowl to stop it from burning. Let it cool for 10 minutes until it is warm but not hot to the touch.
- Cream the sugars and butter: Add both sugars to the warm browned butter. Beat with an electric mixer on medium speed for 2-3 minutes. The mixture will look like wet sand and feel slightly grainy against the bowl. It should smell deeply of caramel.
- Add the wet ingredients: Beat in the whole egg, the egg yolk, and the vanilla extract. Continue mixing for a full 2 minutes until the batter is pale, thick, and glossy. When you lift the beaters, the mixture should fall in a thick, ribbon-like stream.
- Combine the dry ingredients: In a separate bowl, whisk together the flour, cornflour, bicarbonate of soda, and fine sea salt. The clumps will disappear, and the colour will be a uniform, pale beige.
- Fold everything together: Add the dry ingredients to the wet mixture in two additions, mixing on low speed until just combined. You should see a few streaks of flour remaining. Now, fold in the chopped milk chocolate chunks with a rubber spatula. The dough will be stiff and slightly sticky, studded with large, uneven pieces of chocolate.
- Chill the dough (non-negotiable): Cover the bowl with cling film and refrigerate for at least 45 minutes, or up to 2 hours. The dough will firm up significantly, becoming less sticky and much easier to handle.
- Shape and bake: Preheat your oven to 180°C (160°C fan). Line two large baking trays with parchment paper. Scoop the chilled dough into 8-10 large balls, about 80g each. Place them on the trays, leaving 8-10cm of space between each. Do not flatten them. Bake one tray at a time for 12-14 minutes. The cookies will spread, their edges will turn a deep golden brown, and the centres will look puffed, pale, and slightly underdone. The smell of browned butter and melted chocolate will fill your kitchen.
- Finish and cool: As soon as you remove the tray from the oven, sprinkle each cookie with a pinch of flaky sea salt. Let them cool on the tray for 10 minutes. The residual heat will continue to set the centres. After 10 minutes, transfer them to a wire rack to cool completely, if you can wait that long.
Tips From My Kitchen
- Browning the butter is a step you cannot skip. This is the single most important tip for achieving that signature Crumbl flavour. It removes some of the water content and adds a deep, nutty, caramelised complexity that plain creamed butter simply cannot replicate. Watch it like a hawk, as it can burn in seconds.
- Chop your own chocolate bars. Pre-made chocolate chips contain stabilisers that prevent them from melting smoothly. For that iconic, gooey, flat pool of chocolate, you need to chop up bars of good-quality milk chocolate. The uneven shards and shavings also distribute better through the dough.
- Chilling the dough is for texture, not just convenience. The long rest in the fridge solidifies the browned butter, preventing the cookies from spreading into thin, crispy discs. It also allows the flour to fully hydrate and the flavours to meld, resulting in a thicker, chewier, and more flavourful cookie.
- Weigh your dough for consistent results. Using a kitchen scale to portion out 80g balls ensures every cookie bakes at the same rate and achieves that perfect, bakery-sized stature. Eyeballing it can lead to some cookies being overbaked while others are still raw.
- Pull them from the oven when the centres look underdone. This is the secret to a soft, doughy centre. The edges should be firm and golden, but the middle should look pale, puffy, and almost raw. They will continue to bake from the residual heat of the tray as they cool, setting perfectly without becoming hard.
Equipment You’ll Need
- Stand mixer or hand mixer
- Large baking tray (at least 2)
- Parchment paper
- Wire cooling rack
- Medium saucepan for browning butter
- Kitchen scale (highly recommended)
Common Mistakes to Avoid
- Overcrowding the pan: These cookies spread significantly. Placing more than 4-5 on a standard tray will cause them to merge into one giant, uneven blob. Always use two trays and bake in batches to give them ample room to expand into perfect rounds.
- Wrong temperature: Baking at too high a heat will set the edges before the centre has a chance to cook, resulting in a burnt exterior and a raw interior. Too low, and they will spread into flat, greasy pancakes. 180°C (160°C fan) is the sweet spot for that thick, soft centre.
- Skipping the rest time: A warm, soft dough will not hold its shape in the oven. The rest in the fridge is essential for solidifying the fat, which is the only thing that stops the cookies from spreading into flat, thin crisps. Do not be tempted to rush this step.
Delicious Variations to Try
- Double Chocolate Delight: Replace 50g of the plain flour with 50g of cocoa powder. The brown butter and chocolate will create a deeply rich, almost fudge-like cookie. Add white chocolate chunks alongside the milk chocolate for a striking contrast.
- Nutty Brown Butter: Add 100g of toasted, roughly chopped pecans or walnuts to the dough along with the chocolate. The toasted nuts add a wonderful crunch and their flavour pairs beautifully with the nuttiness of the browned butter.
- Caramel Stuffed: Press a soft caramel square into the centre of each dough ball before baking, ensuring it is completely sealed in. As the cookie bakes, the caramel melts into a luscious, gooey pocket.
What to Serve With Copycat Crumbl Milk Chocolate Chip Cookies
- A tall, cold glass of whole milk is the classic pairing, cutting through the richness perfectly.
- A scoop of vanilla bean ice cream transforms these into a decadent ice cream sandwich or a warm à la mode dessert.
- For a cosy autumnal twist, serve alongside a mug of this Cozy Light Lentil Soup for a sweet-and-savoury contrast.
- A strong cup of black coffee or an espresso martini (with a non-alcoholic coffee syrup) provides a bitter counterpoint to the sweet, creamy cookie.
Still hungry for ideas? You might also love White Chocolate Peppermint Cookies Recipe, Quick Weeknight Copycat Panera Kitchen Sink Cookies from our sister kitchens.
Frequently Asked Questions
Copycat Crumbl Milk Chocolate Chip Cookies
Ingredients
Method
- Brown the butter (the soul of the flavour): Place the butter in a medium, light-coloured saucepan over medium heat. Swirl the pan occasionally as it melts. You’ll hear it begin to crackle and pop as the water evaporates. Watch for the milk solids to turn a deep golden-amber colour and smell intensely nutty and toasty—this takes about 5-7 minutes. Immediately pour it into a large, heatproof bowl to stop it from burning. Let it cool for 10 minutes until it is warm but not hot to the touch.
- Cream the sugars and butter: Add both sugars to the warm browned butter. Beat with an electric mixer on medium speed for 2-3 minutes. The mixture will look like wet sand and feel slightly grainy against the bowl. It should smell deeply of caramel.
- Add the wet ingredients: Beat in the whole egg, the egg yolk, and the vanilla extract. Continue mixing for a full 2 minutes until the batter is pale, thick, and glossy. When you lift the beaters, the mixture should fall in a thick, ribbon-like stream.
- Combine the dry ingredients: In a separate bowl, whisk together the flour, cornflour, bicarbonate of soda, and fine sea salt. The clumps will disappear, and the colour will be a uniform, pale beige.
- Fold everything together: Add the dry ingredients to the wet mixture in two additions, mixing on low speed until just combined. You should see a few streaks of flour remaining. Now, fold in the chopped milk chocolate chunks with a rubber spatula. The dough will be stiff and slightly sticky, studded with large, uneven pieces of chocolate.
- Chill the dough (non-negotiable): Cover the bowl with cling film and refrigerate for at least 45 minutes, or up to 2 hours. The dough will firm up significantly, becoming less sticky and much easier to handle.
- Shape and bake: Preheat your oven to 180°C (160°C fan). Line two large baking trays with parchment paper. Scoop the chilled dough into 8-10 large balls, about 80g each. Place them on the trays, leaving 8-10cm of space between each. Do not flatten them. Bake one tray at a time for 12-14 minutes. The cookies will spread, their edges will turn a deep golden brown, and the centres will look puffed, pale, and slightly underdone. The smell of browned butter and melted chocolate will fill your kitchen.
- Finish and cool: As soon as you remove the tray from the oven, sprinkle each cookie with a pinch of flaky sea salt. Let them cool on the tray for 10 minutes. The residual heat will continue to set the centres. After 10 minutes, transfer them to a wire rack to cool completely, if you can wait that long.
Notes
I hope this recipe becomes a cherished part of your weekend rhythm, a way to slow down and fill your home with the simple, profound joy of baking. If you give these a try, I’d love to hear how they turned out in the comments below — happy baking!