Classic Bbq Beef Ribs
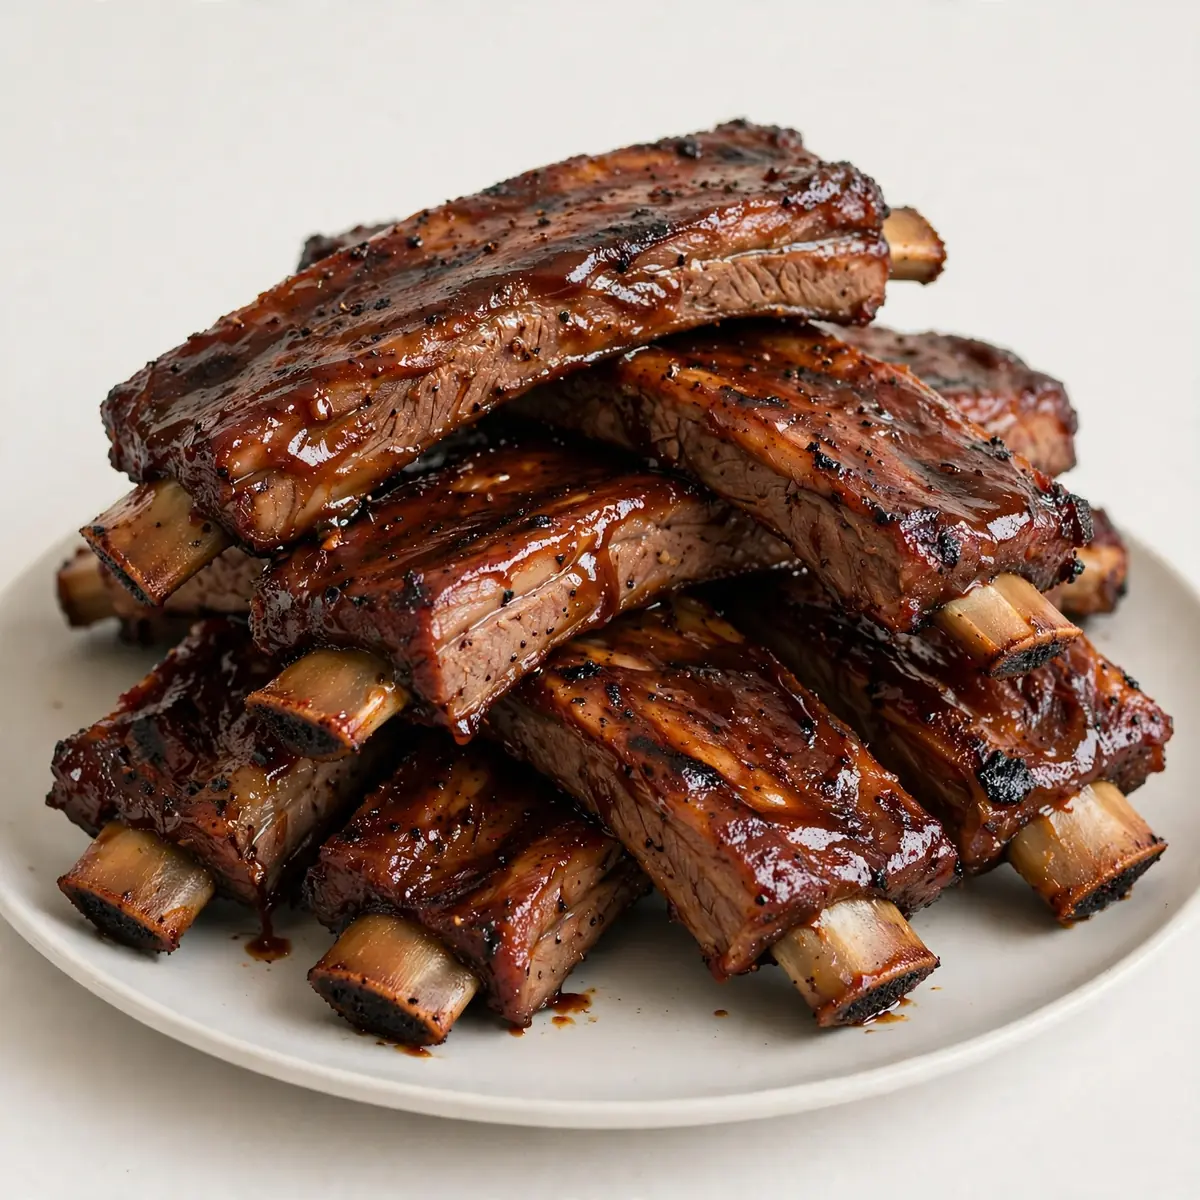
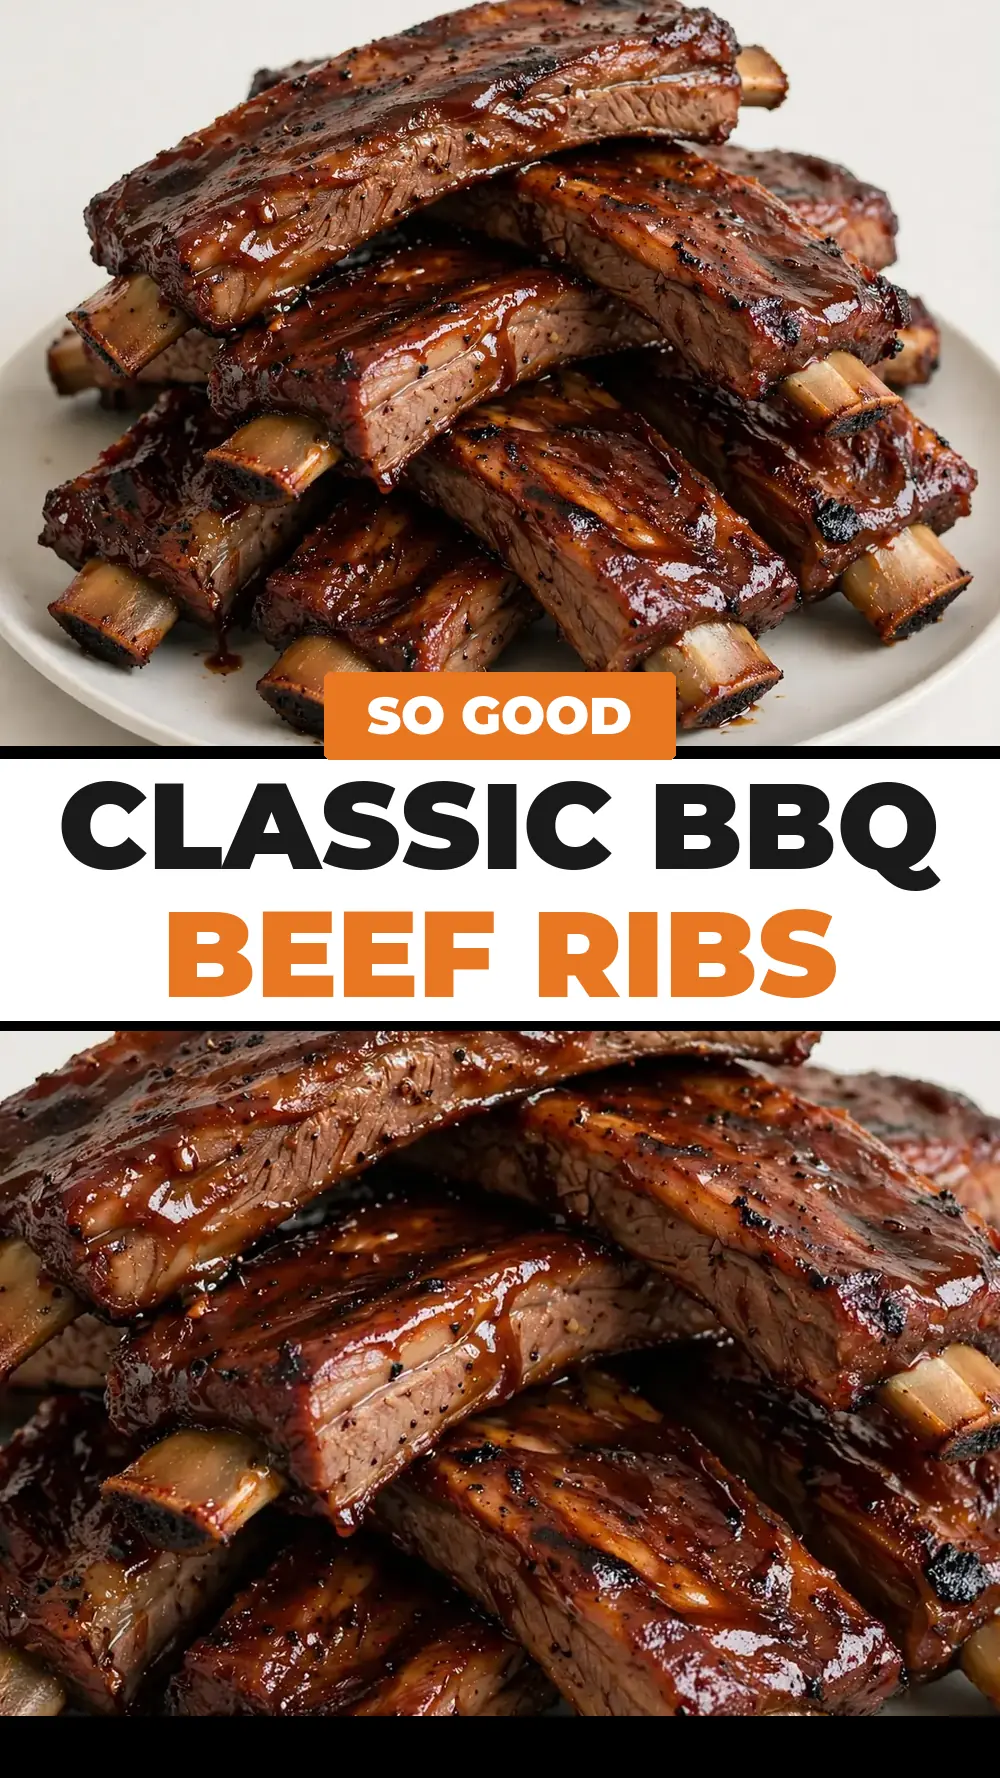
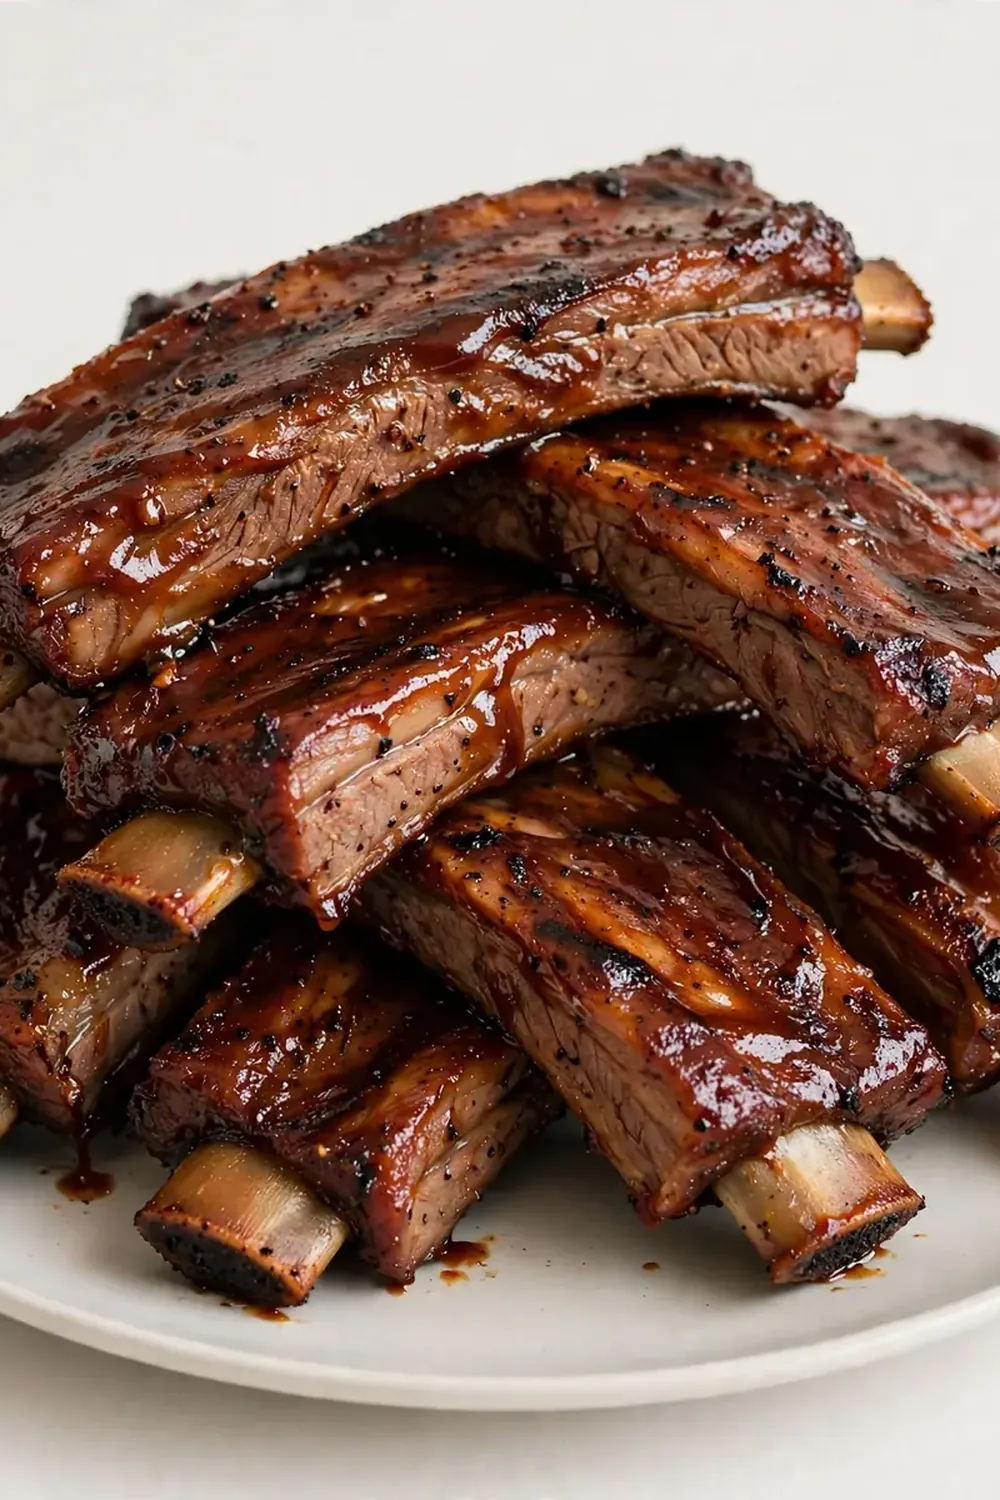
There’s a quiet confidence that comes from placing a whole, glistening rack of Classic BBQ Beef Ribs in the centre of your dining table, the kind of moment that turns a simple dinner into a memorable event. I’ve been making this for over 7 years, and it never disappoints; the key is treating the meat with the same respect a steakhouse chef would, focusing on a deep, savoury crust and a tender, juicy interior that pulls cleanly from the bone. This guide will walk you through every step to create that restaurant-quality presentation in your own kitchen.
Recipe Overview
- Prep Time: 30 minutes
- Cook Time: 3 hours 30 minutes
- Total Time: 4 hours (including resting)
- Servings: 4–6
- Difficulty: Medium
Why You’ll Love This Classic BBQ Beef Ribs
- Impressive Presentation: A full rack of beef ribs, glazed and garnished, looks spectacular on a platter and makes guests feel truly special.
- Deep, Complex Flavour: A slow, gentle cook allows the beefy richness to develop, while the spice rub and glaze create layers of sweet, smoky, and tangy notes.
- Tender, Not Falling Apart: The goal is meat that yields to a gentle pull, not mush. This method ensures a satisfying bite with a beautiful pink smoke ring.
- Make-Ahead Friendly: The ribs can be cooked a day in advance and finished on the grill or under the broiler just before serving, reducing last-minute stress.
- Customisable Glaze: You can adjust the sweetness, heat, or tang of the final glaze to perfectly match your personal preference or the side dishes you’re serving.
Ingredients You’ll Need
- 2 full racks of beef back ribs (about 2.5–3 kg total)
- 3 tablespoons smoked paprika
- 2 tablespoons dark brown sugar
- 1 tablespoon garlic powder
- 1 tablespoon onion powder
- 1 tablespoon freshly ground black pepper
- 2 teaspoons sea salt
- 1 teaspoon cayenne pepper (optional, for heat)
- 250 ml beef stock
- 120 ml tomato ketchup
- 60 ml apple cider vinegar
- 2 tablespoons Worcestershire sauce
- 1 tablespoon Dijon mustard
- 2 tablespoons unsalted butter
- Fresh parsley and sliced spring onions, for garnish
Tip: For the most impressive presentation, ask your butcher for ‘flanken-cut’ or ‘plate’ beef ribs, which have a generous layer of meat on top of the bone. The quality of the beef stock also makes a difference here; use a good-quality, low-sodium variety to control the saltiness of your glaze.
How to Make Classic BBQ Beef Ribs
- Prepare the Ribs and Rub: Start by removing the thin, silvery membrane from the back of each rib rack. Slide a butter knife under the membrane at one end, then grip it with a paper towel and pull it off in one piece. In a small bowl, combine the smoked paprika, brown sugar, garlic powder, onion powder, black pepper, salt, and cayenne. Pat the ribs dry with kitchen paper, then coat them generously all over with the spice rub. You should see the deep red and brown spices clinging to every surface, creating a textured, fragrant crust. Let the ribs sit at room temperature for 30 minutes while your oven preheats to 150°C (300°F).
- Slow-Roast the Ribs: Place the seasoned ribs, bone-side down, in a large roasting tin or on a baking tray lined with foil. Pour the beef stock into the bottom of the tin, being careful not to wash the rub off the meat. Cover the tin tightly with a double layer of foil. The aroma that escapes when you seal it is the first hint of the magic to come — a deep, savoury, peppery scent. Roast for 2 hours and 30 minutes to 3 hours, until the meat is tender and has shrunk back from the ends of the bones by about 1–2 cm. A skewer inserted between the bones should slide in with very little resistance.
- Make the Glaze: While the ribs roast, make the glaze. In a small saucepan over medium heat, combine the ketchup, apple cider vinegar, Worcestershire sauce, Dijon mustard, and butter. Stir occasionally as the mixture comes to a gentle simmer. You will see the colour deepen from a bright red to a rich, mahogany brown, and the consistency will thicken slightly, coating the back of a spoon. Let it bubble for 5–7 minutes, then remove from the heat.
- Glaze and Finish: Carefully remove the ribs from the oven and increase the temperature to 200°C (400°F). Discard the foil and the cooking liquid. Brush a generous layer of the glaze over the top and sides of each rib rack. The first coat will sizzle slightly as it hits the hot meat. Return the ribs to the oven, uncovered, for 10 minutes. Apply a second, thicker coat of glaze and roast for another 10 minutes. The ribs will look sticky and glossy, with the edges of the glaze beginning to caramelise and darken in spots. The kitchen will smell intensely of sweet, smoky barbecue.
- Rest and Carve: Remove the ribs from the oven and let them rest on a cutting board for 10–15 minutes. This resting period is crucial; it allows the juices to redistribute evenly throughout the meat, ensuring every bite is moist. Use a sharp knife to cut between the bones, creating individual ribs. The meat should be deeply bronzed, with a slight pull away from the bone, and a clean, glistening cut surface.
- Plate and Garnish: For a restaurant-quality presentation, arrange the cut ribs on a large, warmed platter. Drizzle any remaining warm glaze over the top. Finish with a generous scattering of fresh, chopped parsley and sliced spring onions for a pop of green against the dark, glossy meat. The contrast of colours and textures is the final touch that signals this is a dish made with care.
Tips From My Kitchen
- Don’t Skip the Membrane: Removing the silvery membrane is non-negotiable. If left on, it acts as a barrier, preventing your spice rub from penetrating the meat and creating a tough, chewy texture that is unpleasant to eat. It also stops the ribs from shrinking uniformly as they cook, leading to an uneven shape.
- Low and Slow is the Path: Beef ribs are full of connective tissue that needs time to break down into gelatin. Cooking at a low temperature of 150°C for several hours is what guarantees that buttery, tender result. Rushing the process with higher heat will leave you with tough, dry meat that fights the bone.
- Use a Meat Thermometer for Precision: While time is a good guide, temperature is the truth. Look for an internal temperature of around 93°C (200°F) when you probe the thickest part of the meat between the bones. At this temperature, the collagen has fully rendered, and the meat will be perfectly tender.
- Glaze in Stages for a Proper Crust: Applying the glaze in two or three thin layers, with a short return to high heat between each, builds a thick, sticky, caramelised crust. A single heavy coat will just burn or slide off. Each layer is a chance to build depth of flavour and that glossy, professional finish.
- Rest for the Perfect Bite: Resting the ribs after their final stint in the oven is not optional. As the meat rests, its internal temperature continues to rise slightly, and the juices, which have been forced to the centre by the heat, redistribute throughout the meat. Cutting into them immediately will cause those juices to run out onto the board, leaving you with a drier rib.
Equipment You’ll Need
- Grill or grill pan (for a final char, optional)
- Meat thermometer
- Tongs
- Basting brush
- Large roasting tin or baking tray
- Aluminium foil
- Sharp chef’s knife
Delicious Variations to Try
- Spicy Version: To add a serious kick, increase the cayenne pepper in the dry rub to a full tablespoon, and stir a finely chopped chipotle pepper in adobo sauce into the glaze. The smoky heat from the chipotle will complement the beef beautifully.
- Vegetarian/Vegan Option: For a plant-based take, replace the beef ribs with large, thick slices of portobello mushroom or slabs of firm, smoked tofu. Roast the mushrooms for a shorter time (about 20 minutes) before brushing with the glaze and finishing under a hot grill. Use a vegan Worcestershire sauce and a plant-based butter substitute in the glaze.
- Different Protein: This same method works wonders with a whole beef brisket point or even large, meaty beef short ribs. The cooking times will vary; a whole brisket point will need 4–5 hours at the same low temperature, while individual short ribs may be done in 2–2.5 hours. Always rely on your meat thermometer for doneness.
What to Serve With Classic BBQ Beef Ribs
The rich, smoky flavour of these ribs calls for sides that can stand up to it without overwhelming the palate. I love serving them with a tangy, crunchy coleslaw to cut through the richness, and a batch of Crispy Oven Roasted Potatoes Side for a satisfying, starchy contrast. For a touch of sweetness, a side of Air Fryer Sweet Potato Fries Recipe is a fantastic pairing. Finish the meal with something light and refreshing, like a Refreshing Fresh Lemonade Recipe, to cleanse the palate.
- Tangy coleslaw with a cider vinegar dressing
- Grilled corn on the cob with chilli lime butter
- Simple steamed green beans with toasted almonds
Still hungry for ideas? You might also love Savory Beef Short Ribs In Dutch Oven, High Protein Braised Beef Short Ribs from our sister kitchens.
Frequently Asked Questions
Classic BBQ Beef Ribs
Ingredients
Method
- Prepare the Ribs and Rub: Start by removing the thin, silvery membrane from the back of each rib rack. Slide a butter knife under the membrane at one end, then grip it with a paper towel and pull it off in one piece. In a small bowl, combine the smoked paprika, brown sugar, garlic powder, onion powder, black pepper, salt, and cayenne. Pat the ribs dry with kitchen paper, then coat them generously all over with the spice rub. You should see the deep red and brown spices clinging to every surface, creating a textured, fragrant crust. Let the ribs sit at room temperature for 30 minutes while your oven preheats to 150°C (300°F).
- Slow-Roast the Ribs: Place the seasoned ribs, bone-side down, in a large roasting tin or on a baking tray lined with foil. Pour the beef stock into the bottom of the tin, being careful not to wash the rub off the meat. Cover the tin tightly with a double layer of foil. The aroma that escapes when you seal it is the first hint of the magic to come — a deep, savoury, peppery scent. Roast for 2 hours and 30 minutes to 3 hours, until the meat is tender and has shrunk back from the ends of the bones by about 1–2 cm. A skewer inserted between the bones should slide in with very little resistance.
- Make the Glaze: While the ribs roast, make the glaze. In a small saucepan over medium heat, combine the ketchup, apple cider vinegar, Worcestershire sauce, Dijon mustard, and butter. Stir occasionally as the mixture comes to a gentle simmer. You will see the colour deepen from a bright red to a rich, mahogany brown, and the consistency will thicken slightly, coating the back of a spoon. Let it bubble for 5–7 minutes, then remove from the heat.
- Glaze and Finish: Carefully remove the ribs from the oven and increase the temperature to 200°C (400°F). Discard the foil and the cooking liquid. Brush a generous layer of the glaze over the top and sides of each rib rack. The first coat will sizzle slightly as it hits the hot meat. Return the ribs to the oven, uncovered, for 10 minutes. Apply a second, thicker coat of glaze and roast for another 10 minutes. The ribs will look sticky and glossy, with the edges of the glaze beginning to caramelise and darken in spots. The kitchen will smell intensely of sweet, smoky barbecue.
- Rest and Carve: Remove the ribs from the oven and let them rest on a cutting board for 10–15 minutes. This resting period is crucial; it allows the juices to redistribute evenly throughout the meat, ensuring every bite is moist. Use a sharp knife to cut between the bones, creating individual ribs. The meat should be deeply bronzed, with a slight pull away from the bone, and a clean, glistening cut surface.
- Plate and Garnish: For a restaurant-quality presentation, arrange the cut ribs on a large, warmed platter. Drizzle any remaining warm glaze over the top. Finish with a generous scattering of fresh, chopped parsley and sliced spring onions for a pop of green against the dark, glossy meat. The contrast of colours and textures is the final touch that signals this is a dish made with care.
Notes
I stumbled upon this combination of a gentle roast and a sticky, tangy glaze by accident one rainy Sunday, and it’s been a hit ever since. The magic is in the details — the careful trimming, the patient resting, the final flourish of fresh herbs. I’d love to hear how your ribs turn out, so please share your experience and any questions you have in the comments below.