Cheeseburger Macaroni (Homemade Hamburger Helper)
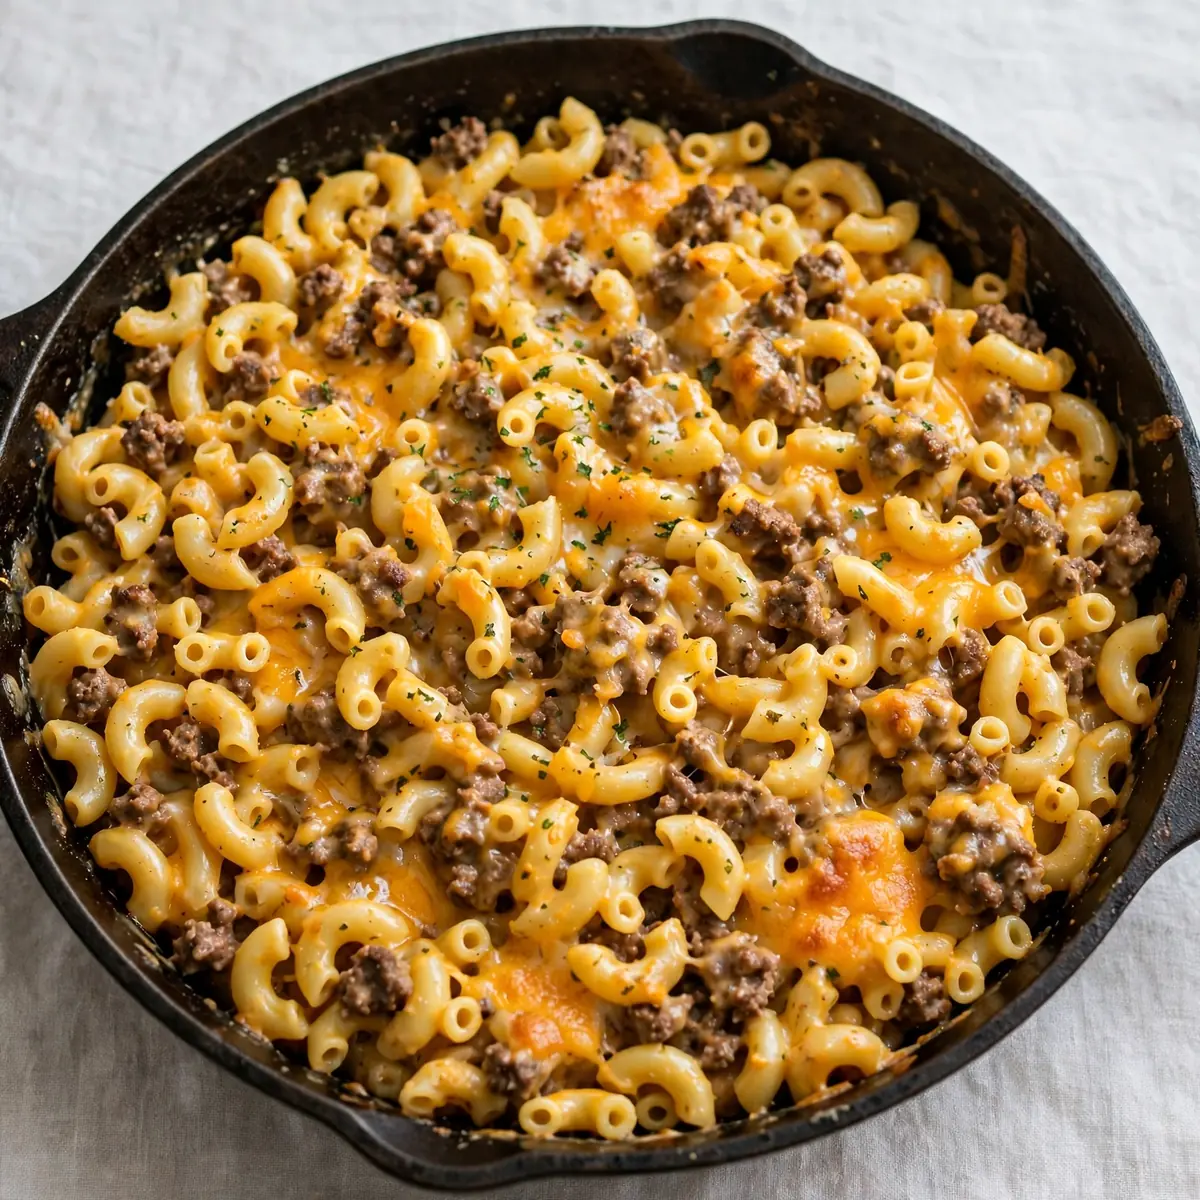
I have spent years perfecting a version of cheeseburger macaroni that looks as good as it tastes, ready to be the centrepiece of a dinner party rather than a midweek afterthought.
Recipe Overview
- Prep Time: 15 minutes
- Cook Time: 25 minutes
- Total Time: 40 minutes
- Servings: 4 generous portions
- Difficulty: Medium
Why You’ll Love This Cheeseburger Macaroni (Homemade Hamburger Helper)
- Restaurant-quality presentation: with a few finishing touches, this dish looks stunning on the plate, far removed from its boxed origins.
- Deep, savoury flavour: the combination of seared mince, umami-rich stock, and a custom cheese blend creates layers of taste that surprise and delight.
- Perfect texture control: you cook the pasta directly in the sauce, ensuring every piece is perfectly al dente and coated in a velvety sauce.
- Impressive yet approachable: this recipe uses simple techniques that yield professional results, making you look like a culinary star without the stress.
- Customisable for guests: it is easy to adapt for different dietary needs or flavour preferences, so everyone at the table feels considered.
Ingredients You’ll Need
- 500g beef mince (15-20% fat for best flavour)
- 1 large onion, finely diced
- 3 cloves garlic, minced
- 2 tablespoons tomato purée
- 1 tablespoon Worcestershire sauce (ensure halal-friendly brand)
- 1 teaspoon smoked paprika
- ½ teaspoon ground black pepper
- ½ teaspoon salt
- 750ml beef stock (low-sodium is best)
- 300ml whole milk
- 250g elbow macaroni (or similar small pasta)
- 200g mature cheddar, grated
- 100g gouda or edam, grated
- 2 tablespoons unsalted butter
- Fresh chives, finely chopped, for garnish
- Optional: 1 teaspoon mustard powder for extra depth
Tip: Grating your own cheese from a block is non-negotiable here. Pre-shredded cheese contains starches that prevent it from melting smoothly, which would ruin the silky texture we are aiming for.
How to Make Cheeseburger Macaroni (Homemade Hamburger Helper)
- Brown the mince: Place a large frying pan or skillet over medium-high heat. Add the beef mince and break it apart with a wooden spoon. Cook for 5-7 minutes, stirring occasionally, until the mince is deeply browned and you hear a satisfying sizzle. The colour should be a rich mahogany, and the fat will have rendered into the pan. Do not stir constantly; let it rest to develop that crust.
- Sweat the aromatics: Reduce the heat to medium. Add the diced onion to the pan with the mince and its fat. Cook for 4-5 minutes until the onion becomes translucent and softens, releasing a sweet, fragrant smell. Stir in the minced garlic and cook for a further minute until it becomes aromatic but not browned.
- Build the flavour base: Add the tomato purée, smoked paprika, mustard powder (if using), salt, and pepper. Stir everything together and cook for 2 minutes. The purée will darken slightly and stick to the bottom of the pan, creating a deep, concentrated flavour. The smell at this stage should be rich and savoury.
- Create the cooking liquid: Pour in the beef stock and whole milk, then add the Worcestershire sauce. Stir well, scraping the bottom of the pan with your wooden spoon to lift any browned bits. Bring the mixture to a gentle boil — you will see small bubbles breaking the surface across the entire pan.
- Cook the pasta: Stir in the elbow macaroni, ensuring it is fully submerged in the liquid. Reduce the heat to a simmer and cover the pan with a lid. Cook for 10-12 minutes, stirring once halfway through. The pasta will absorb the liquid and swell; the sauce will thicken and become glossy. Test a piece of pasta — it should be al dente, offering slight resistance when bitten.
- Incorporate the cheese: Remove the pan from the heat completely. Add the butter and both grated cheeses, then stir vigorously until everything has melted into a smooth, cohesive sauce. The texture should be thick, velvety, and stretch slightly when you lift the spoon. If the sauce seems too thick, stir in a splash of warm milk.
- Rest and finish: Let the pan sit, uncovered, for 3-4 minutes. This rest time allows the sauce to settle and the flavours to meld. During this time, the surface will develop a slight sheen. Just before serving, sprinkle the fresh chives over the top for a bright, clean finish.
Tips From My Kitchen
- Sear the mince in batches if needed: If your pan is not large enough, cook the mince in two batches. Overcrowding the pan traps steam, which prevents browning. You want that deep, caramelised crust on the meat; it is the foundation of the dish’s flavour. Each batch should have room for the moisture to evaporate quickly.
- Use whole milk for richness, not cream: Whole milk provides a luxurious texture without making the sauce heavy or greasy. Cream can dull the other flavours and feels too rich for this dish. The milk also helps the cheese melt more evenly, creating a sauce that coats the pasta beautifully without separating.
- Grate your cheese while the pasta cooks: This is a small timing trick that makes a big difference. Freshly grated cheese melts faster and more uniformly than pre-grated. As the pasta finishes cooking, you can stir in the cheese immediately, ensuring it melts into the hot sauce without clumping or becoming stringy.
- Reserve a little pasta water: Before you drain any pasta (if you were to cook it separately), keep a cup of the starchy water. However, since we cook the pasta directly in the sauce, this tip applies to the liquid in the pan. If you need to thin the sauce at the end, use a splash of warm stock or milk rather than water, as this keeps the flavour concentrated.
- Season in layers, not all at once: Season the mince as it browns, then again when you add the stock. This builds complexity. The cheese will also add saltiness, so be cautious with salt early on. You can always adjust at the end, but you cannot take salt out. Taste the sauce before you add the cheese to gauge the seasoning.
Equipment You’ll Need
- Large frying pan or skillet (30cm or larger, with a lid)
- Sharp knife and cutting board
- Mixing bowls for grated cheese and prepared ingredients
- Wooden spoon or spatula for stirring and scraping
- Box grater for the cheese
- Measuring jug for stock and milk
- Fine sieve (optional, for a smoother sauce if preferred)
Common Mistakes to Avoid
- Overcrowding the pan: When you add too much mince to the pan at once, it steams rather than sears. This results in grey, flavourless meat. Cook in a single layer, leaving space between pieces, and you will achieve that deep, browned crust that is essential for a rich taste.
- Wrong temperature: Cooking the pasta at too high a heat can cause the liquid to evaporate too quickly, leaving you with undercooked pasta in a thick paste. Maintain a gentle simmer — small bubbles should break the surface, not a rolling boil. If the liquid reduces too much, add a splash of warm stock or milk to restore the consistency.
- Skipping the rest time: Resting the dish for 3-4 minutes after cooking is crucial. This allows the sauce to thicken and the flavours to meld together. Serving immediately can result in a thin, watery sauce that has not yet set, and the cheese may not have fully integrated into the mixture.
Delicious Variations to Try
- Spicy Version: Add 1-2 finely chopped fresh red chillies with the onion, or stir in 1 teaspoon of chilli flakes with the spices. A dash of hot sauce at the end can also provide a pleasant warmth that cuts through the richness.
- Vegetarian/Vegan Option: Substitute the beef mince with a plant-based mince alternative or finely chopped mushrooms. Use vegetable stock instead of beef stock, and replace the cheese with a good-quality vegan melting cheese. Nutritional yeast can add a cheesy, savoury note if needed.
- Different Protein: Swap the beef mince for lamb mince for a richer, slightly gamey flavour, or use turkey mince for a lighter option. If using turkey, add a little extra oil to compensate for the lower fat content, ensuring the sauce remains moist and flavourful.
What to Serve With Cheeseburger Macaroni (Homemade Hamburger Helper)
- A crisp green salad with a sharp vinaigrette to cut through the richness.
- Steamed green beans or tenderstem broccoli, simply seasoned with salt and pepper.
- Grilled corn on the cob with a sprinkle of paprika for a smoky side.
- Buttered crusty bread or garlic bread to mop up every last drop of sauce.
- A side of pickles or cornichons for a tangy contrast.
Still hungry for ideas? You might also love Easy Homemade Hamburger Helper, One Pot Cheeseburger Macaroni Recipe from our sister kitchens.
Frequently Asked Questions
Cheeseburger Macaroni (Homemade Hamburger Helper)
Ingredients
Method
- Brown the mince: Place a large frying pan or skillet over medium-high heat. Add the beef mince and break it apart with a wooden spoon. Cook for 5-7 minutes, stirring occasionally, until the mince is deeply browned and you hear a satisfying sizzle. The colour should be a rich mahogany, and the fat will have rendered into the pan. Do not stir constantly; let it rest to develop that crust.
- Sweat the aromatics: Reduce the heat to medium. Add the diced onion to the pan with the mince and its fat. Cook for 4-5 minutes until the onion becomes translucent and softens, releasing a sweet, fragrant smell. Stir in the minced garlic and cook for a further minute until it becomes aromatic but not browned.
- Build the flavour base: Add the tomato purée, smoked paprika, mustard powder (if using), salt, and pepper. Stir everything together and cook for 2 minutes. The purée will darken slightly and stick to the bottom of the pan, creating a deep, concentrated flavour. The smell at this stage should be rich and savoury.
- Create the cooking liquid: Pour in the beef stock and whole milk, then add the Worcestershire sauce. Stir well, scraping the bottom of the pan with your wooden spoon to lift any browned bits. Bring the mixture to a gentle boil — you will see small bubbles breaking the surface across the entire pan.
- Cook the pasta: Stir in the elbow macaroni, ensuring it is fully submerged in the liquid. Reduce the heat to a simmer and cover the pan with a lid. Cook for 10-12 minutes, stirring once halfway through. The pasta will absorb the liquid and swell; the sauce will thicken and become glossy. Test a piece of pasta — it should be al dente, offering slight resistance when bitten.
- Incorporate the cheese: Remove the pan from the heat completely. Add the butter and both grated cheeses, then stir vigorously until everything has melted into a smooth, cohesive sauce. The texture should be thick, velvety, and stretch slightly when you lift the spoon. If the sauce seems too thick, stir in a splash of warm milk.
- Rest and finish: Let the pan sit, uncovered, for 3-4 minutes. This rest time allows the sauce to settle and the flavours to meld. During this time, the surface will develop a slight sheen. Just before serving, sprinkle the fresh chives over the top for a bright, clean finish.
Notes
I would love to hear how you present this dish at your own table. Share your plating ideas or any twists you added in the comments below — your creativity might inspire another cook’s next dinner party. After testing this recipe five times, I finally got it just right, and I am certain you will find your own perfect version too.