Baked Bbq Chicken Thighs
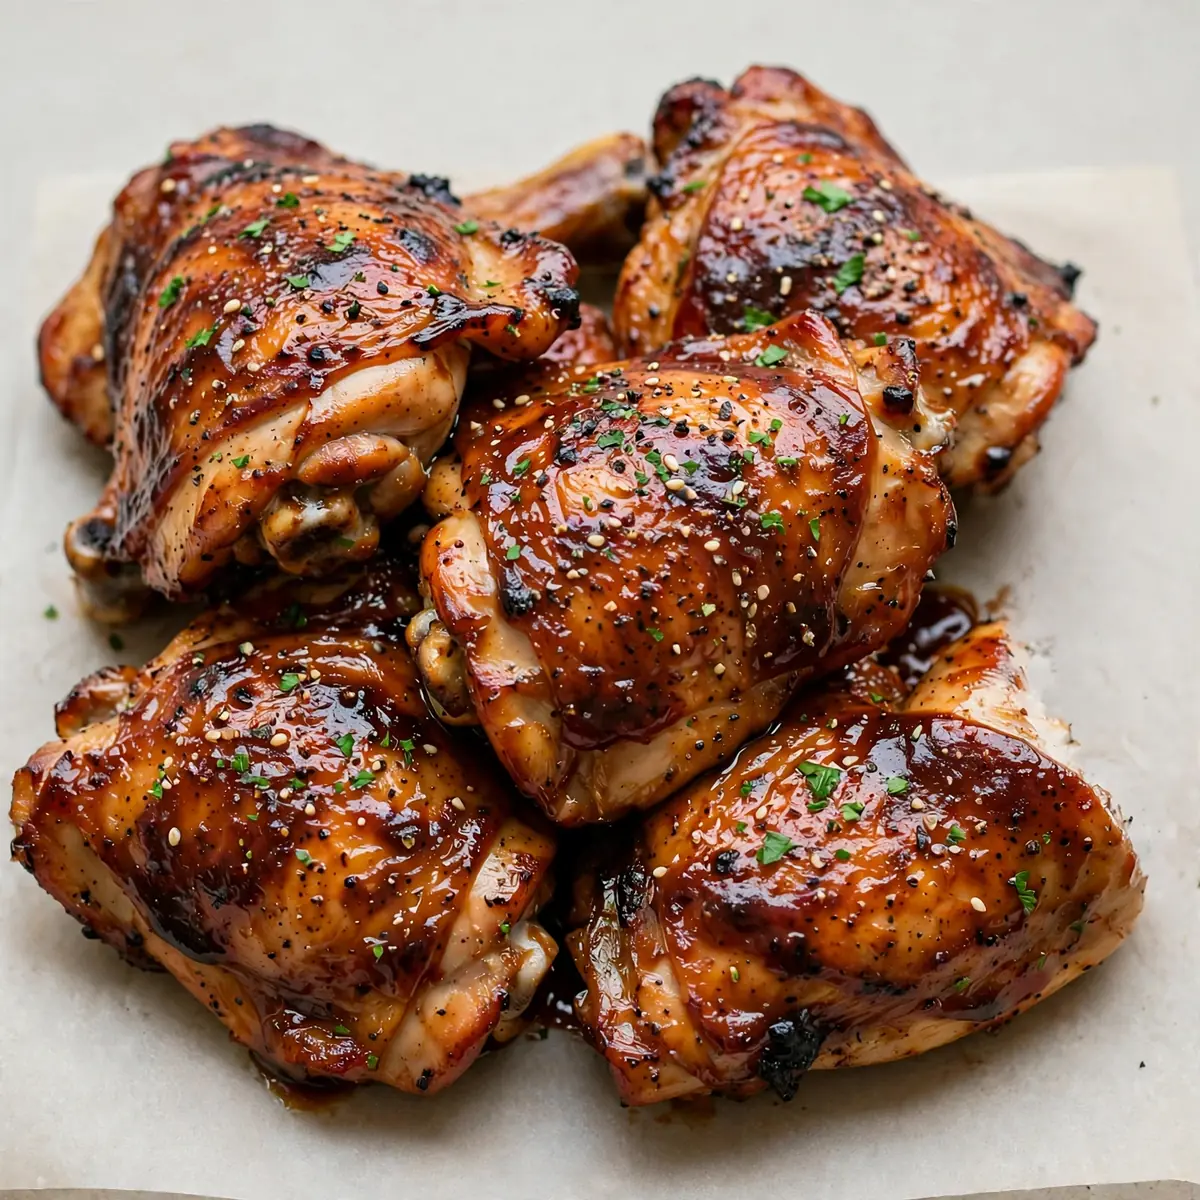
Forget everything you think you know about home-cooked chicken thighs. I’m about to show you how to transform a humble cut of meat into a centrepiece so stunning, your guests will swear you’ve been hiding a Michelin star in your kitchen. This isn’t just about getting dinner on the table; it’s about creating a moment, a dish that arrives at the table with a glossy, caramelised sheen and an aroma that stops conversations. This is my definitive guide to Baked BBQ Chicken Thighs that look and taste like they belong in a high-end restaurant, all achieved with a few clever tricks and a whole lot of love.
Recipe Overview
- Prep Time: 20 minutes (plus 30 minutes resting time for the dry brine)
- Cook Time: 35-40 minutes
- Total Time: 1 hour 30 minutes
- Servings: 4-6 people
- Difficulty: Easy (looks impressive, but the technique is straightforward)
Why You’ll Love This Baked BBQ Chicken Thighs
- Restaurant-Quality Presentation: We focus on the final plating—a glossy, lacquered finish that makes the chicken look as good as it tastes.
- Foolproof Juiciness: Bone-in, skin-on thighs are naturally forgiving, but our method guarantees they stay succulent and tender every single time.
- Deep, Complex Flavour: A dry brine and a two-stage cooking process build layers of savoury, smoky, and sweet notes that go far beyond bottled sauce.
- Effortless for Entertaining: You can do most of the prep ahead, leaving you free to enjoy your guests while the oven does the heavy lifting.
- My kids absolutely devour this every time I make it, and they feel the same way about Smoky Weekend Cheeseburger with Crispy Fries.kirarecipes.com/cozy-weekend-project-copycat-panera-kitchen-sink-cookies/”>Cozy Weekend Project: Copycat Panera Kitchen Sink Cookies.kirarecipes.com/cozy-weekend-project-copycat-chilis-southwestern-eggrolls/”>Cozy Weekend Project: Copycat Chili’s Southwestern Eggrolls. Even the pickiest eaters can’t resist that sticky, caramelised exterior.
Ingredients You’ll Need
- 8 bone-in, skin-on chicken thighs (about 1.2 kg total)
- 2 teaspoons fine sea salt
- 1 teaspoon smoked paprika
- 1 teaspoon garlic powder
- 1 teaspoon onion powder
- ½ teaspoon black pepper
- 2 tablespoons olive oil
- 240 ml (1 cup) good-quality BBQ sauce (look for one with a high sugar content for that lacquered finish)
- 2 tablespoons tomato purée
- 1 tablespoon apple cider vinegar
- 1 tablespoon Worcestershire sauce (ensure it’s halal-friendly, as some brands contain anchovies)
- 1 teaspoon liquid smoke (optional, but adds incredible depth)
- Fresh parsley or chives, finely chopped, for garnish
- Flaky sea salt, for finishing
Tip: For the most impressive results, use a BBQ sauce you love eating straight from the jar. The flavour will concentrate as it bakes, so quality matters here. I often make a double batch of the sauce mixture and reserve half for serving at the table.
How to Make Baked BBQ Chicken Thighs
- Prepare the Dry Brine: Pat the chicken thighs completely dry with kitchen paper. This is non-negotiable—any moisture on the skin will prevent it from crisping. In a small bowl, mix the salt, smoked paprika, garlic powder, onion powder, and black pepper. Sprinkle this mixture evenly over all sides of the chicken. Place the thighs on a wire rack set over a baking tray and leave them uncovered in the fridge for at least 30 minutes, or up to 24 hours. You will notice the skin tighten and dry out slightly—this is the sound of success.
- Create the Glaze: In a medium bowl, whisk together the BBQ sauce, tomato purée, apple cider vinegar, Worcestershire sauce, and liquid smoke (if using). The colour should be a deep, rich mahogany, and the smell should be tangy and sweet. Set aside 3 tablespoons of this mixture for basting later.
- Preheat and Prepare: Preheat your oven to 200°C (180°C fan) or 400°F. Remove the chicken from the fridge and let it sit at room temperature for 15 minutes. Brush the thighs all over with the olive oil. You should see the oil sheen on the seasoned skin.
- Initial Bake: Place the chicken thighs skin-side up on the wire rack (still on the baking tray). Bake for 20 minutes. At this stage, the skin will be starting to turn a pale golden colour and will feel firm to the touch. The fat will be rendering, and you’ll hear a gentle sizzle.
- First Glaze: Remove the tray from the oven. Using a basting brush, generously coat each thigh with the reserved 3 tablespoons of glaze, being careful to cover the skin completely. Return to the oven for another 10 minutes. The glaze will begin to bubble and set, and the kitchen will smell incredible—sweet, smoky, and savoury.
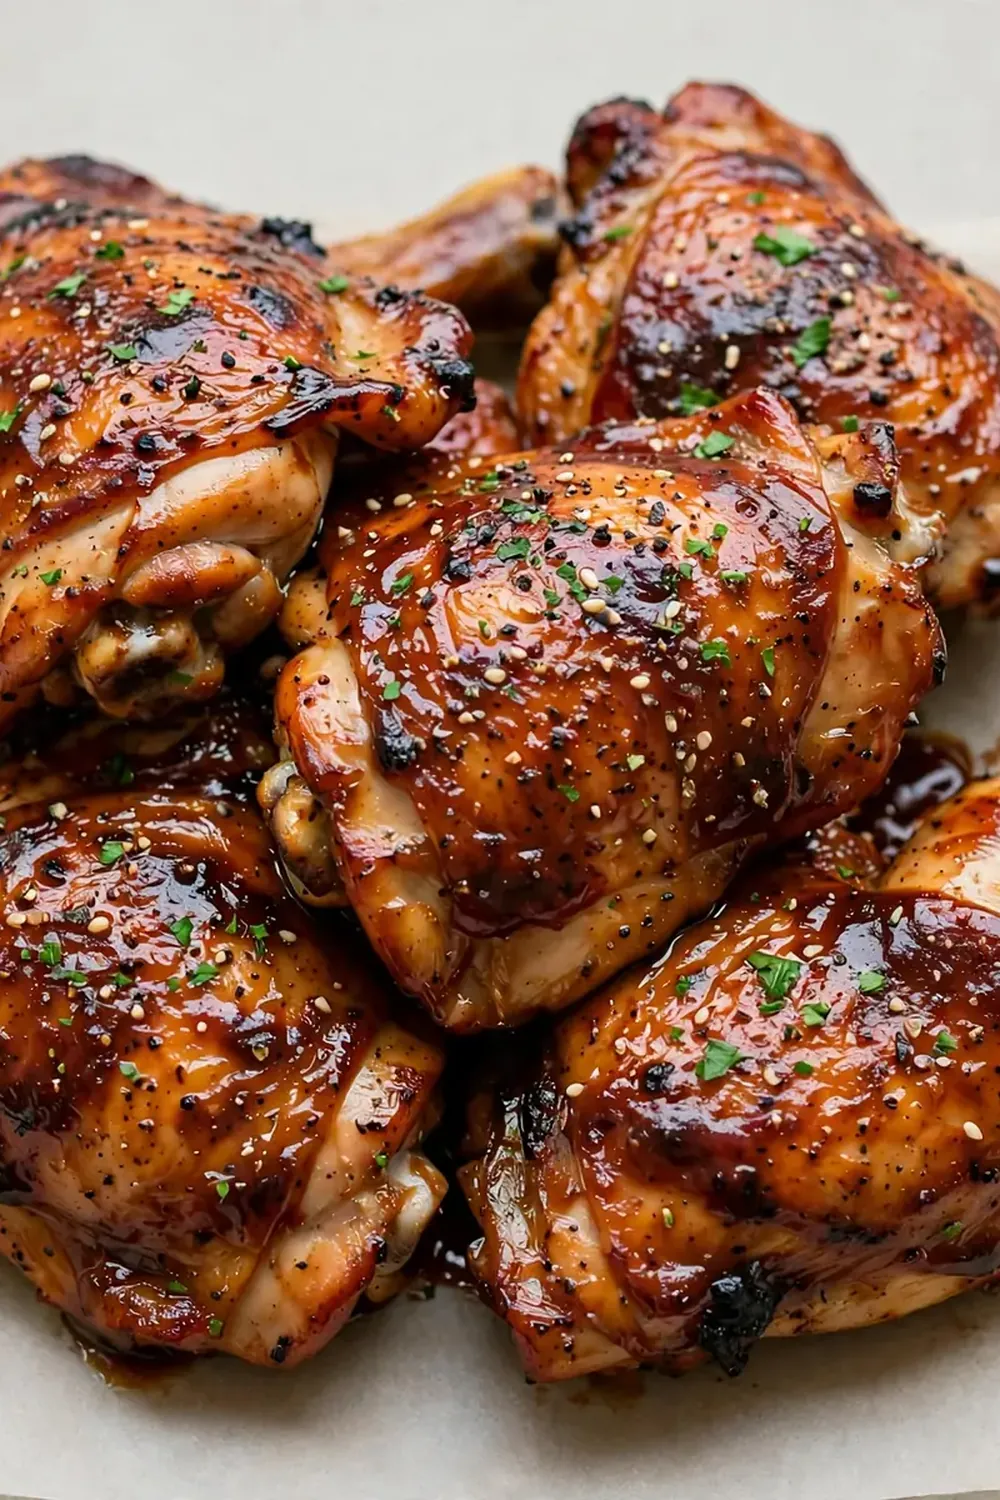
- Second Glaze and Finish: After 10 minutes, brush on a second, thicker layer of the remaining glaze. Increase the oven temperature to 220°C (200°C fan) or 425°F. Bake for a final 8-12 minutes. Watch closely: the glaze should turn a deep, sticky, almost burnt-orange colour, and the edges of the skin will start to char slightly. This is your cue. The internal temperature of the thickest part of a thigh should read 74°C (165°F) on a meat thermometer.
- The Resting Ritual: Remove the tray from the oven and let the chicken rest on the wire rack for 5 minutes. Do not skip this step. The juices need to redistribute, and the glaze will set into a beautiful, glossy lacquer. The skin will be cracklingly crisp.
- Plate and Present: Transfer the thighs to a warmed serving platter. Sprinkle immediately with the fresh parsley or chives and a pinch of flaky sea salt. The contrast of the green herbs against the dark, glossy chicken is visually stunning. Serve with the reserved sauce on the side.
Tips From My Kitchen
- Dry the Skin Thoroughly: This is the single most important step for achieving that shatteringly crisp skin. Moisture is the enemy of crispiness. Pat the thighs dry with paper towels before applying the dry brine, and never cover them while they rest in the fridge. The air circulation is what dries out the surface.
- Use a Wire Rack: Baking the chicken directly on a tray will cause it to steam in its own juices, resulting in soggy skin. A wire rack elevates the chicken, allowing hot air to circulate all around it. This ensures even cooking and promotes that all-important Maillard reaction on the bottom of the thigh as well.
- The Double-Glaze Method: Applying the glaze in two stages, with the second coat applied at a higher temperature, is the secret to that restaurant-quality, lacquered finish. The first coat bakes on and sets, creating a base. The second coat caramelises and thickens, producing a sticky, glossy shell that doesn’t slide off.
- Don’t Overcrowd the Oven: If you’re cooking for a crowd, use two trays or bake in batches. Overcrowding traps steam and lowers the oven temperature, which ruins the crisp skin and prevents the glaze from caramelising properly. Your guests are worth the extra effort.
- Friends always ask me for this recipe after trying it at dinner parties. The trick is to let the chicken rest on the wire rack, not on a plate. If you put it on a flat plate straight away, the steam from the bottom will soften the crisp skin you’ve worked so hard to create. The wire rack keeps it perfectly crunchy.
Equipment You’ll Need
- Baking tray
- Wire rack that fits inside the baking tray
- Meat thermometer (digital instant-read is best)
- Basting brush (silicone works brilliantly)
- Small bowl for the dry brine
- Medium bowl for the glaze
- Kitchen paper
- Tongs
Common Mistakes to Avoid
- Overcrowding the pan: As mentioned, this is a cardinal sin for crispy skin. If the thighs are touching, they will steam each other. Give them at least 2 cm of space around each piece. Use two trays if needed, and rotate them halfway through cooking.
- Wrong temperature: Baking at too low a temperature will dry out the meat before the skin crisps. Too high, and the sugar in the glaze will burn before the chicken is cooked through. The two-temperature method (200°C then 220°C) is perfect for a deep cook followed by a rapid caramelisation.
- Skipping the rest time: Cutting into a hot chicken thigh immediately will cause all the precious juices to run out onto the plate, leaving you with dry meat. Resting for 5 minutes allows the muscle fibres to relax and reabsorb the juices, ensuring every bite is moist and tender.
Delicious Variations to Try
- Spicy Version: Add 1-2 teaspoons of chipotle chilli flakes or a finely chopped red chilli to the dry brine. For an extra kick, stir a tablespoon of harissa paste into the BBQ glaze. The heat cuts through the sweetness beautifully.
- Vegetarian/Vegan Option: Use large, firm portobello mushrooms or thick slices of aubergine. Brush them with olive oil, season well, and follow the same baking and glazing method. Reduce the initial bake time to 10 minutes, as they cook faster. The glaze will create the same stunning, sticky finish.
- Different Protein: This method works brilliantly with chicken drumsticks or bone-in chicken breasts. Adjust cooking times accordingly—drumsticks will need about 30 minutes total, while breasts may need 5-10 minutes less. Always use a meat thermometer to check for doneness.
What to Serve With Baked BBQ Chicken Thighs
- A crisp, fresh coleslaw with a tangy yoghurt dressing to cut through the richness.
- Fluffy, buttery mashed potatoes or a simple potato salad.
- Grilled corn on the cob slathered in herbed butter.
- A light, vibrant Fresh Greek Salad Recipe for a refreshing contrast.
- For a more substantial meal, serve alongside a creamy Chicken And Mashed Potatoes Recipe for the ultimate comfort food experience.
Still hungry for ideas? You might also love Easy Crispy Oven Baked Chicken, Protein Packed Oven Baked Chicken Tenders Recipe from our sister kitchens.
Frequently Asked Questions
Baked BBQ Chicken Thighs
Ingredients
Method
- Prepare the Dry Brine: Pat the chicken thighs completely dry with kitchen paper. This is non-negotiable—any moisture on the skin will prevent it from crisping. In a small bowl, mix the salt, smoked paprika, garlic powder, onion powder, and black pepper. Sprinkle this mixture evenly over all sides of the chicken. Place the thighs on a wire rack set over a baking tray and leave them uncovered in the fridge for at least 30 minutes, or up to 24 hours. You will notice the skin tighten and dry out slightly—this is the sound of success.
- Create the Glaze: In a medium bowl, whisk together the BBQ sauce, tomato purée, apple cider vinegar, Worcestershire sauce, and liquid smoke (if using). The colour should be a deep, rich mahogany, and the smell should be tangy and sweet. Set aside 3 tablespoons of this mixture for basting later.
- Preheat and Prepare: Preheat your oven to 200°C (180°C fan) or 400°F. Remove the chicken from the fridge and let it sit at room temperature for 15 minutes. Brush the thighs all over with the olive oil. You should see the oil sheen on the seasoned skin.
- Initial Bake: Place the chicken thighs skin-side up on the wire rack (still on the baking tray). Bake for 20 minutes. At this stage, the skin will be starting to turn a pale golden colour and will feel firm to the touch. The fat will be rendering, and you’ll hear a gentle sizzle.
- First Glaze: Remove the tray from the oven. Using a basting brush, generously coat each thigh with the reserved 3 tablespoons of glaze, being careful to cover the skin completely. Return to the oven for another 10 minutes. The glaze will begin to bubble and set, and the kitchen will smell incredible—sweet, smoky, and savoury.
- Second Glaze and Finish: After 10 minutes, brush on a second, thicker layer of the remaining glaze. Increase the oven temperature to 220°C (200°C fan) or 425°F. Bake for a final 8-12 minutes. Watch closely: the glaze should turn a deep, sticky, almost burnt-orange colour, and the edges of the skin will start to char slightly. This is your cue. The internal temperature of the thickest part of a thigh should read 74°C (165°F) on a meat thermometer.
- The Resting Ritual: Remove the tray from the oven and let the chicken rest on the wire rack for 5 minutes. Do not skip this step. The juices need to redistribute, and the glaze will set into a beautiful, glossy lacquer. The skin will be cracklingly crisp.
- Plate and Present: Transfer the thighs to a warmed serving platter. Sprinkle immediately with the fresh parsley or chives and a pinch of flaky sea salt. The contrast of the green herbs against the dark, glossy chicken is visually stunning. Serve with the reserved sauce on the side.
Notes
I’d love to hear how your restaurant-worthy Baked BBQ Chicken Thighs turned out! Did your guests rave? Did you try a fun variation? Drop a comment below and share your experience—your feedback might just inspire another home cook to create their own masterpiece. Happy cooking!