Crispy Cozy Copycat Raising Cane’s Chicken Tenders
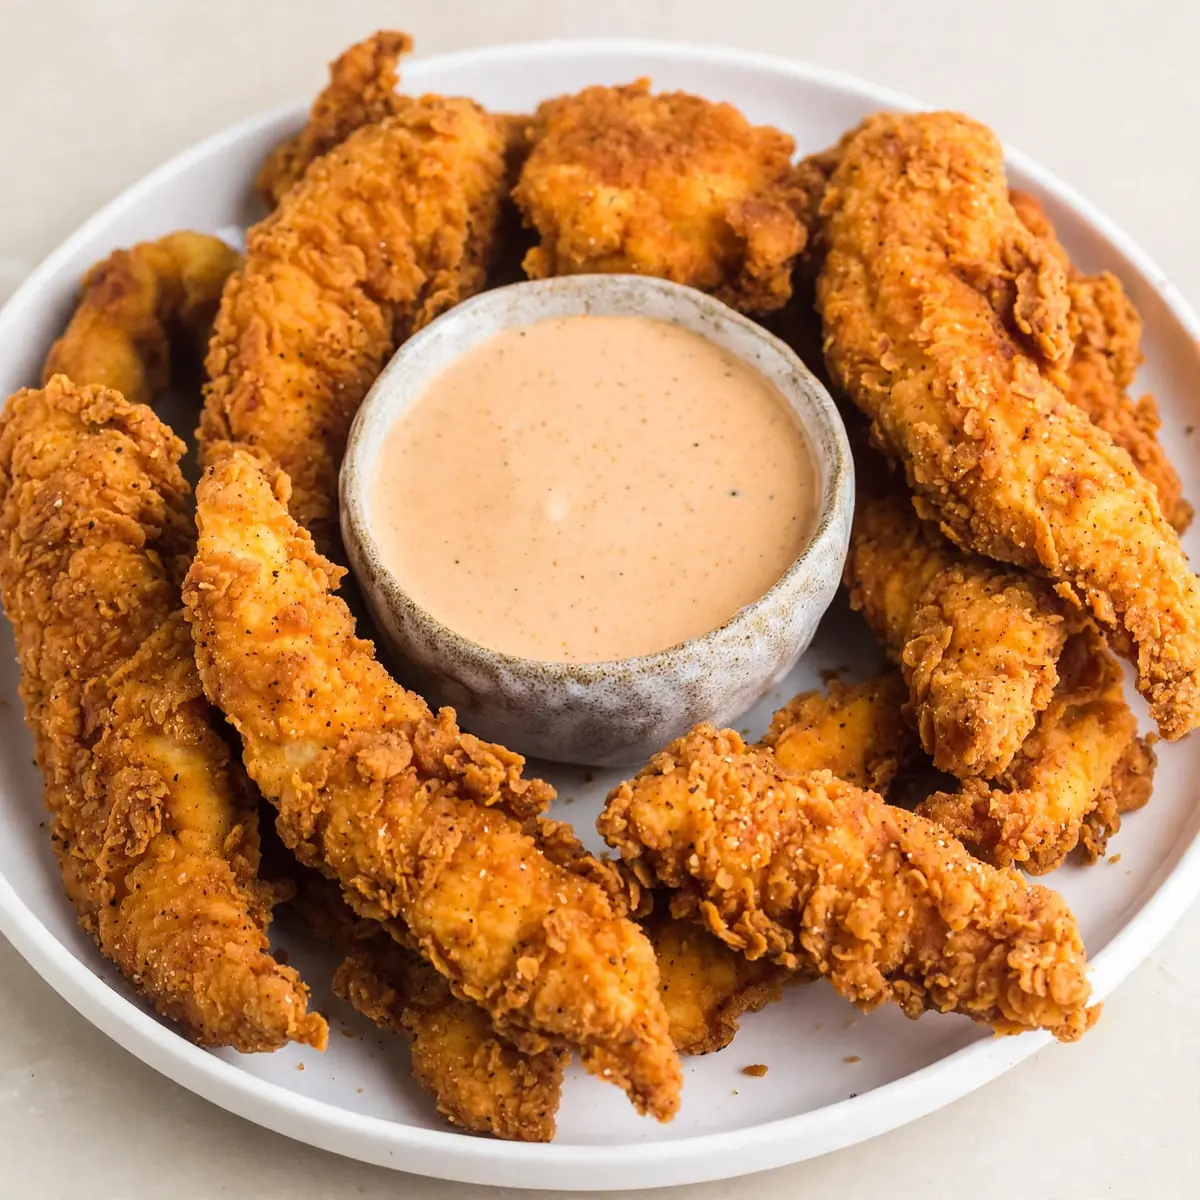
There are some weekends that call for nothing more than the deep, savoury scent of seasoned chicken hitting hot oil, the satisfying crunch of that first bite, and a leisurely afternoon spent pottering about the kitchen with no particular place to be. This is my definitive guide to recreating that iconic fast-food experience at home, focusing entirely on the sensory joy of making your own Copycat Raising Cane’s Chicken Tenders and Cane’s Sauce from scratch.
Recipe Overview
- Prep Time: 25 minutes
- Cook Time: 15 minutes
- Total Time: 40 minutes (plus 30 minutes optional marinating time)
- Servings: 4
- Difficulty: Easy
Why You’ll Love This Copycat Raising Cane’s Chicken Tenders and Cane’s Sauce
- Authentic crunch without the queue: You get that signature shatteringly crisp coating, achieved through a careful balance of seasoned flour and buttermilk, right in your own kitchen.
- A sauce that steals the show: The tangy, peppery, utterly addictive dipping sauce is the real star here, and it comes together in under two minutes with pantry staples.
- Perfect for a slow weekend ritual: This recipe invites you to take your time — whisking the brine, setting up your dredging station, and listening to the gentle sizzle as each tender hits the pan.
- Reliable results every time: After testing this recipe five times, I finally got it just right. The tips below will ensure your chicken stays juicy inside and golden outside on the first go.
- Endlessly adaptable: The base recipe is superb, but you can easily dial the heat up or down in the seasoning to suit your personal taste.

Ingredients You’ll Need
- 500g chicken breast fillets, cut into tenders (about 2.5cm thick)
- 250ml buttermilk
- 1 large egg
- 150g plain flour
- 50g cornflour
- 1½ teaspoons fine sea salt
- 1 teaspoon freshly ground black pepper
- 1 teaspoon smoked paprika
- 1 teaspoon garlic powder
- ½ teaspoon cayenne pepper (adjust to taste)
- ½ teaspoon dried oregano
- Vegetable or sunflower oil, for shallow frying
- For the Cane’s Sauce:
- 120ml good-quality mayonnaise
- 3 tablespoons tomato ketchup
- 1 tablespoon Worcestershire sauce
- 1½ teaspoons freshly ground black pepper
- ½ teaspoon garlic powder
- ½ teaspoon smoked paprika
Tip: For the most tender results, let the chicken sit in the buttermilk mixture for at least 30 minutes before coating. This helps the meat stay moist and gives the flour something to cling to.
How to Make Copycat Raising Cane’s Chicken Tenders and Cane’s Sauce
- Begin with the brine: In a medium bowl, whisk together the buttermilk and the egg until completely combined and slightly frothy. Add the chicken tenders, ensuring each piece is fully submerged. Cover the bowl and place it in the fridge for at least 30 minutes. You’ll notice the chicken absorbing the liquid, plumping up slightly.
- Build the coating: In a separate, wide, shallow dish, combine the plain flour, cornflour, salt, black pepper, smoked paprika, garlic powder, cayenne pepper, and dried oregano. Whisk the dry ingredients thoroughly until the spices are evenly distributed and the mixture smells wonderfully aromatic.
- Set up your dredging station: Remove the chicken from the fridge. Have your bowl of flour mixture, a clean plate, and your frying pan ready. Working one piece at a time, lift a tender from the buttermilk, letting the excess drip off. Place it into the flour mixture and press the coating firmly onto all sides. The chicken should look completely dry and dusty, with no wet patches showing through.
- Heat the oil: Pour oil into your large frying pan to a depth of about 1.5cm. Heat over a medium-high flame until a small piece of flour dropped in sizzles immediately. The oil should shimmer but not smoke — this usually takes about 3-4 minutes. You want a temperature around 175°C if using a thermometer.
- Fry in batches: Gently lay 3-4 coated tenders into the hot oil, being careful not to overcrowd the pan. You should hear a lively, steady sizzle. Fry for 4-5 minutes on the first side, until the underside is a deep golden brown and the edges look lacy and crisp.
- Flip and finish: Using tongs, carefully turn each tender over. Fry for another 3-4 minutes. The chicken should feel firm to the touch, and the coating will have developed a beautiful, craggy texture. The kitchen will be filled with the warm, peppery scent of fried chicken.
- Drain and rest: Transfer the cooked tenders to a wire rack set over a baking tray. This keeps them crisp, unlike paper towels which can steam the coating. Let them rest for 2-3 minutes while you prepare the sauce.
- Make the Cane’s Sauce: In a small bowl, stir together the mayonnaise, ketchup, Worcestershire sauce, black pepper, garlic powder, and smoked paprika. Whisk until the sauce is a uniform, pale coral colour and completely smooth. Taste and adjust the pepper if desired.
Tips From My Kitchen
- Don’t skip the buttermilk soak: This isn’t just for flavour — the acid in the buttermilk gently tenderises the chicken, breaking down proteins so the meat stays soft and juicy even after frying. A dry chicken tender is a sad thing, and this step is your insurance policy.
- Use a wire rack for draining: Friends always ask me why their homemade tenders go soggy so quickly. The answer is almost always resting them on kitchen paper. A wire rack allows air to circulate around the entire tender, keeping that hard-won crust shatteringly crisp for much longer.
- Mind your oil temperature: If the oil is too cool, the coating will absorb fat and become greasy. If it’s too hot, the outside will burn before the chicken cooks through. I recommend using a kitchen thermometer for the first batch, but you can also test by dropping a cube of bread into the oil — it should turn golden brown in about 60 seconds.
- Double-dredge for extra crunch: For an even thicker, more textured coating, dip the floured tender back into the buttermilk mixture and then into the flour a second time. This creates those wonderful craggy bits that fry up extra crisp. It’s entirely optional, but highly recommended for a truly indulgent result.
- Season the sauce ahead of time: The Cane’s Sauce benefits from a short rest. If you make it 15-20 minutes before serving, the flavours meld together beautifully, and the black pepper loses its raw edge. Give it a quick stir before serving.
Equipment You’ll Need
- Large frying pan or skillet
- Sharp knife and cutting board
- Mixing bowls (one large, one medium, one small)
- Wooden spoon or spatula
- Whisk
- Tongs
- Wire rack and baking tray
- Kitchen thermometer (optional, but helpful)
What to Serve With Copycat Raising Cane’s Chicken Tenders and Cane’s Sauce
- A generous pile of crinkle-cut chips, seasoned with a little extra salt and smoked paprika.
- Buttered white bread or soft rolls, perfect for mopping up any extra sauce.
- A simple coleslaw with a tangy, vinegar-based dressing to cut through the richness.
- Pickled cucumber spears for a bright, acidic contrast.
Still hungry for ideas? You might also love Crispy Buttermilk Chicken Tenders, Red Robin Campfire Sauce Copycat from our sister kitchens.
Frequently Asked Questions
Copycat Raising Cane's Chicken Tenders and Cane's Sauce
Ingredients
Method
- Begin with the brine: In a medium bowl, whisk together the buttermilk and the egg until completely combined and slightly frothy. Add the chicken tenders, ensuring each piece is fully submerged. Cover the bowl and place it in the fridge for at least 30 minutes. You'll notice the chicken absorbing the liquid, plumping up slightly.
- Build the coating: In a separate, wide, shallow dish, combine the plain flour, cornflour, salt, black pepper, smoked paprika, garlic powder, cayenne pepper, and dried oregano. Whisk the dry ingredients thoroughly until the spices are evenly distributed and the mixture smells wonderfully aromatic.
- Set up your dredging station: Remove the chicken from the fridge. Have your bowl of flour mixture, a clean plate, and your frying pan ready. Working one piece at a time, lift a tender from the buttermilk, letting the excess drip off. Place it into the flour mixture and press the coating firmly onto all sides. The chicken should look completely dry and dusty, with no wet patches showing through.
- Heat the oil: Pour oil into your large frying pan to a depth of about 1.5cm. Heat over a medium-high flame until a small piece of flour dropped in sizzles immediately. The oil should shimmer but not smoke — this usually takes about 3-4 minutes. You want a temperature around 175°C if using a thermometer.
- Fry in batches: Gently lay 3-4 coated tenders into the hot oil, being careful not to overcrowd the pan. You should hear a lively, steady sizzle. Fry for 4-5 minutes on the first side, until the underside is a deep golden brown and the edges look lacy and crisp.
- Flip and finish: Using tongs, carefully turn each tender over. Fry for another 3-4 minutes. The chicken should feel firm to the touch, and the coating will have developed a beautiful, craggy texture. The kitchen will be filled with the warm, peppery scent of fried chicken.
- Drain and rest: Transfer the cooked tenders to a wire rack set over a baking tray. This keeps them crisp, unlike paper towels which can steam the coating. Let them rest for 2-3 minutes while you prepare the sauce.
- Make the Cane's Sauce: In a small bowl, stir together the mayonnaise, ketchup, Worcestershire sauce, black pepper, garlic powder, and smoked paprika. Whisk until the sauce is a uniform, pale coral colour and completely smooth. Taste and adjust the pepper if desired.
Notes
This recipe has become my weekend kitchen ritual, a way to slow down and savour the process as much as the meal itself. I’d love to hear how your own batch turns out — drop a comment below and let me know if you’ve added your own twist to the sauce or the coating. If you enjoy this kind of hearty, satisfying meal, you might also appreciate my Creamy Lemon Herb Chicken Thighs for another comforting chicken dinner, or a lighter option like this Fluffy Egg White Omelette for a weekend brunch. Happy cooking!