Juicy Air Fryer Whole Roasted Chicken
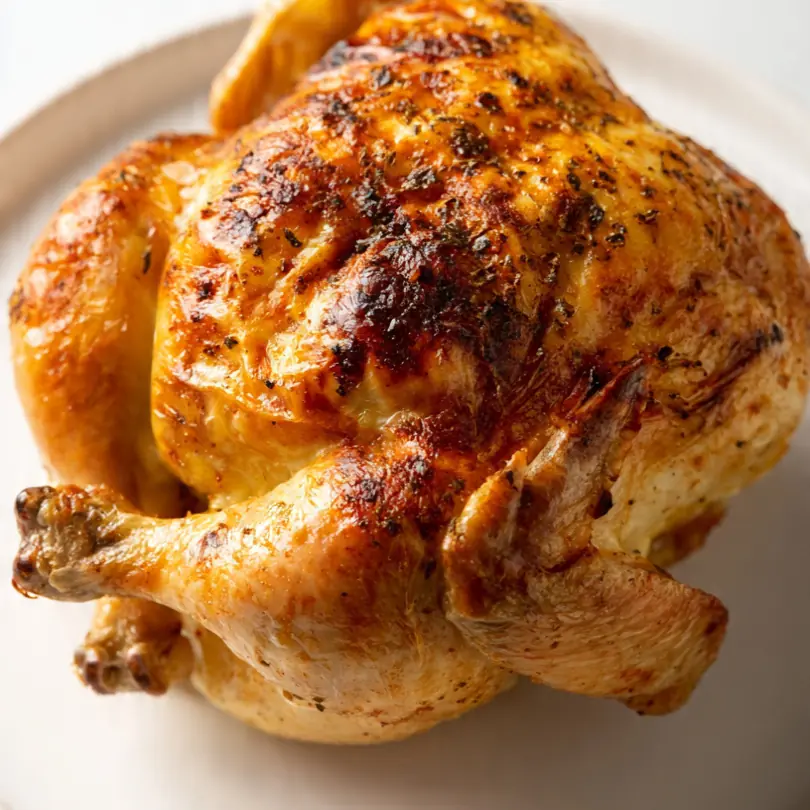
Welcome to my kitchen! Today, we’re embarking on a journey to create the most succulent, beautifully golden whole roasted chicken right in your air fryer. Forget soggy skin or dry breast meat; this method guarantees a truly delicious result every single time.
Recipe Overview
- Prep time: 25 minutes (plus 1-4 hours brining, optional)
- Cook time: 60-75 minutes
- Total time: 1 hour 25 minutes (excluding brining)
- Servings: 4-6 people
- Difficulty: Moderate
Why You’ll Love This Juicy Air Fryer Whole Roasted Chicken
- Achieve incredibly crispy skin and unbelievably juicy meat with minimal fuss.
- The air fryer circulates heat efficiently, ensuring even cooking and a consistent golden finish.
- It’s a fantastic way to prepare a substantial meal that feels special without hours of oven time.
- This recipe is wonderfully versatile, allowing for endless variations with different herbs and spices.
- You’ll have a show-stopping centrepiece for your family dinner or a delightful weekend treat, perhaps alongside a comforting side like Classic Green Bean Casserole.kirarecipes.com/new-york-cheesecake/”>New York Cheesecake.
Ingredients You’ll Need
- 1 whole chicken, approximately 1.5-1.8 kg (about 3.3-4 lbs)
- 2 tablespoons olive oil
- 1 tablespoon dried oregano
- 1 tablespoon smoked paprika
- 1 teaspoon garlic powder
- 1 teaspoon onion powder
- ½ teaspoon dried thyme
- ½ teaspoon black pepper
- 1-2 teaspoons sea salt (adjust to taste, more if not brining)
- 1 lemon, halved
- 2 sprigs fresh rosemary
- 2 sprigs fresh thyme
- 1 medium onion, quartered (optional, for the cavity)
- 1 head garlic, cut in half horizontally (optional, for the cavity)
Tip: Using fresh, good quality herbs like rosemary and thyme makes a noticeable difference to the aromatic depth of your roasted chicken. Don’t be shy with the seasoning; it’s key to a flavourful bird!
How to Make Juicy Air Fryer Whole Roasted Chicken
- Prepare the Chicken: Firstly, remove your chicken from its packaging and pat it thoroughly dry with kitchen paper, inside and out. This step is crucial for crispy skin! You’ll feel the skin become much less tacky to the touch. Let it sit at room temperature for about 20-30 minutes if possible, as this helps with even cooking.
- Season the Chicken: In a small bowl, combine the olive oil, oregano, smoked paprika, garlic powder, onion powder, dried thyme, black pepper, and sea salt. Mix until it forms a thick paste. Rub this mixture generously all over the chicken, making sure to get into every crevice and even under the skin of the breast if you can gently lift it. Your hands will be coated in a beautiful reddish-orange spice blend, and the chicken will already smell wonderfully aromatic.
- Stuff and Truss (Optional but Recommended): Place the halved lemon, fresh rosemary sprigs, fresh thyme sprigs, quartered onion, and halved garlic head into the chicken’s cavity. This will infuse the meat with incredible flavour as it cooks. If you have kitchen twine, truss the chicken by tying the legs together and tucking the wing tips under the body. This helps the chicken cook more evenly and keeps it compact, making it easier to fit into the air fryer basket. The chicken will look neat and ready for roasting.
- Preheat and Position: Preheat your air fryer to 180°C (350°F) for 5 minutes. Carefully place the seasoned and trussed chicken breast-side down in the air fryer basket. You might hear a gentle sizzle as it hits the hot surface. Ensure there’s enough space around it for air to circulate; if your air fryer is smaller, you might need to adjust the chicken slightly.
- First Cook Cycle: Air fry the chicken breast-side down for 30 minutes. After this time, you’ll notice the skin starting to brown, turning a light golden hue, and a delicious roasted aroma will begin to fill your kitchen. Carefully flip the chicken over so it’s now breast-side up.
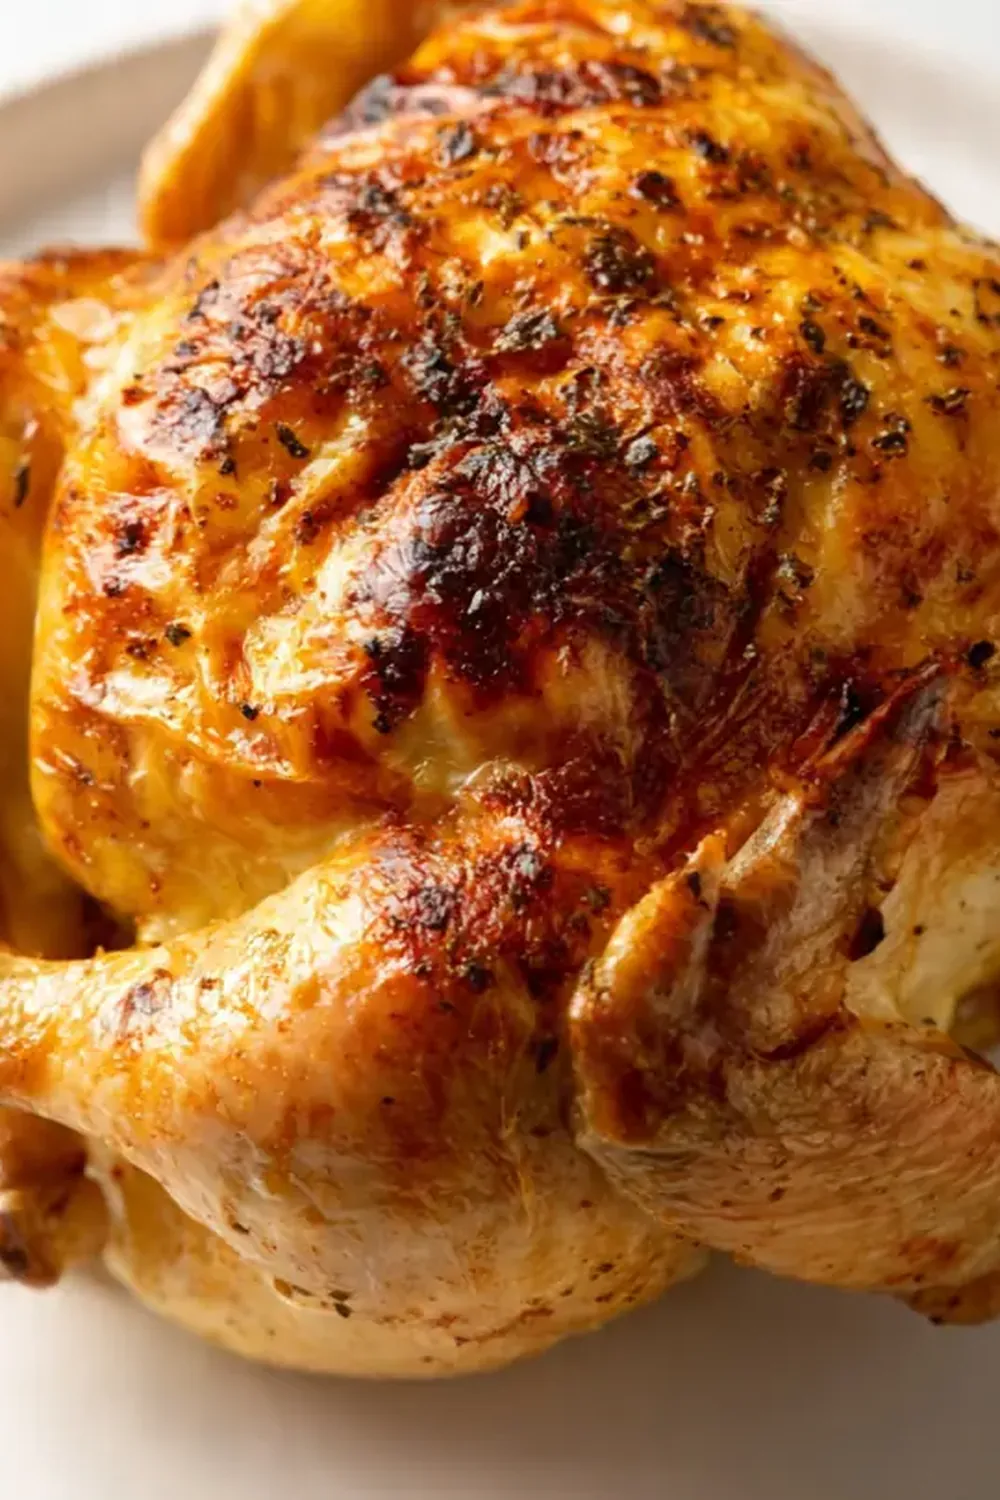
- Second Cook Cycle: Continue to air fry for another 30-45 minutes at 180°C (350°F). Keep an eye on it during this stage. The skin should gradually deepen to a rich, dark golden-brown, becoming wonderfully crisp. You might hear the skin crackling slightly, indicating its crispness.
- Check for Doneness: To ensure the chicken is thoroughly cooked, insert a meat thermometer into the thickest part of the thigh, avoiding the bone. The internal temperature should register 74°C (165°F). The juices running from the chicken when pierced should also be clear, not pink. The skin will be gloriously bronzed and feel firm and crisp to the touch.
- Rest the Chicken: Once cooked, carefully remove the chicken from the air fryer basket and place it on a cutting board or serving platter. Tent it loosely with foil and let it rest for at least 10-15 minutes. This resting period is vital; it allows the juices to redistribute throughout the meat, resulting in an incredibly juicy and tender chicken. You’ll notice the chicken relaxes and settles, and the aroma will deepen.
- Carve and Serve: Carve the chicken into portions and serve immediately. Enjoy the fruits of your labour!
Tips From My Kitchen
- Brine Your Chicken for Ultimate Juiciness: I’ve been making this for over 6 years, and brining is the secret weapon for a truly moist bird. Dissolve 60g (about 4 tablespoons) of salt in 1 litre of water with a few bay leaves and peppercorns. Submerge the chicken for 1-4 hours in the fridge. The salt helps the chicken retain moisture, ensuring it stays incredibly juicy even after roasting. Remember to rinse and pat dry thoroughly after brining.
- Pat Dry, Pat Dry, Pat Dry: This cannot be stressed enough! A dry surface is paramount for achieving that coveted crispy skin. Moisture on the skin creates steam, which prevents browning and crisping. So, grab plenty of kitchen paper and give that chicken a good, thorough pat-down, inside and out, before seasoning.
- Don’t Skimp on the Seasoning: Chicken can be quite bland on its own, so don’t be afraid to season generously. The spices and herbs are what build layers of flavour. Ensure you rub the seasoning all over, including under the wings and legs, and even gently under the breast skin. This ensures every bite is packed with flavour.
- Use a Meat Thermometer: This is your best friend for perfectly cooked chicken and avoiding over or under-cooking. Visual cues are helpful, but an internal temperature reading of 74°C (165°F) in the thickest part of the thigh is the only way to be certain. It takes the guesswork out and guarantees safety and optimal texture.
- The Importance of Resting: After all that cooking, it’s tempting to carve right away, but resist! Resting the chicken, tented with foil, allows the muscle fibres to relax and reabsorb the juices that have been pushed to the centre during cooking. Skipping this step means all those lovely juices will run out onto your cutting board, leaving you with drier meat.
- Trussing for Even Cooking: Tying the legs together and tucking the wing tips under the body helps to create a more compact, uniform shape. This ensures that the thinner parts (like the wing tips and ends of the drumsticks) don’t overcook and dry out before the thicker breast and thigh meat are done. It also makes the chicken easier to handle and fit into the air fryer.
Equipment You’ll Need
- Air Fryer (large enough for your chicken)
- Sharp knife and cutting board
- Mixing bowls
- Kitchen paper
- Meat thermometer
- Kitchen twine (optional, for trussing)
Common Mistakes to Avoid
- Overcrowding the air fryer basket: If your chicken is too large for your air fryer, or if you try to cook other items alongside it, the air won’t circulate properly. This leads to uneven cooking, soggy skin, and a longer cooking time. Ensure there’s ample space around the chicken for optimal air flow.
- Not preheating the air fryer: Just like an oven, an air fryer benefits from preheating. Placing the chicken in a hot air fryer helps to immediately crisp the skin and kick-start the cooking process, leading to a better texture and more even cooking.
- Skipping the rest time: As mentioned in my tips, resting is crucial. When meat cooks, its fibres contract and push moisture to the centre. Resting allows these fibres to relax and redistribute the juices throughout the entire bird, resulting in a much juicier and more flavourful chicken.
- Not using a meat thermometer: Guessing if your chicken is cooked can lead to dry, overcooked meat or, worse, undercooked and unsafe meat. A meat thermometer is an inexpensive tool that guarantees your chicken is cooked to the perfect internal temperature of 74°C (165°F).
Delicious Variations to Try
- Spicy Version: For those who love a bit of heat, add 1-2 teaspoons of chilli powder or a pinch of cayenne pepper to the spice rub. You could also rub a little hot sauce under the skin before applying the dry rub for an extra kick.
- Herbaceous Delight: Instead of the standard dried herbs, experiment with a blend of fresh herbs. Finely chop fresh rosemary, sage, and thyme and mix them with the olive oil, along with a bit of lemon zest. Stuff extra sprigs into the cavity for an even more potent aroma.
- Citrus & Garlic Infusion: Roast the chicken with extra lemon slices and several cloves of garlic (smashed, not peeled) tucked into the cavity and around the chicken in the air fryer basket. The citrus brightens the flavour, and the garlic offers a lovely sweetness.
What to Serve With Juicy Air Fryer Whole Roasted Chicken
- Crispy Air Fryer Roast Potatoes
- Steamed green beans with toasted almonds
- Creamy mashed potatoes
- Garden salad with a zesty vinaigrette
- Roasted root vegetables like carrots and parsnips
- Homemade gravy (made with the chicken drippings from the air fryer, if any)
Frequently Asked Questions
How do I ensure the skin is extra crispy?
The key to extra crispy skin is ensuring the chicken is thoroughly patted dry before seasoning. You can even leave it uncovered in the fridge for an hour or two before cooking to further dry the skin. A light brush of oil and a slightly higher finishing temperature (for the last 10 minutes) can also help achieve a beautiful crunch.
Can I use a smaller chicken in the air fryer?
Absolutely! A smaller chicken (around 1.2-1.5 kg) will cook faster, so keep a close eye on the internal temperature. Adjust the cooking time down by 10-15 minutes, checking for doneness from around the 50-minute mark.
What if my chicken doesn’t fit in the air fryer?
If your whole chicken is too large for your air fryer basket, you can spatchcock it (remove the backbone and flatten it). This makes it fit better and also helps it cook more evenly and quickly. Alternatively, consider cutting the chicken into halves or quarters before air frying.
How do I store leftover roasted chicken?
Leftover roasted chicken should be cooled completely, then stored in an airtight container in the refrigerator for up to 3-4 days. It’s wonderful for sandwiches, salads, or adding to soups and stews.
Can I use a different spice rub?
Definitely! This recipe is incredibly versatile. Feel free to experiment with your favourite spice blends, such as a lemon-herb rub, a smoky chilli blend, or even a simple blend of salt, pepper, and garlic powder. I make this at least once a week – it’s become a family favourite, and I often change up the rub!
Juicy Air Fryer Whole Roasted Chicken
This recipe delivers an incredibly juicy and tender whole roasted chicken with delightfully crispy skin, all achieved in your air fryer. Seasoned with a robust blend of herbs and spices, and infused with aromatics like lemon, rosemary, and garlic, it’s a flavorful and surprisingly easy main course.
Ingredients
Method
- Prepare the Chicken: Firstly, remove your chicken from its packaging and pat it thoroughly dry with kitchen paper, inside and out. This step is crucial for crispy skin! You’ll feel the skin become much less tacky to the touch. Let it sit at room temperature for about 20-30 minutes if possible, as this helps with even cooking.
- Season the Chicken: In a small bowl, combine the olive oil, oregano, smoked paprika, garlic powder, onion powder, dried thyme, black pepper, and sea salt. Mix until it forms a thick paste. Rub this mixture generously all over the chicken, making sure to get into every crevice and even under the skin of the breast if you can gently lift it. Your hands will be coated in a beautiful reddish-orange spice blend, and the chicken will already smell wonderfully aromatic.
- Stuff and Truss (Optional but Recommended): Place the halved lemon, fresh rosemary sprigs, fresh thyme sprigs, quartered onion, and halved garlic head into the chicken’s cavity. This will infuse the meat with incredible flavour as it cooks. If you have kitchen twine, truss the chicken by tying the legs together and tucking the wing tips under the body. This helps the chicken cook more evenly and keeps it compact, making it easier to fit into the air fryer basket. The chicken will look neat and ready for roasting.
- Preheat and Position: Preheat your air fryer to 180°C (350°F) for 5 minutes. Carefully place the seasoned and trussed chicken breast-side down in the air fryer basket. You might hear a gentle sizzle as it hits the hot surface. Ensure there’s enough space around it for air to circulate; if your air fryer is smaller, you might need to adjust the chicken slightly.
- First Cook Cycle: Air fry the chicken breast-side down for 30 minutes. After this time, you’ll notice the skin starting to brown, turning a light golden hue, and a delicious roasted aroma will begin to fill your kitchen. Carefully flip the chicken over so it’s now breast-side up.
- Second Cook Cycle: Continue to air fry for another 30-45 minutes at 180°C (350°F). Keep an eye on it during this stage. The skin should gradually deepen to a rich, dark golden-brown, becoming wonderfully crisp. You might hear the skin crackling slightly, indicating its crispness.
- Check for Doneness: To ensure the chicken is thoroughly cooked, insert a meat thermometer into the thickest part of the thigh, avoiding the bone. The internal temperature should register 74°C (165°F). The juices running from the chicken when pierced should also be clear, not pink. The skin will be gloriously bronzed and feel firm and crisp to the touch.
- Rest the Chicken: Once cooked, carefully remove the chicken from the air fryer basket and place it on a cutting board or serving platter. Tent it loosely with foil and let it rest for at least 10-15 minutes. This resting period is vital; it allows the juices to redistribute throughout the meat, resulting in an incredibly juicy and tender chicken. You’ll notice the chicken relaxes and settles, and the aroma will deepen.
- Carve and Serve: Carve the chicken into portions and serve immediately. Enjoy the fruits of your labour!
Notes
Thoroughly patting the chicken dry is crucial for crispy skin. Letting it sit at room temperature for 20-30 minutes helps with even cooking. Trussing is recommended for better shape and even cooking in the air fryer. Resting the chicken after cooking is vital for juicy results.
There you have it – a truly juicy and flavourful whole roasted chicken, made effortlessly in your air fryer. I hope you enjoy making and, more importantly, eating this as much as I do. Do let me know in the comments below if you try it and what variations you come up with!