Cast Iron Skillet Cornbread Stuffing
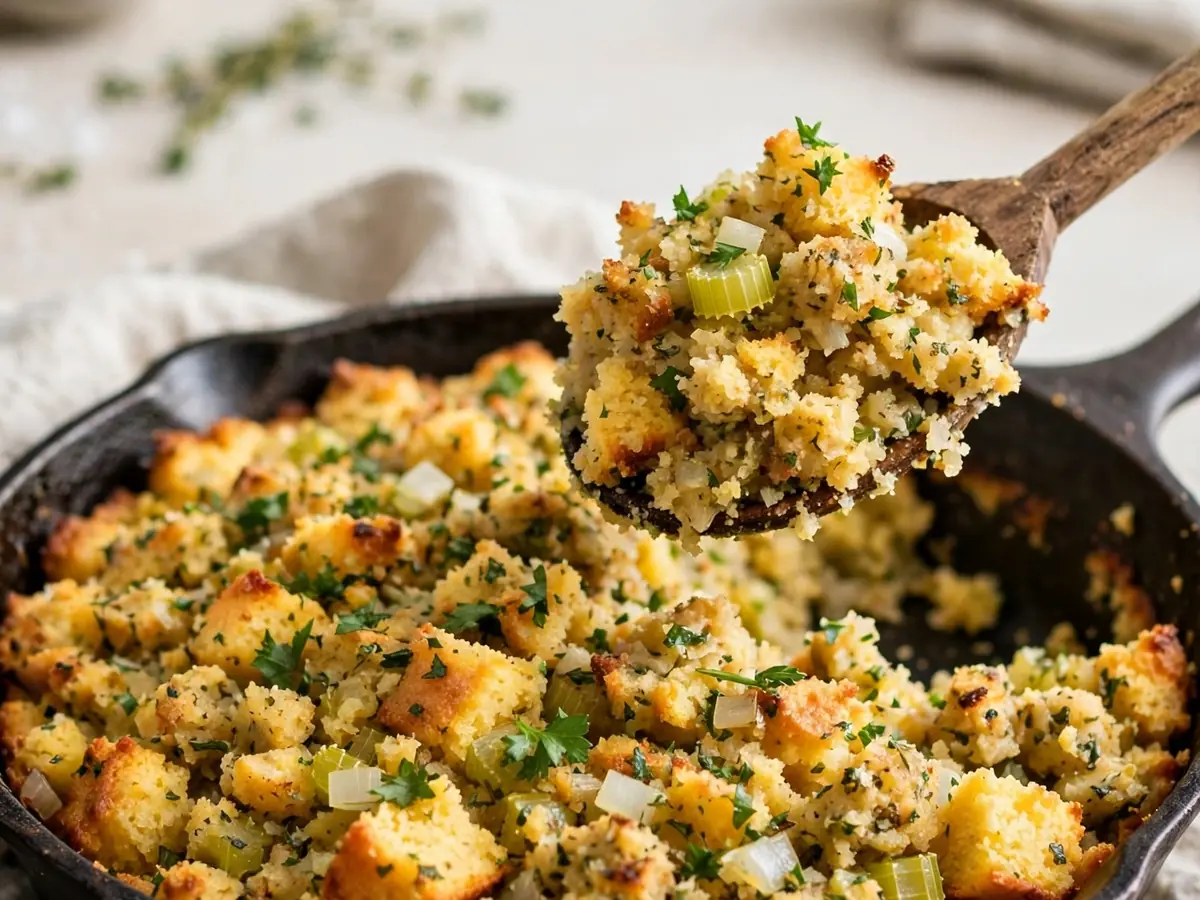
Cornbread stuffing baked in a cast iron skillet is one of those dishes that feels like it has always belonged on the table. The skillet does two jobs at once: it toasts the cornbread into crisp-edged cubes and then becomes the baking vessel, giving the finished stuffing a deep golden crust on the bottom and sides while the center stays tender and custardy. This version is built from scratch — no boxed mix, no stale-bread guesswork — with precise quantities so it works the first time and every time after.
The recipe makes enough to serve 8 to 10 people as a side dish, which means it fits comfortably alongside a roast chicken or a holiday turkey. It is savory, lightly herby, and just rich enough to feel celebratory without being heavy. If you have never made stuffing from a skillet cornbread base, the method below walks through each stage: mixing and baking the cornbread, drying and cubing it, sweating the aromatics, and assembling everything so the texture lands exactly where you want it — crisp top, custardy middle, and a crust that releases cleanly from the pan.
Why Bake Cornbread Stuffing in a Cast Iron Skillet
A cast iron skillet is not a gimmick here; it changes the result in three concrete ways. First, cast iron holds heat evenly and releases it slowly, so the bottom of the stuffing browns instead of steaming. Second, the pan can go from stovetop to oven without transferring anything, which means the aromatics can be sautéed directly in the same vessel the stuffing bakes in — one pan, fewer dishes, and no lost browned bits. Third, the seasoned surface of a well-cared-for skillet contributes a subtle toasted flavor that pairs naturally with cornmeal.
A 12-inch skillet is the right size for this quantity. If yours is 10 inches, the stuffing will be deeper and will need a few extra minutes in the oven; if it is 14 inches, expect a shallower layer and a shorter bake. Either way, the visual cue — a deep golden top and a center that springs back when pressed — matters more than the clock.
Ingredients
For the Skillet Cornbread
- 1 1/2 cups medium-grind yellow cornmeal (210 g)
- 1 cup all-purpose flour (125 g)
- 3 tablespoons granulated sugar (38 g)
- 1 tablespoon baking powder
- 1/2 teaspoon baking soda
- 1 1/4 teaspoons fine sea salt
- 2 large eggs, at room temperature
- 1 1/2 cups buttermilk (360 ml)
- 6 tablespoons unsalted butter, melted and slightly cooled (85 g)
- 2 tablespoons bacon fat or neutral oil, for the skillet
For the Stuffing
- 4 tablespoons unsalted butter (57 g), divided
- 1 large yellow onion, finely diced (about 1 1/2 cups / 200 g)
- 3 medium celery ribs, finely diced (about 1 cup / 120 g)
- 3 garlic cloves, minced
- 1 tablespoon finely chopped fresh sage (or 1 1/2 teaspoons dried sage)
- 1 tablespoon finely chopped fresh thyme leaves (or 1 teaspoon dried thyme)
- 1/2 teaspoon freshly ground black pepper
- 1/4 teaspoon ground nutmeg
- 2 1/4 cups low-sodium chicken or vegetable broth (530 ml), plus up to 1/4 cup more if needed
- 2 large eggs, lightly beaten
- 1/3 cup chopped fresh flat-leaf parsley (15 g)
- 1 teaspoon fine sea salt, or to taste (adjust depending on broth salinity)
Yield: 8 to 10 side-dish servings. Active time: about 35 minutes. Total time: about 2 hours 15 minutes, including cooling and drying time for the cornbread.
Equipment
- 12-inch cast iron skillet (well seasoned)
- Large mixing bowls (two)
- Whisk and rubber spatula
- Chef’s knife and cutting board
- Wooden spoon
- Measuring cups and spoons, or a digital scale
- Rimmed baking sheet (optional, for drying the cornbread cubes)
Step-by-Step Instructions
Stage 1: Bake the Cornbread (Day Before or Morning Of)
- Preheat the oven to 400°F (200°C). Place the 12-inch cast iron skillet in the oven with the 2 tablespoons of bacon fat or oil while the oven heats, at least 10 minutes.
- In a large bowl, whisk together the cornmeal, flour, sugar, baking powder, baking soda, and salt until evenly combined.
- In a second bowl, whisk the eggs, buttermilk, and melted butter until smooth. Pour the wet mixture into the dry ingredients and stir with a spatula just until no dry streaks remain. The batter will be thick but pourable; a few small lumps are fine.
- Carefully remove the hot skillet from the oven, swirl the fat to coat the bottom and sides, and pour in the batter, spreading it evenly with the spatula.
- Bake for 22 to 26 minutes, until the top is golden brown and a toothpick inserted in the center comes out clean. The edges will pull slightly away from the pan.
- Cool in the skillet for 15 minutes, then turn the cornbread out onto a rack to cool completely, about 45 minutes. Do not skip full cooling; warm cornbread crumbles when cubed.
Stage 2: Dry and Cube the Cornbread
- Cut the cooled cornbread into 3/4-inch cubes. You should have roughly 9 to 10 cups of cubes.
- Spread the cubes on a rimmed baking sheet in a single layer. Leave them uncovered at room temperature for 4 to 8 hours, or overnight, until they feel dry and slightly firm on the outside but still tender inside. If you are short on time, bake at 250°F (120°C) for 20 to 25 minutes, stirring once, until dried but not browned.
Stage 3: Build the Stuffing
- Preheat the oven to 375°F (190°C). Wipe the skillet clean and return it to the stovetop over medium heat.
- Melt 3 tablespoons of the butter in the skillet. Add the onion and celery and cook, stirring occasionally, for 7 to 9 minutes, until softened and translucent but not browned. Add the garlic, sage, thyme, pepper, and nutmeg and cook for 1 minute more, until fragrant.
- Scrape the vegetable mixture into a very large bowl. Add the dried cornbread cubes and toss gently with a spatula to distribute the aromatics without crushing the cubes.
- In a separate bowl, whisk together the broth, beaten eggs, parsley, and salt. Pour this over the cornbread mixture and fold gently until every cube is moistened. The mixture should be damp and cohesive but not soggy; if it looks dry, add broth 2 tablespoons at a time, up to 1/4 cup.
- Melt the remaining 1 tablespoon butter in the skillet over medium heat, swirling to coat the bottom and sides. Spoon the stuffing into the skillet and press it into an even layer with the back of a spoon. Do not pack it tightly — a loose, airy layer bakes more evenly.
- Bake uncovered for 35 to 40 minutes, until the top is deep golden brown and the center is set and springs back when lightly pressed. If the top browns faster than the center sets, tent loosely with foil after 30 minutes.
- Rest the skillet on a rack for 10 minutes before serving. Spoon directly from the pan, or run a thin spatula around the edge and under the bottom to lift out wedges.
Tips for the Best Skillet Cornbread Stuffing
- Dry the cornbread properly. The single biggest factor in texture is how dry the cubes are before assembly. Fresh cornbread turns to mush; well-dried cubes absorb broth and hold their shape.
- Season the broth, not just the bread. Because the cornbread already contains salt, taste the broth-and-egg mixture before pouring and adjust. If your broth is salty, reduce the added teaspoon to 1/2 teaspoon.
- Do not overmix. Fold rather than stir. You want cubes, not paste.
- Watch the moisture level. The stuffing should look wet but not pooled. If liquid collects at the edges of the pan before baking, stir in a handful of extra dried cubes.
- Reheat in the skillet. Leftovers reheat beautifully at 325°F (165°C) for 15 to 20 minutes with a splash of broth to re-moisten.
Practical Substitutions
- No buttermilk: Stir 1 tablespoon lemon juice or white vinegar into 1 1/2 cups whole milk and let stand 10 minutes.
- No fresh herbs: Use 1 1/2 teaspoons dried sage and 1 teaspoon dried thyme in place of the fresh amounts.
- Vegetarian: Use vegetable broth and replace the bacon fat with neutral oil or butter. Check that your broth is not overly salty.
- Add-ins: Up to 1 cup of cooked, crumbled sausage, 3/4 cup of chopped toasted pecans, or 1 cup of sautéed sliced mushrooms can be folded in with the aromatics. Reduce the broth by 2 tablespoons if adding sausage.
- Different pan: A 9×13-inch baking dish works if you do not have a skillet; grease it well and bake at the same temperature, checking at 30 minutes.
Storage and Make-Ahead Guidance
Make ahead: The cornbread can be baked and cubed up to 2 days in advance and stored uncovered at room temperature. The assembled, unbaked stuffing can be covered and refrigerated for up to 24 hours; bring it to room temperature for 30 minutes before baking and add 5 to 8 minutes to the oven time.
Refrigerating leftovers: Cool the stuffing completely, transfer to an airtight container, and refrigerate for up to 4 days. Reheat covered at 325°F (165°C) for 15 to 20 minutes, or in portions in the microwave with a splash of broth.
Freezing: Baked stuffing freezes well for up to 2 months. Thaw overnight in the refrigerator, then reheat covered at 325°F (165°C) for 25 to 30 minutes, uncovering for the last 10 minutes to crisp the top. Do not freeze the unbaked assembled mixture; the cubes break down.
For more everyday cooking ideas and kitchen-tested recipes, browse the Kira Recipes blog, and if you enjoy savory comfort-food baking, the meatloaf with Stove Top stuffing recipe is a natural companion dish for a cozy dinner.
Frequently Asked Questions
Can I use store-bought cornbread for this stuffing?
Yes. You will need about 9 to 10 cups of 3/4-inch cubes, roughly equivalent to a 9×13-inch pan of cornbread. Cut it into cubes and dry it exactly as directed — store-bought cornbread is often sweeter and more tender, so it benefits from a longer drying time, ideally overnight at room temperature. Taste the broth mixture before baking, since purchased cornbread may already be quite sweet and salty.
How do I know when the stuffing is fully baked?
The top should be deep golden brown and the center should look set rather than wet. Press the center gently with a finger or the back of a spoon; it should spring back and feel firm, not squishy. If the center still looks glossy and loose after 35 minutes, bake 5 to 8 minutes longer, tenting the top with foil if it is already dark. The stuffing will continue to firm up as it rests for 10 minutes after coming out of the oven.
Can I bake this stuffing inside the turkey?
It is not recommended for food-safety reasons, because the stuffing must reach a safe internal temperature before the turkey is done, which often means overcooking the bird. This recipe is designed as a skillet-baked side dish. If you want the flavor of turkey-seasoned stuffing, spoon a few tablespoons of pan drippings over the top before baking, or stir 1/2 cup of cooked, crumbled turkey sausage into the mixture.
My stuffing came out dry — what went wrong?
Dryness usually comes from over-dried cornbread, a low-moisture broth, or baking uncovered for too long. Next time, measure the broth carefully, add it gradually, and stop when the cubes are damp but not swimming. If you are reheating leftovers, sprinkle 2 to 3 tablespoons of broth over the top, cover with foil, and reheat at 325°F (165°C) until warmed through. A tablespoon of melted butter brushed over the top before reheating also restores richness.
Can I make this recipe gluten-free?
Yes. Replace the all-purpose flour with a 1-to-1 gluten-free baking blend and use a gluten-free cornmeal; check the label, since cornmeal can be processed in facilities that handle wheat. Use gluten-free broth as well. The texture will be slightly more crumbly, so handle the cubes gently when folding and consider reducing the broth by 2 tablespoons to prevent sogginess.
How far in advance can I assemble the stuffing before baking?
You can assemble the unbaked stuffing up to 24 hours ahead. Cover the skillet tightly and refrigerate. Before baking, let it sit at room temperature for 30 minutes, then bake as directed, adding 5 to 8 minutes to the total time. If you prefer to prep even earlier, bake and cube the cornbread up to 2 days ahead and keep the cubes uncovered at room temperature; assemble and bake on the day you plan to serve it for the best texture.