Honey Garlic Baked Chicken Thighs
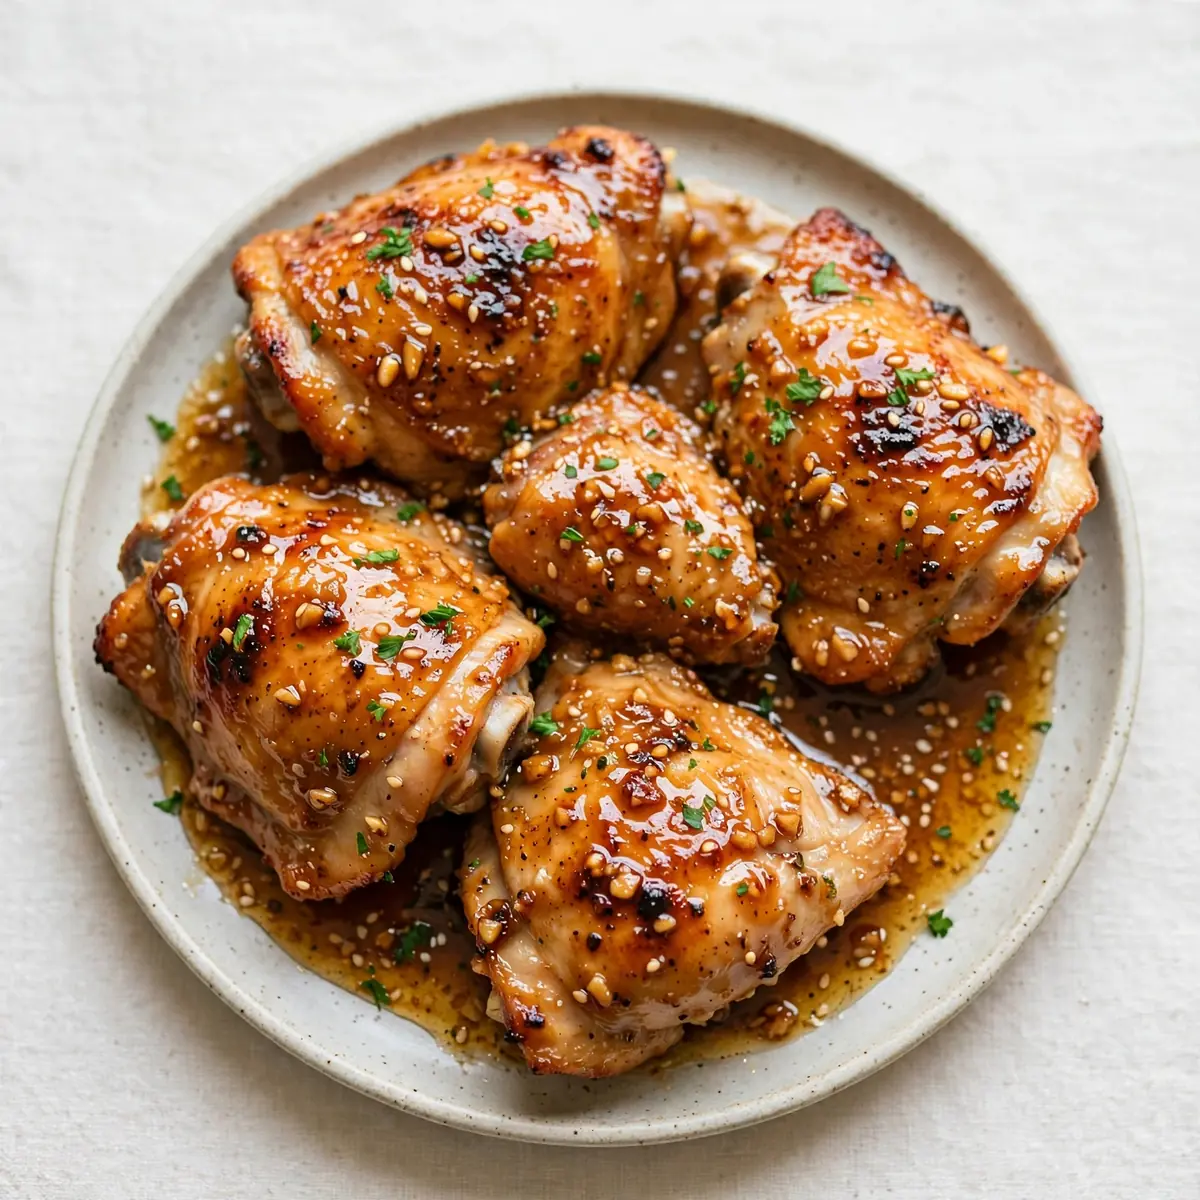
I’ll never forget the first time I served these Honey Garlic Baked Chicken Thighs to dinner guests. I was aiming for something that looked like it belonged on a tasting menu but required none of the fuss. The sauce glazed the chicken with a glossy, lacquered finish, and the golden skin cracked under the fork. That evening, I realised that a humble chicken thigh, treated with a little care, could steal the show from any roast.
Recipe Overview
- Prep time: 15 minutes
- Cook time: 40–45 minutes
- Total time: 55–60 minutes
- Servings: 4 generous portions
- Difficulty: Easy (but looks impressive)
Why You’ll Love This Honey Garlic Baked Chicken Thighs
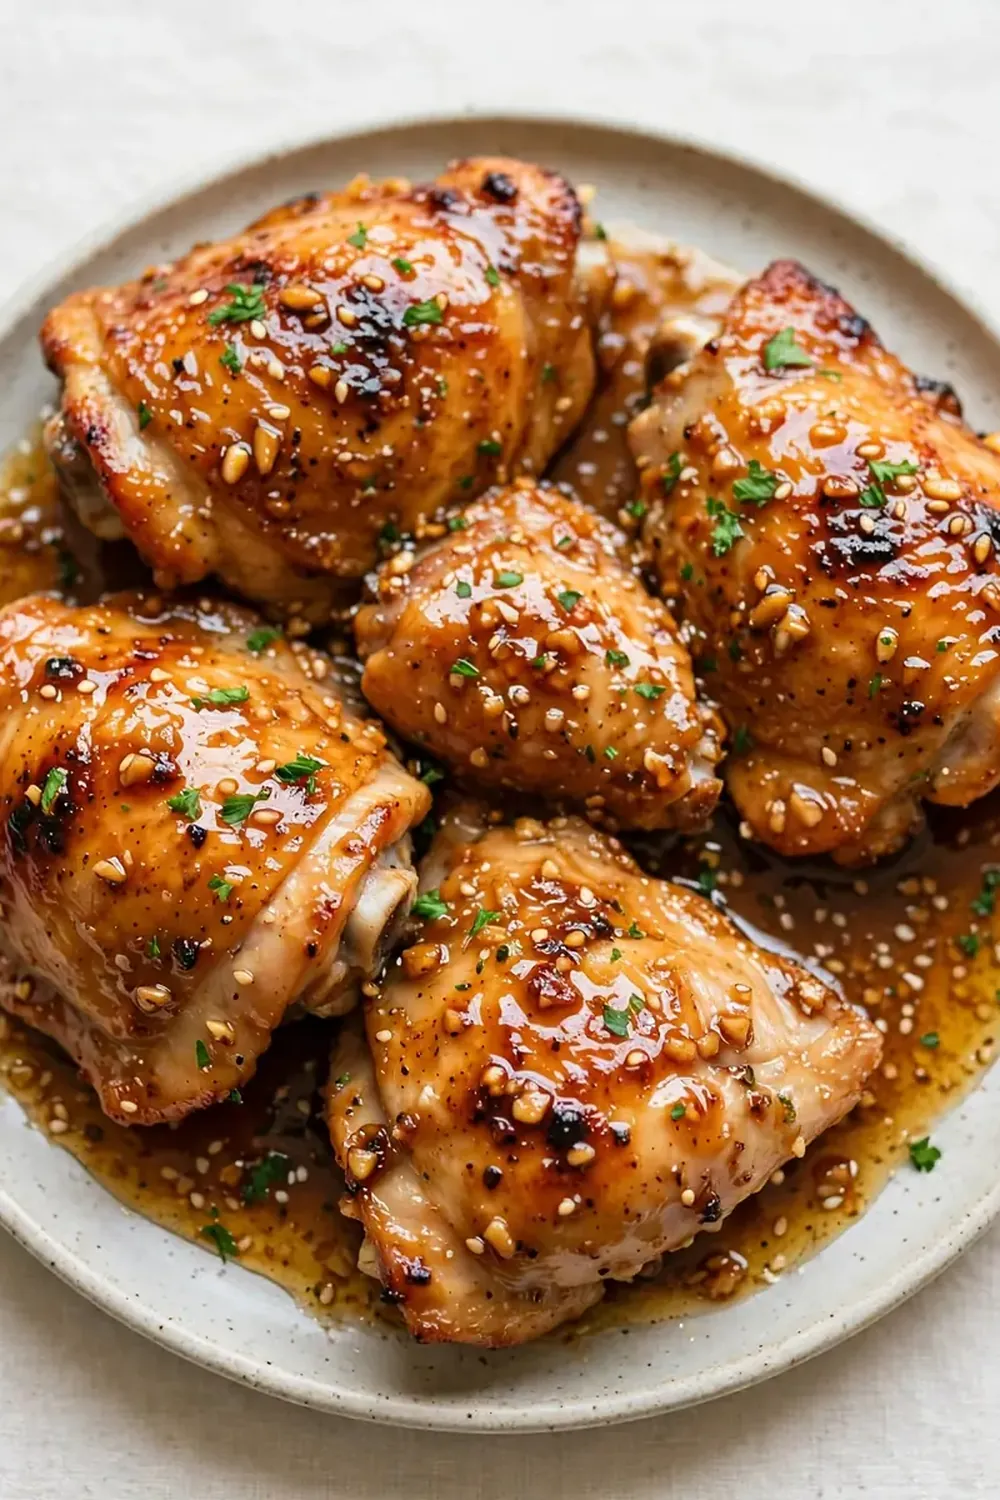
- Restaurant-ready presentation: The glossy, caramelised glaze and perfectly bronzed skin make this dish look as though it came from a professional kitchen. A sprinkle of fresh herbs or sesame seeds just before serving elevates it even further.
- Deep, balanced flavour: The honey brings a gentle sweetness that plays against the savoury garlic and umami-rich soy. Every bite is layered, never cloying.
- Juicy, never dry: Chicken thighs are naturally more forgiving than breasts, but the method here—basting and a moderate oven temperature—ensures the meat stays succulent right to the bone.
- Make-ahead friendly: You can marinate the thighs in the morning or even the night before. The flavours deepen as they rest, and the final bake is a breeze when you’re hosting.
- Minimal washing up: Everything happens in one baking dish. Less time scrubbing means more time enjoying the meal with your guests.
Ingredients You’ll Need
- 8 bone-in, skin-on chicken thighs (about 1.2 kg)
- 4 tablespoons clear honey
- 4 cloves garlic, finely minced
- 3 tablespoons light soy sauce (or tamari for gluten-free)
- 2 tablespoons tomato purée
- 1 tablespoon apple cider vinegar
- 1 tablespoon sesame oil (toasted, for extra depth)
- 1 tablespoon olive oil
- 1 teaspoon smoked paprika
- ½ teaspoon ground white pepper (or black pepper)
- ½ teaspoon sea salt
- 2 tablespoons unsalted butter, cut into small cubes
- Fresh chives or spring onions, finely sliced, for garnish
- Toasted sesame seeds, for garnish
Tip: For the most impressive sheen, use a good-quality runny honey. Thicker, crystallised honey can be warmed slightly to loosen it before mixing into the sauce.
How to Make Honey Garlic Baked Chicken Thighs
- Preheat the oven and prepare the dish. Set the oven to 190°C (fan-assisted) or 200°C conventional. Lightly grease a 9×13 inch baking dish with a drizzle of olive oil. The oil will help the skin release cleanly later.
- Pat the chicken dry and season. Use kitchen paper to dry the chicken thighs thoroughly—this is the single most important step for crisp skin. You should feel the surface become tacky, not slippery. Sprinkle both sides with the salt, white pepper, and smoked paprika. Rub gently so the spices adhere.
- Whisk the honey garlic sauce. In a small bowl, combine the honey, minced garlic, soy sauce, tomato purée, apple cider vinegar, and toasted sesame oil. Stir until the tomato purée is fully incorporated and the mixture looks glossy and dark amber. The aroma should be pungent with garlic and sweet honey.
- Coat the chicken. Lay the seasoned thighs skin-side up in the baking dish, spacing them slightly apart—crowding will steam the skin rather than crisp it. Pour the sauce evenly over each piece, using a spoon to spread it over the skin. Dot the small cubes of butter around the dish, tucking them between the thighs. The butter will melt and help baste the meat.
- Bake for the first stage. Place the dish on the middle rack, uncovered, and bake for 25 minutes. At this point, the kitchen will smell sweet and savoury, and the sauce will be bubbling vigorously around the chicken. The skin should be beginning to brown.
- Baste and rotate. Remove the dish carefully. Using a spoon, baste the hot sauce from the bottom of the dish over each thigh. The sauce will have thickened slightly and will coat the spoon in a sticky, fragrant glaze. Turn the dish around to ensure even baking.
- Bake for the second stage. Return to the oven for another 15–20 minutes. The chicken is done when the internal temperature reaches 74°C at the thickest part, and the skin is a deep golden bronze with patches of darker caramelisation. If you press the skin gently with a spoon, it should feel taut and crackly.
- Rest and garnish. Remove the dish from the oven and let it rest for 5 minutes—this allows the juices to redistribute. Just before serving, sprinkle the sliced chives or spring onions and toasted sesame seeds over the top. The green against the glossy brown creates a beautiful restaurant-style contrast.
Tips From My Kitchen
- Dry the skin thoroughly: Moisture is the enemy of crisp skin. Even if you’re short on time, spend an extra minute patting each thigh dry. I often leave them uncovered in the fridge for 20 minutes before cooking to air-dry the surface. The difference in texture is remarkable—you’ll hear a satisfying crack when you cut into it.
- Don’t skip the butter cubes: The butter does more than add richness. As it melts, it mixes with the honey and soy to create a sauce that bastes the chicken from below. This prevents the honey from burning onto the dish and keeps the meat incredibly moist. I stumbled upon this combination by accident, and it’s been a hit ever since.
- Space the thighs properly: If the thighs are touching, the steam trapped between them will soften the skin. Leave a small gap between each piece—about 1 cm. The exposed areas will caramelise more evenly, giving you that patchy, golden look that signals great flavour.
- Baste with purpose: Use a spoon to lift the sauce from the bottom of the dish, not a brush. The sauce thickens and concentrates in the dish during baking, and a brush can’t pick up the syrupy bits as effectively. Baste once halfway through, and again in the last 5 minutes if you want an extra-glossy finish.
- Let it rest uncovered: After baking, resist the urge to cover the dish with foil while it rests. Covering traps steam and softens the crisp skin you worked hard to achieve. A 5-minute uncovered rest is all it needs. My kids absolutely devour this every time I make it, and the crisp skin is the first thing they reach for.
- Adjust sweetness to taste: Honey varies in sweetness depending on the source. If your honey is very floral and sweet, you can balance it with an extra teaspoon of apple cider vinegar. Taste the sauce before pouring—it should be sweet, tangy, and savoury all at once.
Equipment You’ll Need
- 9×13 inch baking dish (ceramic or metal both work well)
- Aluminium foil (for covering leftovers, not during baking)
- Mixing bowls (one small for the sauce)
- Sharp knife (for mincing garlic and trimming excess fat)
- Kitchen paper (for drying the chicken)
- Meat thermometer (for accuracy, though not strictly essential)
Delicious Variations to Try
- Spicy Version: Add 1 teaspoon of red chilli flakes or a finely chopped red bird’s eye chilli to the sauce. For a smoky heat, use a pinch of chipotle powder. The spice cuts through the honey beautifully and adds a lovely warmth on the finish.
- Vegetarian/Vegan Option: Substitute the chicken thighs with large portobello mushrooms or thick slices of firm tofu (pressed well). For mushrooms, score the caps lightly and marinate for 30 minutes before baking. They will absorb the sauce and become wonderfully tender. Use a plant-based butter or extra olive oil instead of dairy butter.
- Different Protein: This sauce works brilliantly with chicken drumsticks, bone-in chicken breasts (reduce baking time slightly), or even turkey thighs. For a seafood twist, try it with firm white fish fillets like cod or haddock—bake for only 15–18 minutes, until the fish flakes easily.
What to Serve With Honey Garlic Baked Chicken Thighs
- Fluffy steamed jasmine rice or coconut rice to soak up the extra sauce
- A crisp green salad with a sharp vinaigrette to balance the sweetness
- Steamed tenderstem broccoli or green beans, tossed in a little butter and lemon zest
- Creamy Mashed Potatoes Side for a comforting, buttery base
- Air Fryer Sweet Potato Fries Recipe for a crunchy, sweet-savoury pairing
Still hungry for ideas? You might also love Sticky Honey Garlic Chicken Recipe For Dinner, Savory Honey Garlic Shrimp Dinner from our sister kitchens.
Frequently Asked Questions
Honey Garlic Baked Chicken Thighs
Ingredients
Method
- Preheat the oven and prepare the dish. Set the oven to 190°C (fan-assisted) or 200°C conventional. Lightly grease a 9x13 inch baking dish with a drizzle of olive oil. The oil will help the skin release cleanly later.
- Pat the chicken dry and season. Use kitchen paper to dry the chicken thighs thoroughly—this is the single most important step for crisp skin. You should feel the surface become tacky, not slippery. Sprinkle both sides with the salt, white pepper, and smoked paprika. Rub gently so the spices adhere.
- Whisk the honey garlic sauce. In a small bowl, combine the honey, minced garlic, soy sauce, tomato purée, apple cider vinegar, and toasted sesame oil. Stir until the tomato purée is fully incorporated and the mixture looks glossy and dark amber. The aroma should be pungent with garlic and sweet honey.
- Coat the chicken. Lay the seasoned thighs skin-side up in the baking dish, spacing them slightly apart—crowding will steam the skin rather than crisp it. Pour the sauce evenly over each piece, using a spoon to spread it over the skin. Dot the small cubes of butter around the dish, tucking them between the thighs. The butter will melt and help baste the meat.
- Bake for the first stage. Place the dish on the middle rack, uncovered, and bake for 25 minutes. At this point, the kitchen will smell sweet and savoury, and the sauce will be bubbling vigorously around the chicken. The skin should be beginning to brown.
- Baste and rotate. Remove the dish carefully. Using a spoon, baste the hot sauce from the bottom of the dish over each thigh. The sauce will have thickened slightly and will coat the spoon in a sticky, fragrant glaze. Turn the dish around to ensure even baking.
- Bake for the second stage. Return to the oven for another 15–20 minutes. The chicken is done when the internal temperature reaches 74°C at the thickest part, and the skin is a deep golden bronze with patches of darker caramelisation. If you press the skin gently with a spoon, it should feel taut and crackly.
- Rest and garnish. Remove the dish from the oven and let it rest for 5 minutes—this allows the juices to redistribute. Just before serving, sprinkle the sliced chives or spring onions and toasted sesame seeds over the top. The green against the glossy brown creates a beautiful restaurant-style contrast.
Notes
I hope these Honey Garlic Baked Chicken Thighs become your new go-to for hosting. They have that rare ability to feel special without demanding hours of effort, and the sauce alone is reason enough to make them again. If you give them a try, I’d love to hear how they turned out—drop a comment below and let me know what you served alongside them.