Smoked Brisket Burnt Ends
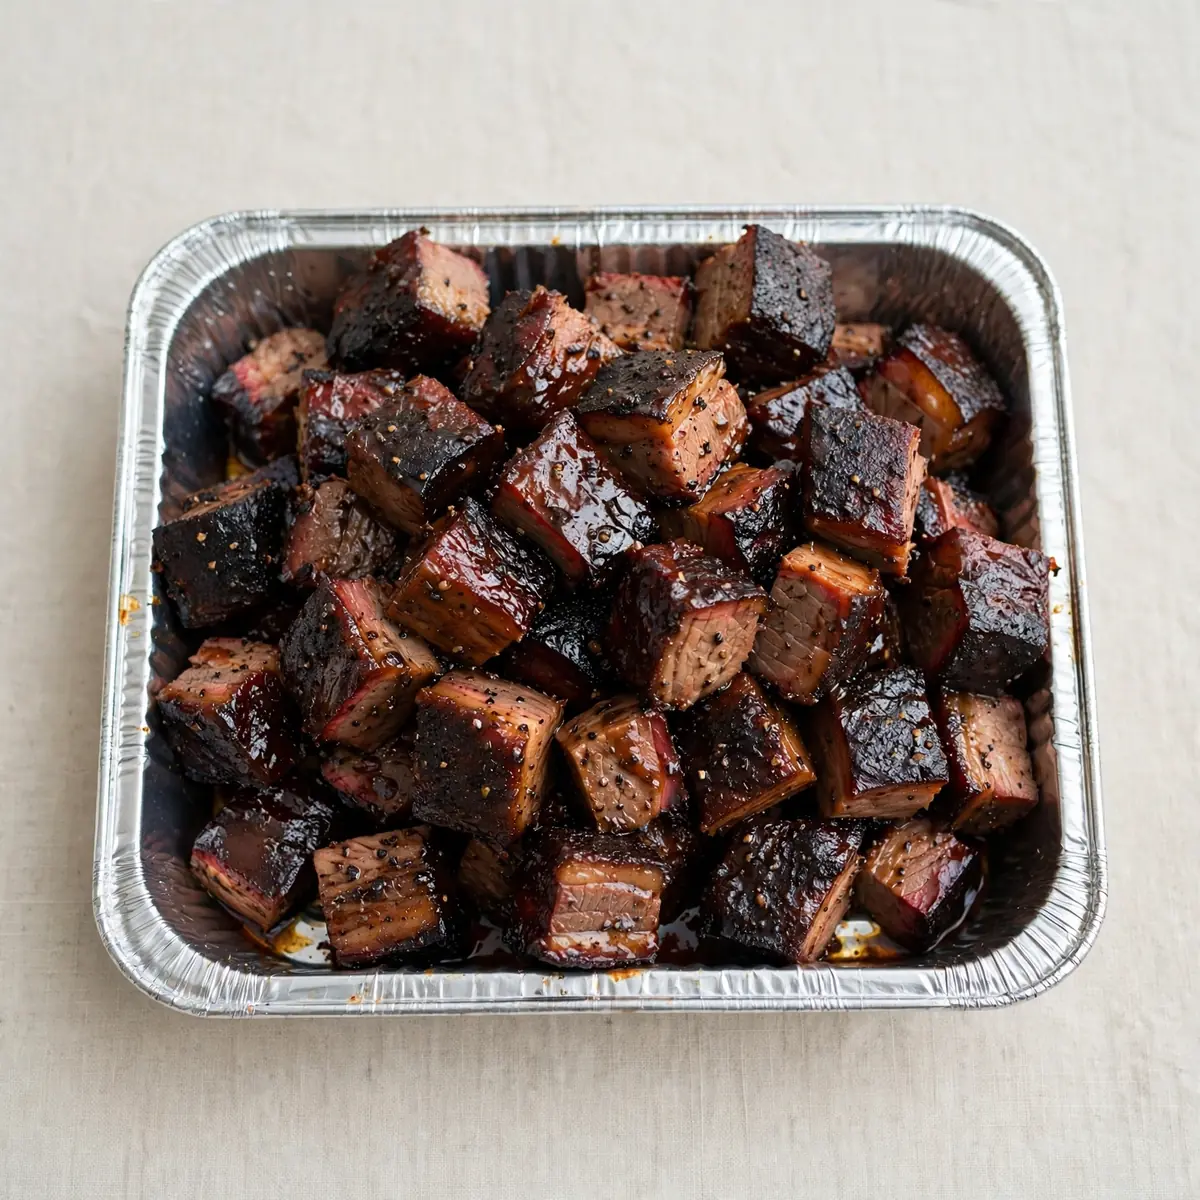
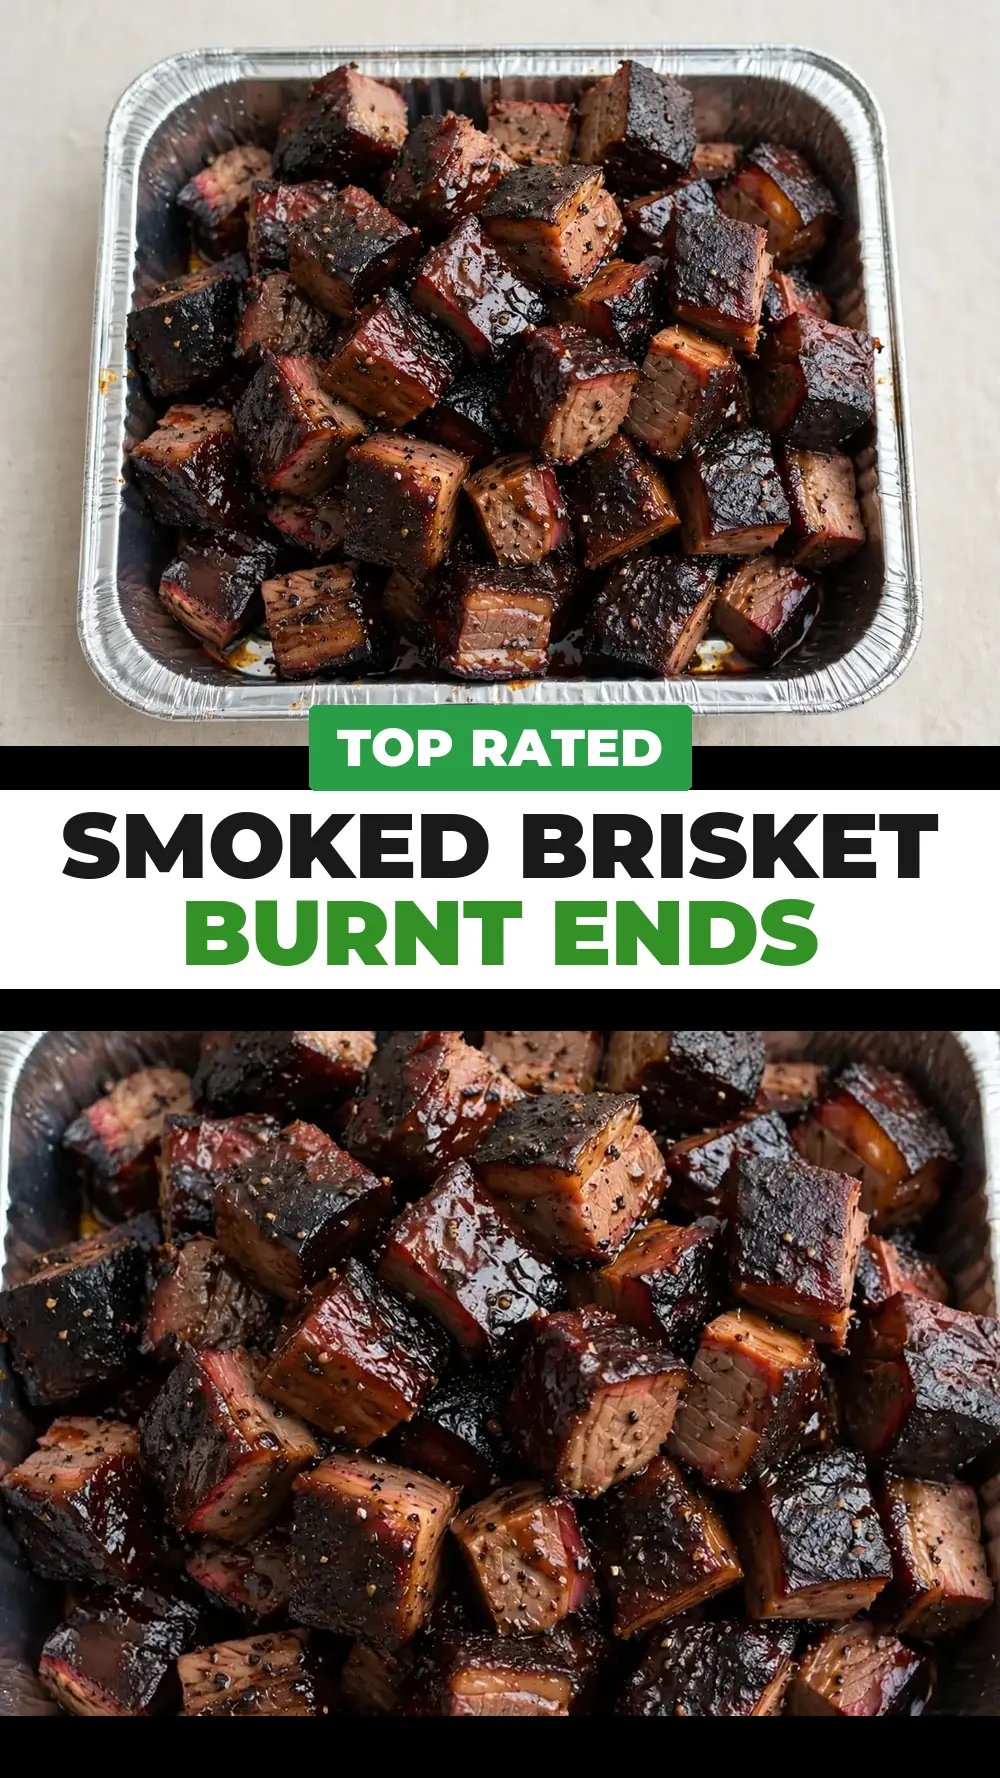
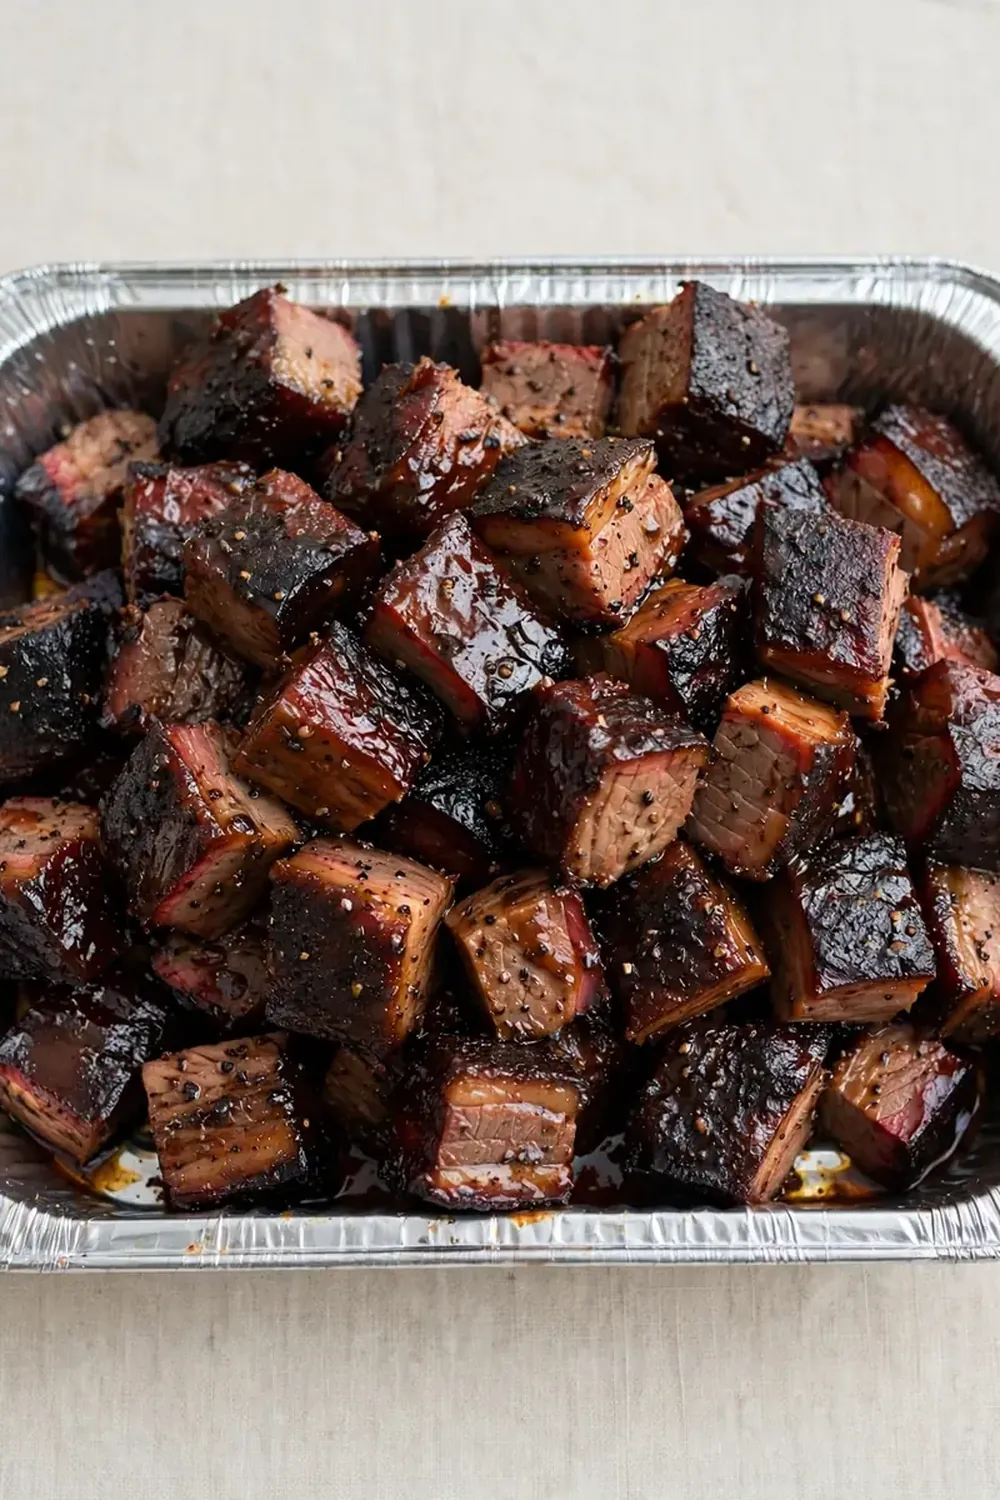
There’s a moment at every dinner party when the conversation dips, forks hover mid-air, and all eyes land on the platter you’re carrying to the table. I live for that moment, especially when that platter holds a pile of glossy, caramelised Smoked Brisket Burnt Ends. These aren’t just scraps of meat; they’re precisely cut cubes of beef brisket, transformed into dark, sticky, intensely savoury nuggets that look as luxurious as they taste. This is the recipe I reach for when I want to turn a simple barbecue into a restaurant-worthy spread, without spending the entire evening in a frantic state.
Recipe Overview
- Prep Time: 30 minutes
- Cook Time: 6 hours (including smoking and glazing)
- Total Time: 6 hours 30 minutes
- Servings: 8-10 as a starter or 4-6 as a main
- Difficulty: Medium
Why You’ll Love This Smoked Brisket Burnt Ends
- Restaurant-Quality Presentation: These burnt ends have a deep, mahogany glaze that catches the light beautifully, making them a stunning centrepiece for any gathering. My husband, who’s usually picky, asked for seconds the first time I plated these, and I knew I’d found a winner, much like when I perfected my Homemade Waffles recipe.
- Unforgettable Texture: The magic of burnt ends is the contrast—a peppery, bark-like exterior that yields to an impossibly tender, almost buttery interior. It’s a textural experience that feels both rustic and refined.
- Make-Ahead Friendly: You can smoke the brisket point a day in advance, then finish the glazing process just before your guests arrive. This takes the pressure off your hosting schedule and allows you to enjoy your own party.
- Deep, Complex Flavour: The long, slow smoking process builds layers of smoky richness that a simple roast or grill can’t replicate, much like a perfectly prepared Smoked Beef Chuck Roast. The final glaze, which I’ll detail below, adds a sweet and tangy finish that balances the savoury beef perfectly.
- Portion Control for Parties: Because they come in perfect, bite-sized cubes, they’re ideal for serving as an impressive canapé or a shareable main course. Guests can easily help themselves without needing a knife and fork for every single piece.
Ingredients You’ll Need
- 1.8 kg whole beef brisket (point cut preferred, or a whole packer brisket)
- 60 ml yellow mustard (as a binder)
- 60 g coarse black pepper
- 30 g kosher salt
- 15 g garlic powder
- 15 g onion powder
- 5 g cayenne pepper (optional, for a subtle heat)
- 120 ml unsalted butter, cubed
- 120 ml honey
- 80 ml tomato ketchup
- 60 ml apple cider vinegar
- 30 ml Worcestershire sauce (ensure it’s halal-certified)
- 60 ml beef stock
- 2 tbsp dark brown sugar
- 1 tbsp smoked paprika
Tip: For the most impressive results, seek out the ‘point’ end of the brisket. It has a higher fat content, which renders down during the long cook, creating the signature melt-in-the-mouth texture that burnt ends are famous for. If you only have the flat, it will work, but you’ll need to watch it more closely to prevent it drying out.
How to Make Smoked Brisket Burnt Ends
- Prepare the Brisket: Start with your brisket, still cold from the fridge. Using a sharp knife, trim any hard, yellow fat, but leave a generous 6mm layer of the white fat cap. This fat will baste the meat as it smokes. Pat the entire surface dry with kitchen paper—this is crucial for the bark to form. You should hear a faint, dry rustle as you press the paper against the meat, indicating a moisture-free surface.
- Season the Meat: Slather the entire brisket with the yellow mustard. It won’t taste mustardy; it acts as a binder for the rub. In a small bowl, combine the black pepper, kosher salt, garlic powder, onion powder, and cayenne, if using. Apply this rub generously, patting it onto the meat until every inch is coated. You’ll see a thick, dark crust form, which will smell deeply of pepper and spice.
- Smoke the Brisket Whole: Set your smoker to 110°C (225°F), using a hardwood like hickory or oak for a robust flavour. Place the seasoned brisket on the grate, fat side up. Insert a probe into the thickest part of the flat. Smoke for 4 to 5 hours, or until the internal temperature reaches 75°C (165°F). At this point, the bark should be a deep, dark mahogany colour and feel dry to the touch, like stiff leather.
- Cube and Tray Up: Remove the brisket from the smoker and let it rest for 15 minutes. Once cool enough to handle, cut the brisket into 2.5cm cubes. You’ll see the pink smoke ring just beneath the dark bark, a beautiful sign of a good smoke. Discard any large pieces of unrendered fat. Place the cubes in a deep aluminium foil pan.
- Make the Glaze: In a small saucepan over medium heat, combine the cubed butter, honey, ketchup, apple cider vinegar, Worcestershire sauce, beef stock, brown sugar, and smoked paprika. Stir frequently until the butter melts and the mixture comes to a gentle simmer. The aroma will be a rich, sweet-tangy blend that fills your kitchen. Pour this hot glaze over the cubed brisket and stir gently to coat every piece.
- Finish in the Smoker: Cover the foil pan tightly with foil and return it to the smoker, still at 110°C (225°F). Smoke for another 1.5 to 2 hours. After the first hour, uncover the pan, stir the cubes, and continue cooking uncovered for the final 30 minutes. You’re looking for the glaze to thicken and become sticky, clinging to each cube. The meat should feel incredibly tender when pierced with a fork.
- Rest and Serve: Remove the pan from the smoker and let the burnt ends rest, uncovered, for 10 minutes. This allows the juices to redistribute and the glaze to set slightly. Before serving, give them a final stir to re-coat in the glossy pan juices. I like to transfer them to a warmed serving platter, letting the sticky, dark cubes pile up in a casual, inviting mound.
Tips From My Kitchen
- Don’t Skip the Rest After Smoking: After you pull the whole brisket from the smoker, that 15-minute rest is non-negotiable. It allows the juices, which are bubbling furiously inside the meat, to settle. If you cut into it immediately, those juices will flood your cutting board, leaving you with dry, disappointing burnt ends. You want every drop of that flavour locked inside the cubes.
- Use a Foil Pan, Not a Baking Dish: A disposable aluminium foil pan is ideal for the glazing stage. It conducts heat efficiently and, more importantly, allows you to easily stir and coat the cubes without damaging a good baking dish. Plus, the high sides prevent the glaze from spilling over and causing a sticky mess in your smoker.
- Monitor Your Smoker Temperature Closely: A consistent temperature of 110°C (225°F) is the goal. Fluctuations can cause the meat to cook unevenly or the glaze to burn. I use a wireless thermometer to keep an eye on it from inside the house. If your smoker runs hot, the glaze will caramelise too quickly and turn bitter instead of sweet and sticky.
- For Extra Sticky Glaze, Try This: In the final 15 minutes of cooking, if you want a tackier, more concentrated glaze, you can carefully pour the pan juices into a small saucepan. Simmer them on the stove until they reduce by half, then pour it back over the burnt ends and stir. This intensifies the sweet-savoury flavour and gives that high-end, lacquered look.
- Keep Them Warm for Guests: If you’re not serving immediately, keep the covered foil pan in a low oven (about 80°C / 175°F). You can hold them for up to an hour without them drying out. Just give them a stir before transferring to your platter to ensure they’re still glossy and well-coated.
Equipment You’ll Need
- A smoker (charcoal, electric, or pellet) or a kettle-style barbecue
- Sharp chef’s knife and a sturdy cutting board
- Digital instant-read meat thermometer
- Disposable aluminium foil pans (deep ones are best)
- Small saucepan for the glaze
- Mixing bowls for the dry rub
- Tongs for handling the hot meat
- Kitchen paper for drying the brisket
Common Mistakes to Avoid
- Overcrowding the Pan: When you add the cubed brisket to the foil pan for the glazing stage, make sure they’re in a single, even layer. If you pile them too high, the cubes on the bottom will steam instead of glaze, and they won’t develop that desirable sticky texture. Use two pans if necessary to keep everything in one layer.
- Wrong Temperature: Smoking at too high a temperature will dry out the brisket before the fat has a chance to render, leaving you with tough, chewy cubes. Conversely, too low a temperature will mean the meat never softens properly. Stick to 110°C (225°F) for the entire process for the most reliable results.
- Skipping the Rest Time: I cannot stress this enough. Resting the whole brisket before cubing, and then resting the burnt ends after the final smoke, is vital. It’s the difference between a dry, crumbly mess and a tender, juicy nugget. Patience here is the secret to that melt-in-the-mouth texture everyone raves about.
Delicious Variations to Try
- Spicy Version: To turn up the heat, add 1-2 finely chopped fresh jalapeños to the glaze mixture. You can also increase the cayenne pepper in the dry rub to 10g and add a teaspoon of chipotle powder for a smoky, lingering warmth that won’t overpower the beef.
- Vegetarian/Vegan Option: For a plant-based version, substitute the beef brisket with large, meaty portobello mushrooms or blocks of extra-firm tofu that have been pressed and frozen (then thawed) for a chewier texture. Smoke them for 45 minutes, then cube and glaze as directed, using a vegan ‘butter’ and a mushroom-based stock. The cooking time will be drastically shorter.
- Different Protein: While brisket is classic, you can make a fantastic version using a thick, well-marbled cut of lamb shoulder or even a whole turkey thigh. The smoking and glazing method remains the same, but adjust the initial smoking time. Lamb will take 3-4 hours, while turkey thighs may only need 2-3 hours to reach the correct internal temperature before cubing.
What to Serve With Smoked Brisket Burnt Ends
Because these burnt ends are so rich and intensely flavoured, I like to serve them with sides that offer contrast. A crisp, acidic salad cuts through the fat beautifully—try my Fresh Tomato And Avocado Salad for a bright, creamy counterpoint. For a bit of crunch, these are fantastic alongside a batch of Air Fryer Sweet Potato Fries Recipe, which soak up any leftover glaze. And if you’re keeping things classic, a simple Fresh Greek Salad Recipe with its tangy feta and olives will cleanse the palate perfectly between those decadent bites of meat.
- Fresh Tomato And Avocado Salad
- Air Fryer Sweet Potato Fries
- Fresh Greek Salad
- Buttery corn on the cob
- Soft, warm flour tortillas
Still hungry for ideas? You might also love Ultimate Smoked Beef Brisket Recipe from our sister kitchens.
Frequently Asked Questions
Smoked Brisket Burnt Ends
Ingredients
Method
- Prepare the Brisket: Start with your brisket, still cold from the fridge. Using a sharp knife, trim any hard, yellow fat, but leave a generous 6mm layer of the white fat cap. This fat will baste the meat as it smokes. Pat the entire surface dry with kitchen paper—this is crucial for the bark to form. You should hear a faint, dry rustle as you press the paper against the meat, indicating a moisture-free surface.
- Season the Meat: Slather the entire brisket with the yellow mustard. It won’t taste mustardy; it acts as a binder for the rub. In a small bowl, combine the black pepper, kosher salt, garlic powder, onion powder, and cayenne, if using. Apply this rub generously, patting it onto the meat until every inch is coated. You’ll see a thick, dark crust form, which will smell deeply of pepper and spice.
- Smoke the Brisket Whole: Set your smoker to 110°C (225°F), using a hardwood like hickory or oak for a robust flavour. Place the seasoned brisket on the grate, fat side up. Insert a probe into the thickest part of the flat. Smoke for 4 to 5 hours, or until the internal temperature reaches 75°C (165°F). At this point, the bark should be a deep, dark mahogany colour and feel dry to the touch, like stiff leather.
- Cube and Tray Up: Remove the brisket from the smoker and let it rest for 15 minutes. Once cool enough to handle, cut the brisket into 2.5cm cubes. You’ll see the pink smoke ring just beneath the dark bark, a beautiful sign of a good smoke. Discard any large pieces of unrendered fat. Place the cubes in a deep aluminium foil pan.
- Make the Glaze: In a small saucepan over medium heat, combine the cubed butter, honey, ketchup, apple cider vinegar, Worcestershire sauce, beef stock, brown sugar, and smoked paprika. Stir frequently until the butter melts and the mixture comes to a gentle simmer. The aroma will be a rich, sweet-tangy blend that fills your kitchen. Pour this hot glaze over the cubed brisket and stir gently to coat every piece.
- Finish in the Smoker: Cover the foil pan tightly with foil and return it to the smoker, still at 110°C (225°F). Smoke for another 1.5 to 2 hours. After the first hour, uncover the pan, stir the cubes, and continue cooking uncovered for the final 30 minutes. You’re looking for the glaze to thicken and become sticky, clinging to each cube. The meat should feel incredibly tender when pierced with a fork.
- Rest and Serve: Remove the pan from the smoker and let the burnt ends rest, uncovered, for 10 minutes. This allows the juices to redistribute and the glaze to set slightly. Before serving, give them a final stir to re-coat in the glossy pan juices. I like to transfer them to a warmed serving platter, letting the sticky, dark cubes pile up in a casual, inviting mound.
Notes
I’d love to hear how these turn out for you. Have you tried a different glaze or served them with a side I haven’t mentioned? Drop a comment below and let me know—I’m always looking for new ideas to try in my own kitchen.